PhantomX Pincher
PhantomX Pincher has been replaced with PincherX 100 Mobile Robotic Arm. Therefore we are no longer supporting this integration. For Integration with PincherX 100 mobile, check this tutorial:
This integration is not compatible with Leo Rover v1.8. It is kept on site for legacy purposes.
In this tutorial, we will show you how to configure and remotely control Trossen Robotics' PhantomX Pincher Robot connected to Leo Rover.
Prerequisites
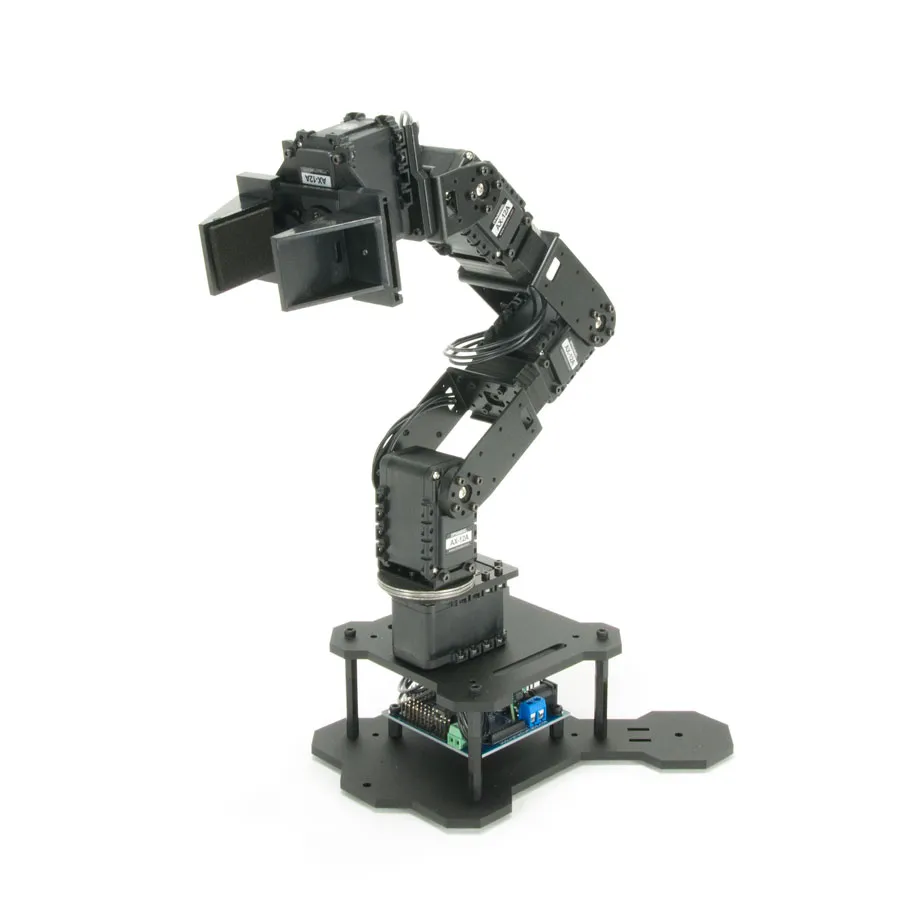
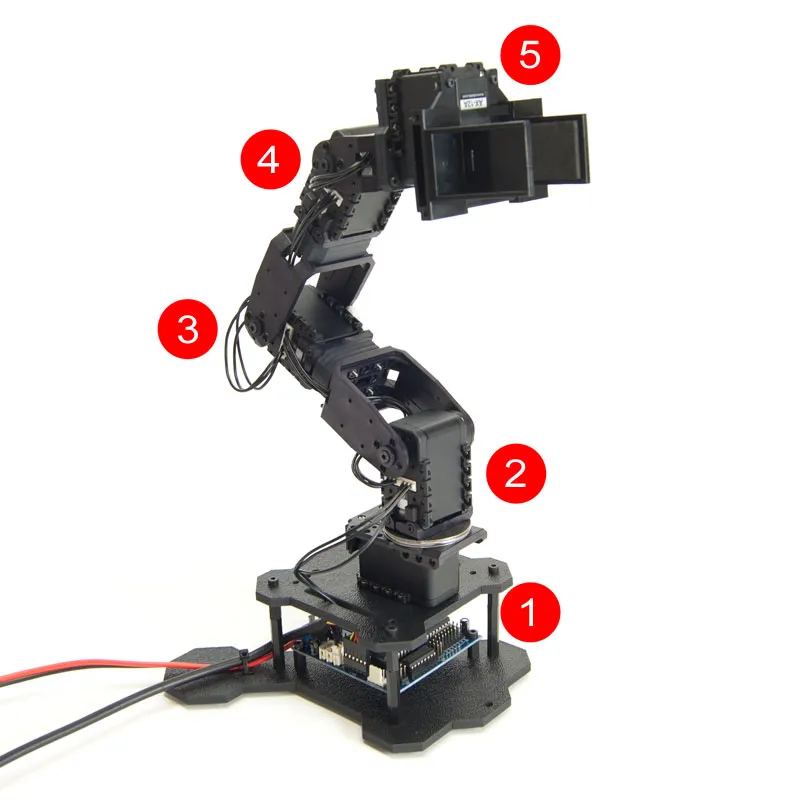
The PhantomX Pincher AX-12 Robot Arm is a 4 degree-of-freedom robotic arm and an easy addition to the TurtleBot ROS robot platform. This hardware kit comes with everything needed to physically assemble and mount the arm as a standalone unit or as an addition to your Turtlebot Robot/mobile platform. source: trossenrobotics.com
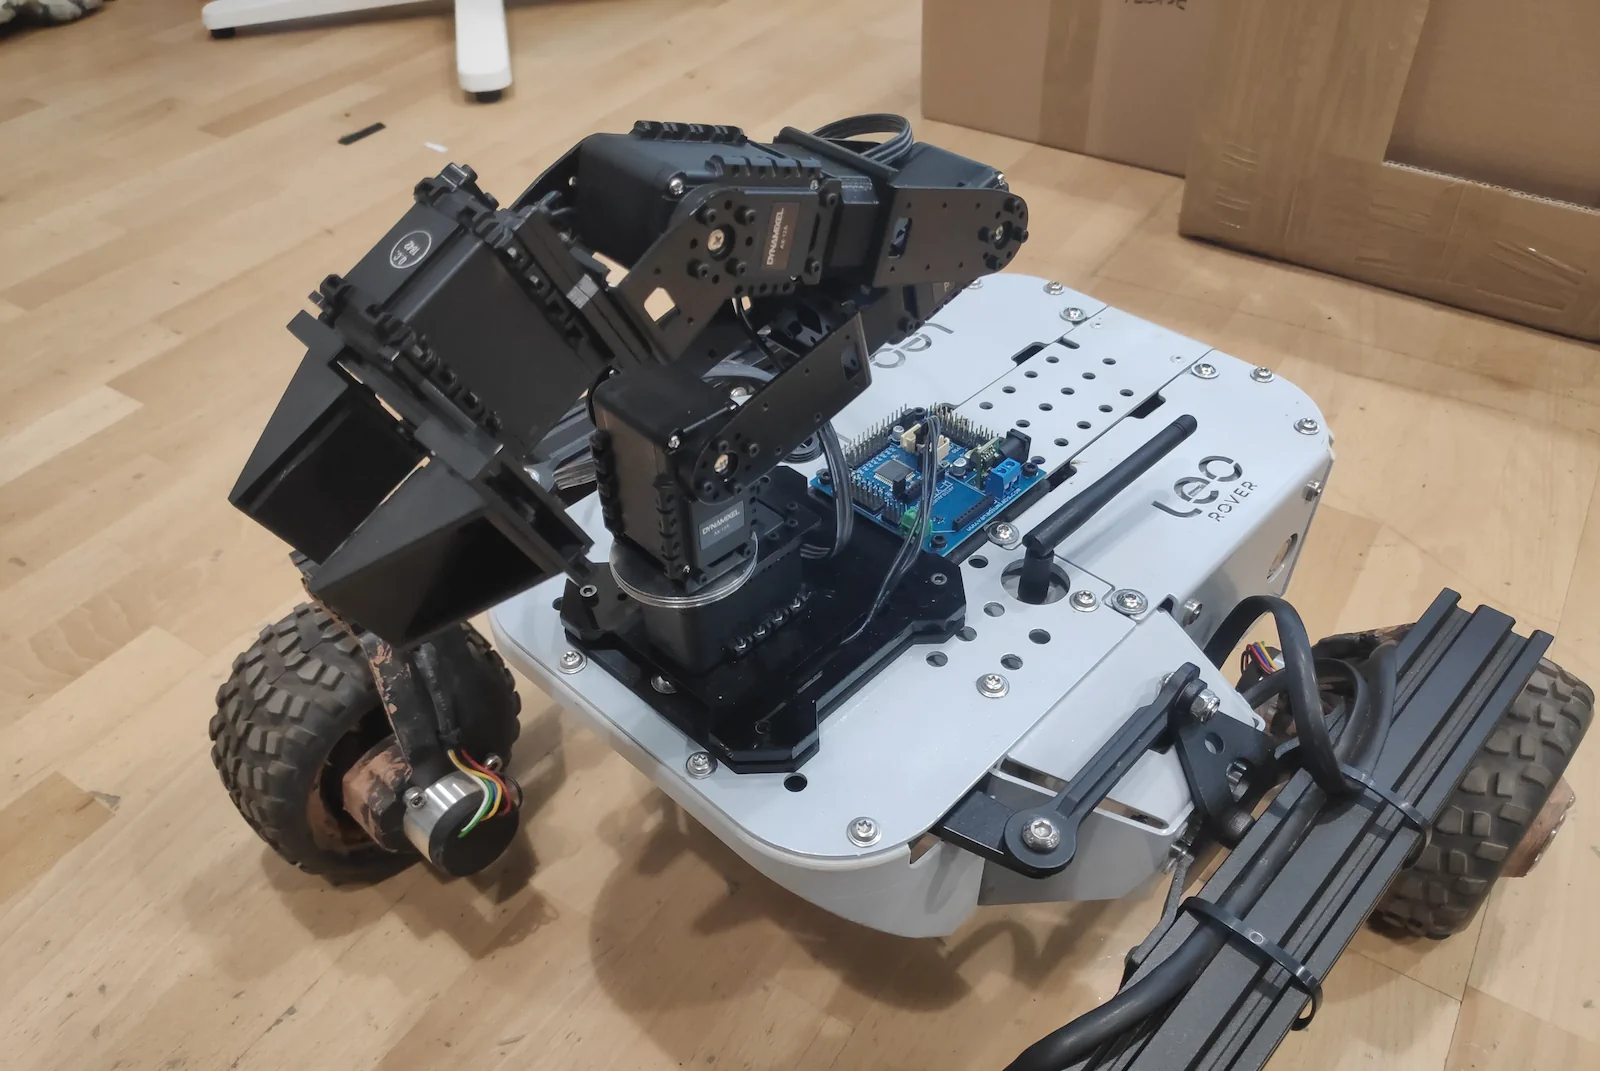
The arm has been redesigned to fit Leo Rover mounting plate. As the arm baseplate has became thinner, its range allows to grab objects from the ground as well as reach the rear and sides of Leo Rover.
Assembling the arm
You'll follow the official instructions from Trossen Robotics' website to assemble the arm with only few exceptions that are specific to Leo Rover mounting interface.
- In Step 1: Build the Upper Deck, point 8:
- instead of using a 100 mm cable as shown in the photo, use the 150 mm cable that is included in Leo Rover to PhantomX adapter kit.
- In Step 2: Build the Base, instead of point 2-6:
- use the lower deck provided with the Leo Rover to PhantomX adapter kit instead of the default one,
- assemble the lower deck (adapter) to Leo Rover mounting plate using 2x M5 screws and the provided nuts,
- attach the upper deck (from Step 1) to the lower deck using 4x M3 screws included, route the servo cable (150 mm version) facing the rear of the lower deck,
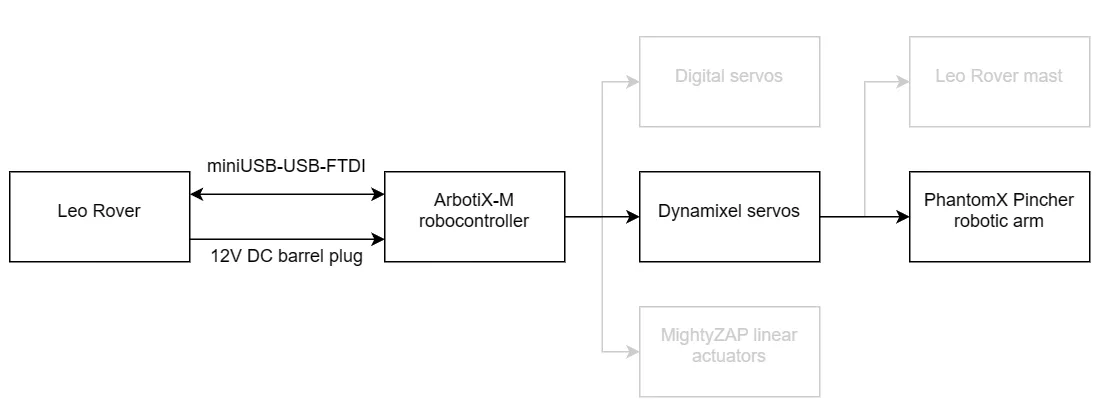
- attach the ArbotiX-M controller to the lower deck using 4x M3 screws included, the board power socket needs to face the rear of the Rover.
- To power the ArbotiX-M controller, use the cable provided in the kit (triple connector). The cable should be used instead of standard MEB-to-Battery cable with barrel jack cable routed through one of the cutouts in the rear frame.
- To connect the ArbotiX-M controller FTDI-USB cable use miniUSB-USB adapter provided in the kit and plug it in the miniUSB socket on top of the Rover.
PhantomX Pincher Robot Arm Assembly Guide - learn.trossenrobotics.com
Setting servo IDs
To properly communicate with the Dynamixel servos, you will need to set the servo IDs like in the picture below:
To do this, you can follow our guide for the Arbotix controller here:
In there, you will also find how to configure and use the arbotix ROS driver.
Installing ROS packages
The pincher_arm packages contain very useful utilities for PhantomX Pincher arm, such as:
- configuration for the arbotix driver
- URDF model of the arm
- Moveit! configuration package
- IKFast Kinematics solver plugin
- MoveIt! pick and place demo
To use these features, you will need to install these packages on your Leo Rover (to run the arm driver) and on your computer (to control the arm remotely).
On your computer
Make sure you have ROS installed:
then type in the terminal:
sudo apt update
sudo apt install ros-${ROS_DISTRO}-pincher-arm ros-${ROS_DISTRO}-leo-desktop
On the Rover
Make sure your rover is connected to the Internet:
You will only need packages that are required to start the arm driver:
sudo apt update
sudo apt install ros-${ROS_DISTRO}-pincher-arm-bringup
Building from source
If for some reason you want to build the packages manually, you can use the instructions below (both for the Rover and your computer).
Create an empty catkin workspace, if you don't have one yet:
mkdir -p ~/ros_ws/src
cd ~/ros_ws
catkin config --extend /opt/ros/${ROS_DISTRO}
Clone the packages into the source space:
cd ~/ros_ws/src
git clone https://github.com/fictionlab/pincher_arm.git
Install the dependencies:
cd ~/ros_ws
sudo apt update
rosdep update
rosdep install --from-paths src -iy
Build the workspace:
catkin build
Source the result space:
source ~/ros_ws/devel/setup.bash
Integrating the arm with Leo Rover
You can start by testing if the driver runs properly.
Use roslaunch to start the arm controllers:
roslaunch pincher_arm_bringup driver.launch --screen
If everything started without errors, you should see new topics spawned (e.g.
with rostopic list) to which you can send position commands:
/arm_shoulder_pan_joint/command
/arm_shoulder_lift_joint/command
/arm_elbow_flex_joint/command
/arm_wrist_flex_joint/command
/gripper_joint/command
as well as services for setting speed and relaxing joints. You can learn more about them in the ArbotiX-M Robocontroller tutorial.
The driver will also provide controllers for FollowJointTrajectory and GripperCommand actions (see the actionlib wiki for more information).
Now that you confirmed that the driver works, you can integrate it with the main Leo Rover launch file and the URDF description.
Open the /etc/ros/robot.launch file in your favorite editor (e.g. nano) and
add these lines before the closing </launch> tag:
<include file="$(find pincher_arm_bringup)/launch/driver.launch">
      <arg name="port" value="/dev/ttyUSB0"/>
</include>
Next, you will need to extend the robot's URDF description, by embedding the
arm's description and adding a fixed joint between Leo and the Pincher arm. To
do this, edit /etc/ros/urdf/robot.urdf.xacro by adding these lines before the
closing </robot> tag:
<xacro:include filename="$(find pincher_arm_description)/urdf/pincher_arm.urdf.xacro"/>

 <joint name="arm_base_joint" type="fixed">
   <origin xyz="0.093 0 0.0265"/>
   <parent link="base_link"/>
   <child link="arm_base_link"/>
 </joint>
Restart the leo service to apply the changes:
sudo systemctl restart leo
Controlling the arm
You will need to have ROS properly configured on your computer to communicate with the nodes running on Leo Rover. To learn how to do this, you can follow Connecting another computer to ROS network section of ROS development tutorial:
To visualize the position of the arm in RViz, just type:
roslaunch leo_viz rviz.launch

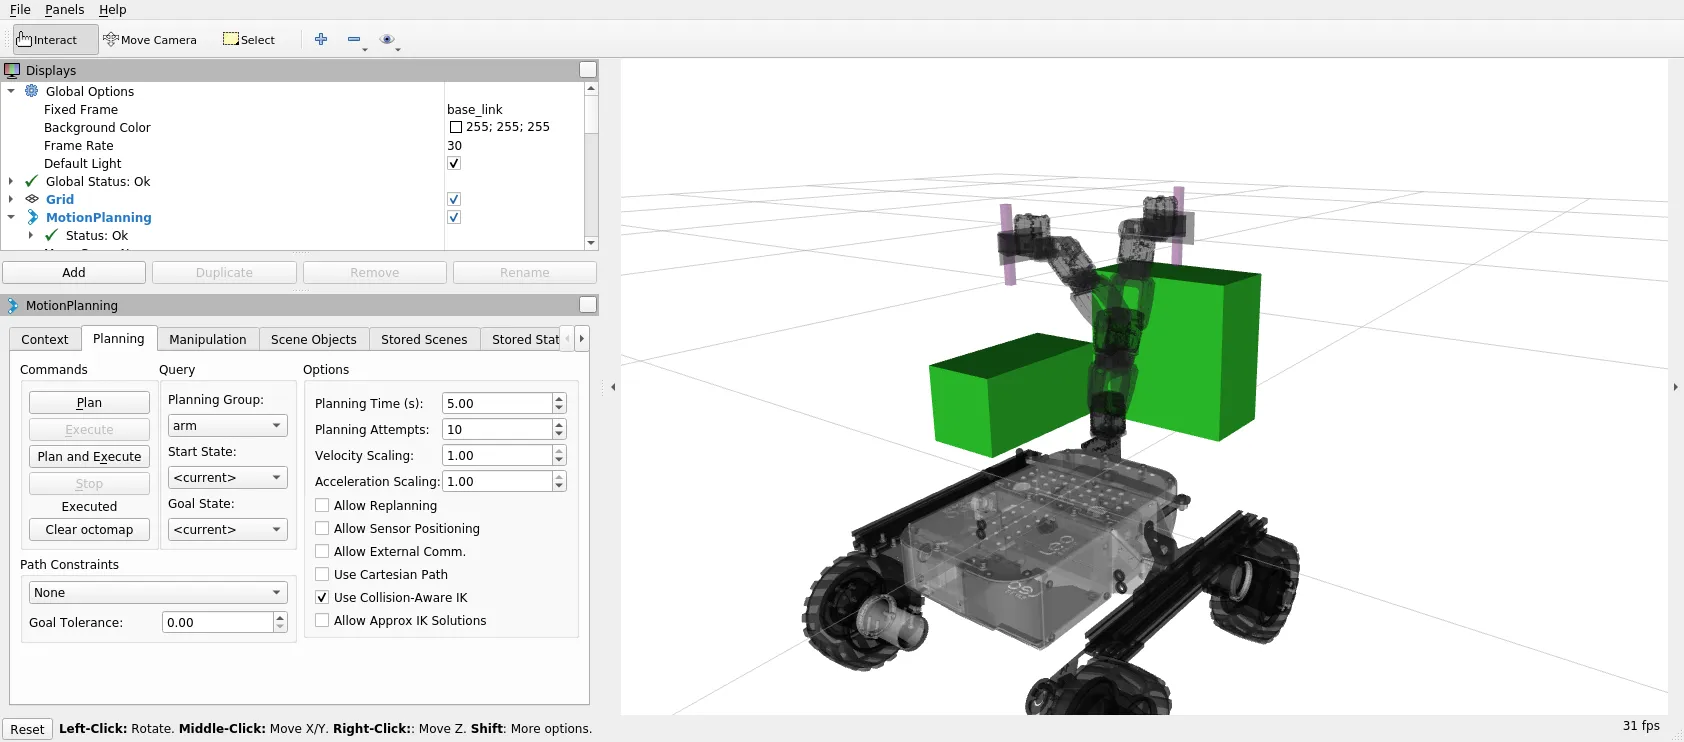
To test Motion Planning with MoveIt!:
- Run
pincher_arm_moveitlaunch file:
roslaunch pincher_arm_moveit_config pincher_arm_moveit.launch
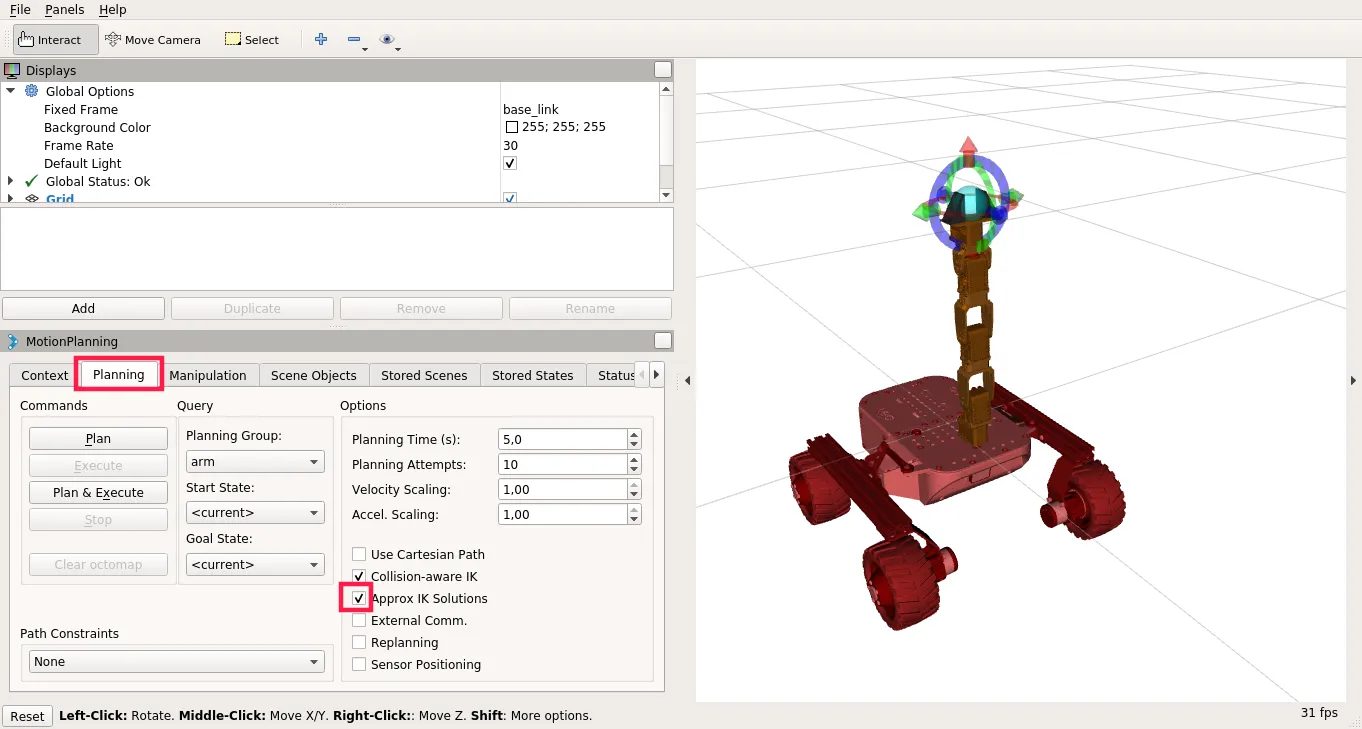
- Click on Planning tab in Motion Planning display and check Approx IK Solutions,
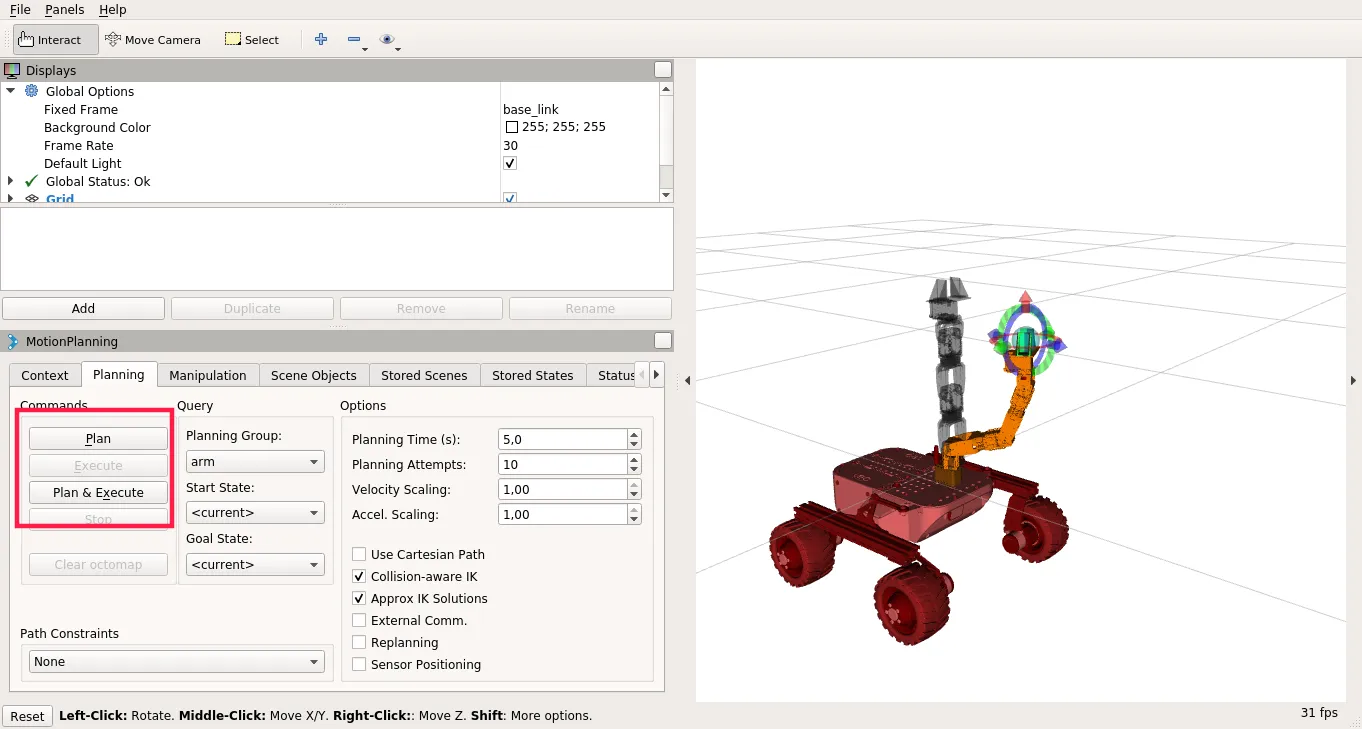
- Move interactive marker to the intended goal position of the end effector

Click on Plan to see Motion visualization and then Execute or just click on Plan and Execute
- Run pick and place demo (in another terminal session):
rosrun pincher_arm_moveit_demos pick_place