Relay Module
This integration is not compatible with Leo Rover v1.8. It is kept on site for legacy purposes.
This tutorial will show you how to connect a generic relay module, flash specific firmware, and launch the additional user's interface.
Prerequisites
Items needed
- Leo Rover
- 1-4 channels relay module
- IDC plug 2x3
- a ribbon cable (6 core)
Connect the module
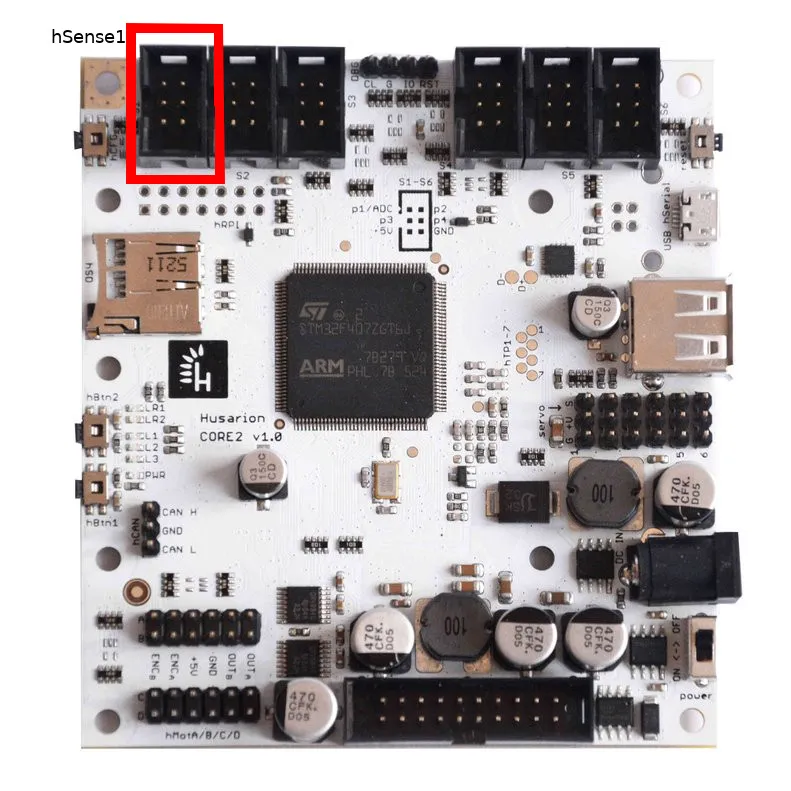
In case of powering and controlling a relay module, we highly recommend using the hSense1 port.
By default hSense2 and hSense3 are reserved for a GPS and an IMU module.
Connect the relay board to the hSens1 port using the IDC plug. Pins 1-4 are dedicated for signals, pin 5 is +5V and the last one is GND.
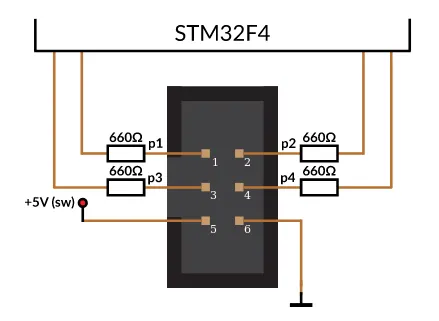
| hSense pin | IMU pin |
|---|---|
| 1 | CH1 |
| 2 | CH2 |
| 3 | CH3 |
| 4 | CH4 |
| 5 | +5V |
| 6 | GND |
Flash the dedicated firmware
We developed a version of the leo_firmware with added features for controlling the relays.
Make sure you have the git tool installed on your system, then clone firmware
repository to any folder on your computer and change the branch to
feature/relay:
git clone https://github.com/LeoRover/leo_firmware.git
cd leo_firmware
git checkout feature/relay
Now, you need to build the firmware and flash it to the Rover. For instructions on how to do it, please follow the Firmware update tutorial:
Restart the leo service to be sure that new topics are registered properly.
sudo systemctl restart leo
Configure the additional UI
The first step of adding the new interface is to clone UI's repository from GitHub to the home directory.
git clone https://github.com/LeoRover/leo_ui_sample_relay.git
In case of launching the additional UI reconfiguration of the nginx service is needed. Follow the tutorial below:
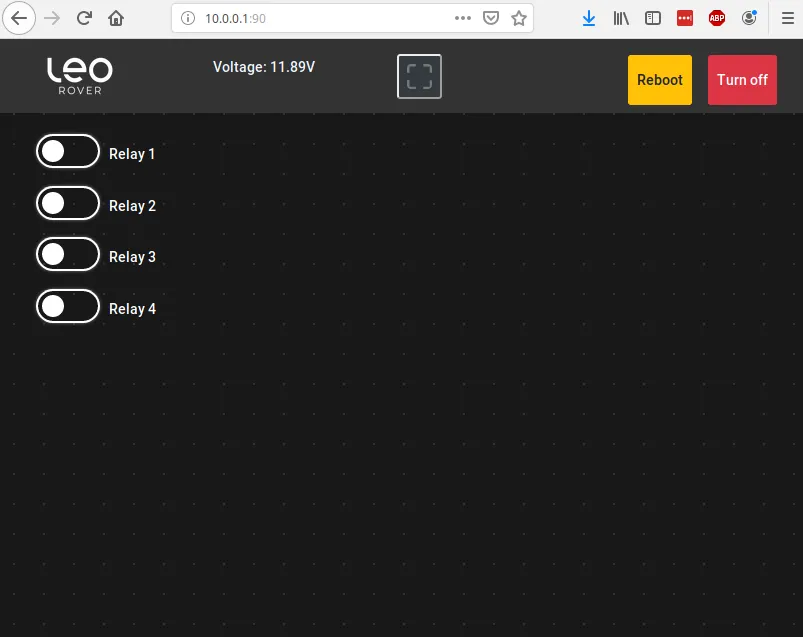
Launch the additional UI
The new interface is available on port 90. To launch it in your WEB browser just type LeoRover's IP address colon port number.
http://10.0.0.1:90