Intel RealSense
In this tutorial we will present the process of connecting a RealSense camera to your Leo Rover and integrating it with the system on Intel RealSense D435i example.
Intel RealSense stereo camera is a type of camera capable of capturing image from two points at the same time. Using stereo disparity - the difference in object location as seen by the left and right lenses - cameras like Intel RealSense are capable of distinguishing the distance of objects from the camera. This data can then be used to in a wide array of cases. In robotics, stereo cameras are commonly used for mapping the environment, object recognition, 3D scanning and in many other.
What to expect?
Having finished the tutorial you will possess basic knowledge about the use of stereo cameras with ROS.
Prerequisites
Mechanical integration
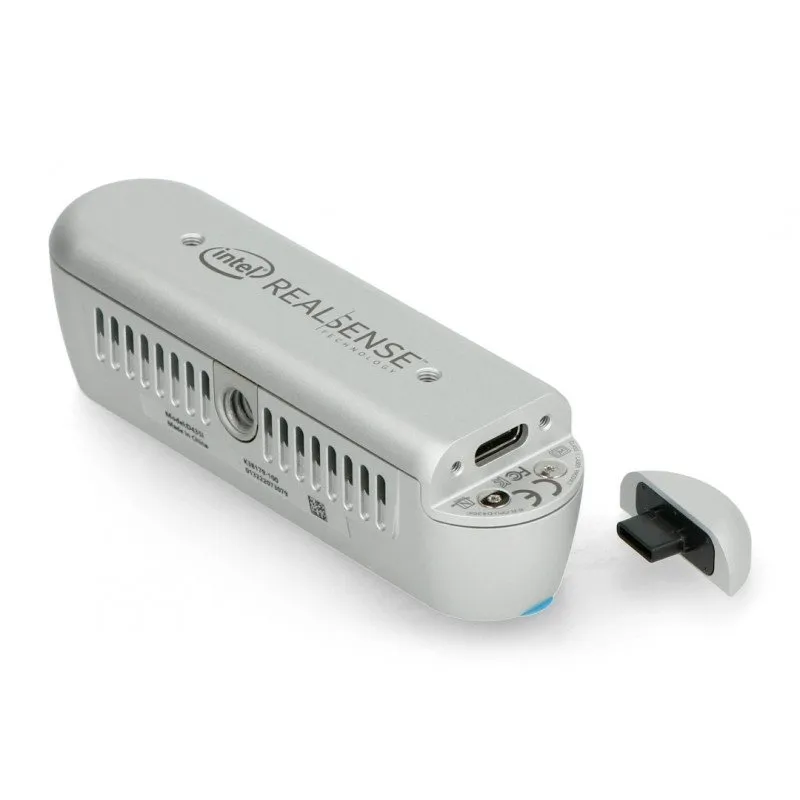
RealSense cameras provide two mounting mechanisms:
- One 1/4-20 UNC thread mounting point.
- Two M3 thread mounting points.
You can use those mechanisms, or print a special plate, and attach camera to it, and then mount the plate to the Rover.
Wiring and electronics connection
For connecting the camera to your Rover you can use USB-C cable, as RealSense has USB-C* 3.1 Gen 1* connector. You need to remove special plate on the back side of the camera, which covers the USB port, and you are ready to connect the camera through the USB port on the Rover.

The USB port on the rover is the USB 2.0 version. This may produce some warnings when running RealSense ROS nodes, but the camera still works.
Software integration
Installing the packages
As ROS realsense2_camera package is available as a debian package, we will
install it using apt. To do so, connect to the rover via ssh, and type:
sudo apt install ros-${ROS_DISTRO}-realsense2-camera
We want also the description package, which includes 3D models of the device (those are required for some nodes). To install them type in the terminal:
sudo apt install ros-${ROS_DISTRO}-realsense2-description
The version of librealsense2 is almost always behind the one available in RealSense™ official repository, but this way is much easier to install. If you want to install the newest version, you can follow this tutorial.
Adding camera model
As we want to have the camera model visible with the rover model, we need to
change robot.urdf.xacro file in /etc/ros/urdf directory. On this site you
can see what RealSense urdf camera models are available in the
realsense2_description package. Each of the urdf files there has xacro macro
with a lot of properties. You have to include such macro in the
robot.urdf.xacro file on the Rover, and change name property to avoid tf
frame conflicts. To do so, you need to include such lines:
<xacro:include filename="$(find realsense2_description)/urdf/_d435i.urdf.xacro"/>

<xacro:sensor_d435i parent="base_link" name="d435i_camera">
    <origin xyz="0 0 0" rpy="0 0 0"/>
  </xacro:sensor_d435i>
You can specify name property to anything you want. We just need to change it,
so we don't have conflicts on camera_link tf frame. Origin property is for
specifying the position of the camera regarding the link specified in parent
property. So if the parent property is set to "base_link", the position in
origin property is regarding the origin of the Rover.
In the end, your robot.urdf.xacro file should look like this:
<?xml version="1.0" encoding="utf-8"?>
<robot xmlns:xacro="http://www.ros.org/wiki/xacro"
       name="leo">

  <xacro:include filename="$(find leo_description)/urdf/macros.xacro"/>
  <xacro:include filename="$(find realsense2_description)/urdf/_d435i.urdf.xacro"/>

  <xacro:leo default_antenna="true"
             rockers_fixed="true"
             footprint_link="true"
	     link_prefix=""
             joint_prefix=""/>

  <xacro:sensor_d435i parent="base_link" name="d435i_camera">
    <origin xyz="0 0 0" rpy="0 0 0"/>
  </xacro:sensor_d435i>

</robot>
Launching camera nodes on system startup
To get the image from camera, you need to launch the camera nodes. You can simply do it by typing in terminal those commands
source /opt/ros/${ROS_DISTRO}/setup.bash
roslaunch realsense2_camera rs_camera.launch camera:=d435i_camera
You need to specify the camera argument because of the tf frame conflicts. You
have to put the same value as in the urdf file.
It's much more comfortable to run this node automatically, as you may sometimes
forget to. To launch it with the system we need to change robot.launch file in
/etc/ros/ directory. You have to include those lines in the file, somewhere
between the <launch> tag:
<include file="$(find realsense2_camera)/launch/rs_camera.launch">
    <arg name="camera" value="d435i_camera"/>
</include>
Make sure to specify the camera argument to the right value. You need that for
working camera model in visualization.
Now, the realsense camera node will be launched with every system startup. You can also force this start right now with
sudo systemctl restart leo
Examples
Reading and visualizing the data
The topics from camera node should be now visible. You can check them with
rostopic tool - topics from your node will have prefix specified by you in the
camera ROS argument.
If you have ROS installed on your computer, you can get the camera image with
rqt, and see the robot model with camera attached using rviz.
Before starting RViz or rqt, make sure you completed the Connecting another computer to ROS network section of ROS Development tutorial:
Now you can start rqt, and from plugins -> visualization choose
image view and then choose your topic.
Don't worry if the quality is low, and the image is lagging. It is due to transfer of the data through your rover and computer.
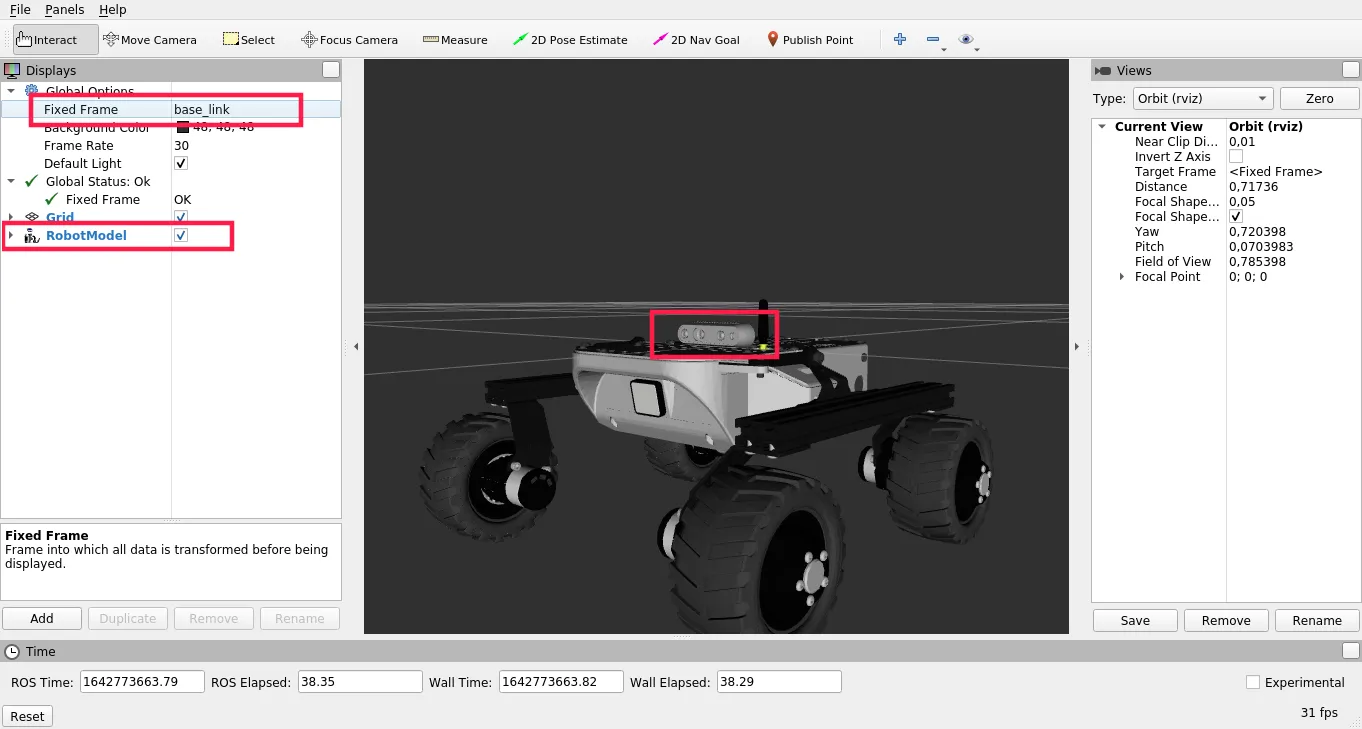
You can also start RViz, and add robot model in the display view. Chose
also base_link as fixed frame, and you should see the rover model with
camera attached.

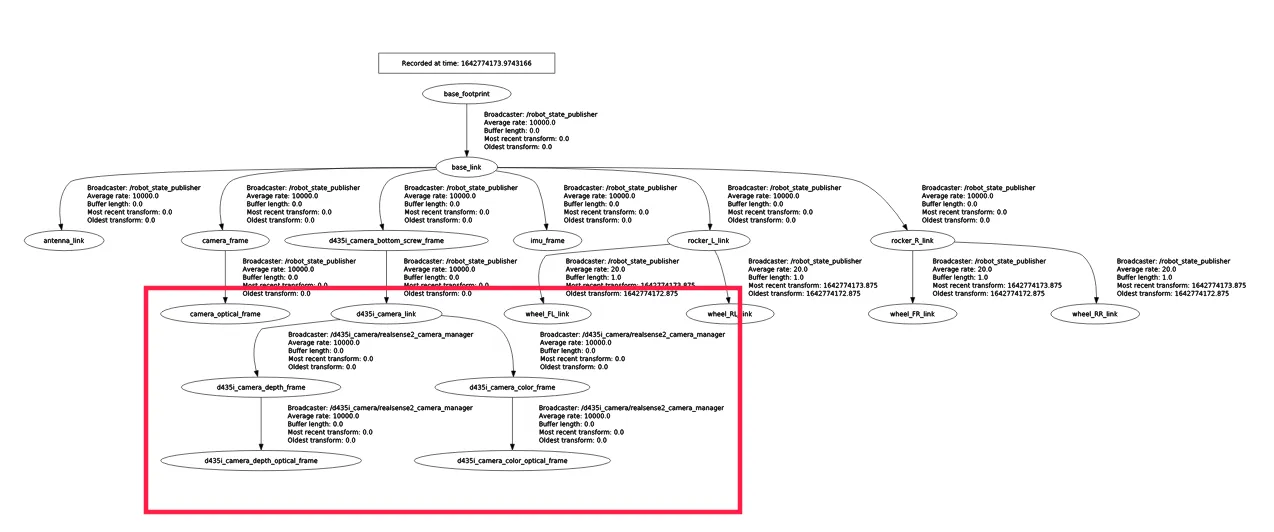
You can also display tf tree in rqt, to see if everything is configured
correctly (plugins -> visualization -> TF Tree)

What next?
Stereo cameras are commonly used in projects involving autonomous navigation, you might be interested in a tutorial about it.
They are however, not the only way of teaching a Leo Rover how to move on it's own. Check out our line follower tutorial if you want to learn more. You can also check our Integrations page for more instructions.