AR-Tag tracking with Alvar package
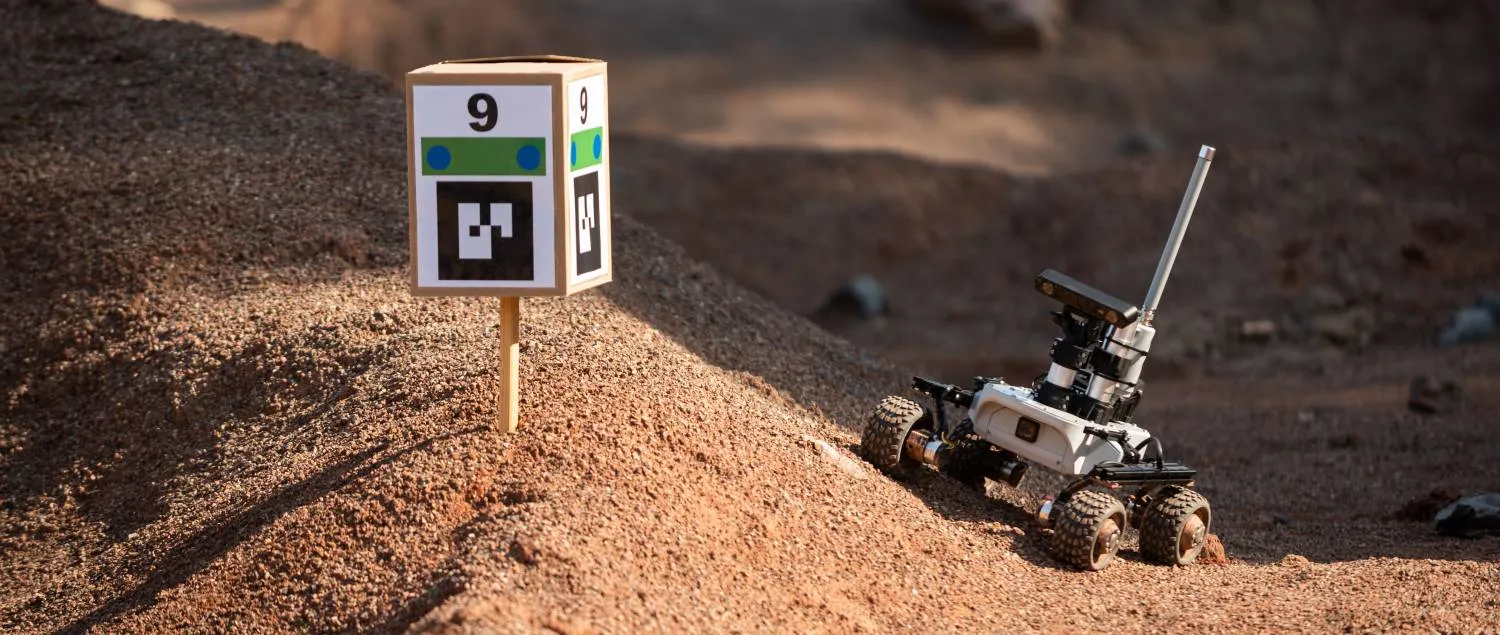
An AR-Tag is a fiduciary marker system that can help with robot perception challenges, serving as a point of reference for autonomous tasks.
In this example, we will use ar_track_alvar package for detecting individual markers.
As sending raw images from the camera via wireless network may be insufficient, we will relay all the processing to the Raspberry Pi.
What to expect?
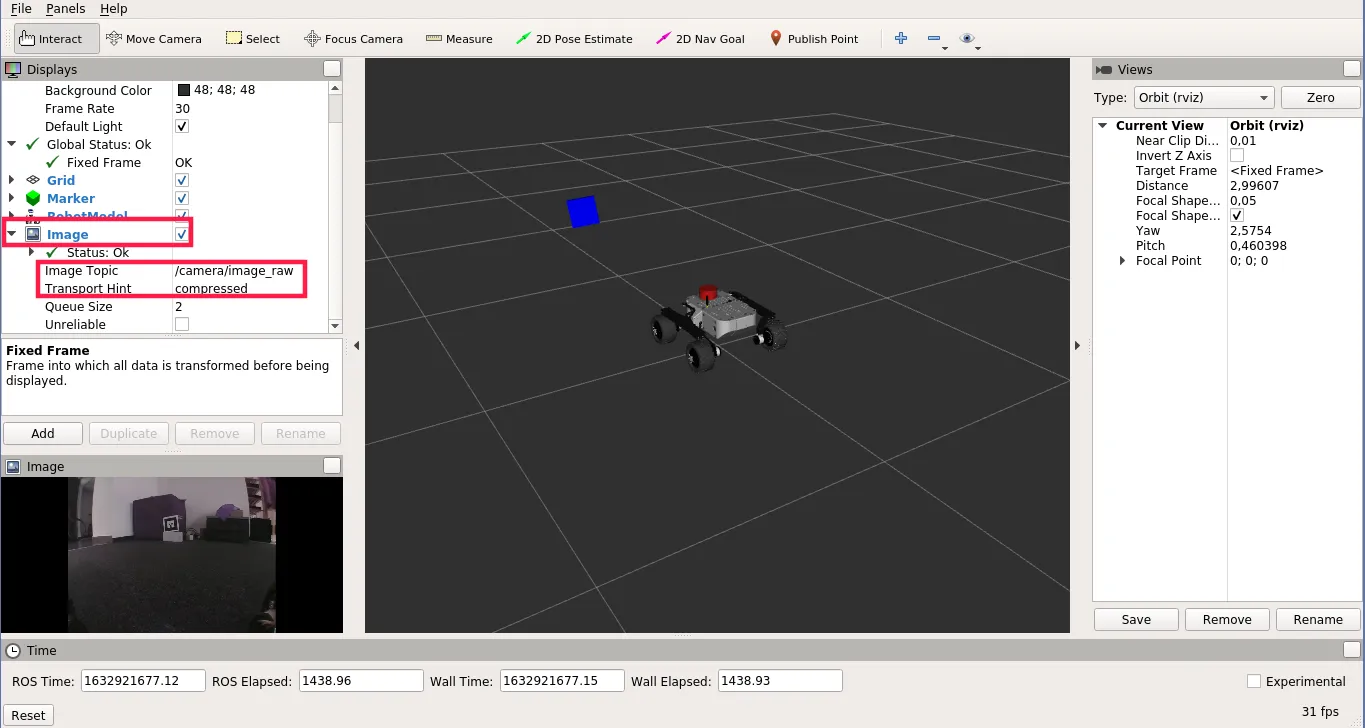
If all goes well, you should end up with something like this:
The detected AR Tags are also published to /ar_pose_marker topic, so you could
use the output in your custom nodes.
Prerequisites
Software integration
Start by logging in into your rover via SSH:
Create a workspace in your home directory if you don't have one yet:
mkdir -p ~/ros_ws/src
cd ~/ros_ws
catkin init
catkin config --extend /opt/ros/${ROS_DISTRO}
Create a new package that depends on ar_track_alvar:
cd ~/ros_ws/src
catkin create pkg leo_alvar_example --catkin-deps ar_track_alvar
Run rosdep to install dependent packages:
cd ~/ros_ws
rosdep update
rosdep install --from-paths src -i
Now, add launch/ and config/ directories inside your package:
cd ~/ros_ws/src/leo_alvar_example
mkdir launch config
Inside launch/ directory add alvar.launch file with the following content:
<launch>
	<arg name="cam_image_topic" default="camera/image_raw" />
	<arg name="cam_info_topic" default="camera/camera_info" />

	<node name="ar_track_alvar" pkg="ar_track_alvar" type="individualMarkersNoKinect" respawn="false" output="screen">
		<rosparam command="load" file="$(find leo_alvar_example)/config/alvar.yaml" />

		<remap from="camera_image"  to="$(arg cam_image_topic)" />
		<remap from="camera_info"   to="$(arg cam_info_topic)" />
	</node>
</launch>
Inside config/ directory add alvar.yaml file:
marker_size: 10.0
max_new_marker_error: 0.08
max_track_error: 0.2
max_frequency: 8.0
output_frame: base_link
You will most likely need to change marker_size parameter depending on the actual size of your printed AR tag. You can read more about the parameters on the package wiki.
And build the package:
cd ~/ros_ws
catkin build
source devel/setup.bash
Launch
To start the Alvar tracking, type:
roslaunch leo_alvar_example alvar.launch
If you want to start the node when the rover boots, add this line to
robot.launch file:
<include file="$(find leo_alvar_example)/launch/alvar.launch"/>
Generate ARTags
Now, we need to create some markers, so go back to your computer.
Install the ar_track_alvar package:
sudo apt install ros-${ROS_DISTRO}-ar-track-alvar
And run the createMarker script:
rosrun ar_track_alvar createMarker 0 -s 10.0
This will create MarkerData_0.png file that stores a 10cm x 10cm marker with
id 0. Print this file on a sheet of paper.
Due to differences in printer setups, the actual size of the printed marker may
be different. Make sure the marker_size parameter represents the actual size
(in centimeters) of the AR tag.
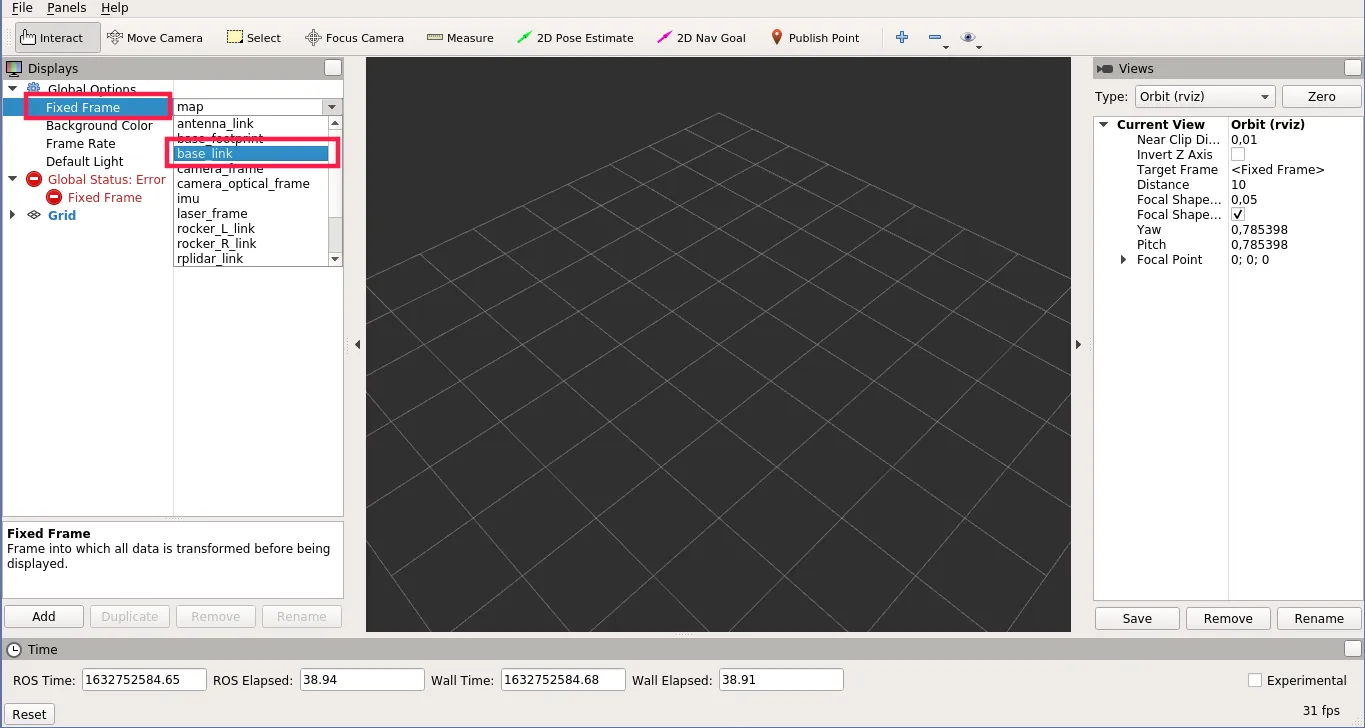
Now to visualize detected AR Tags, you just need to:
- open RViz, by typing
rvizin the terminal - set Fixed Frame to
base_link
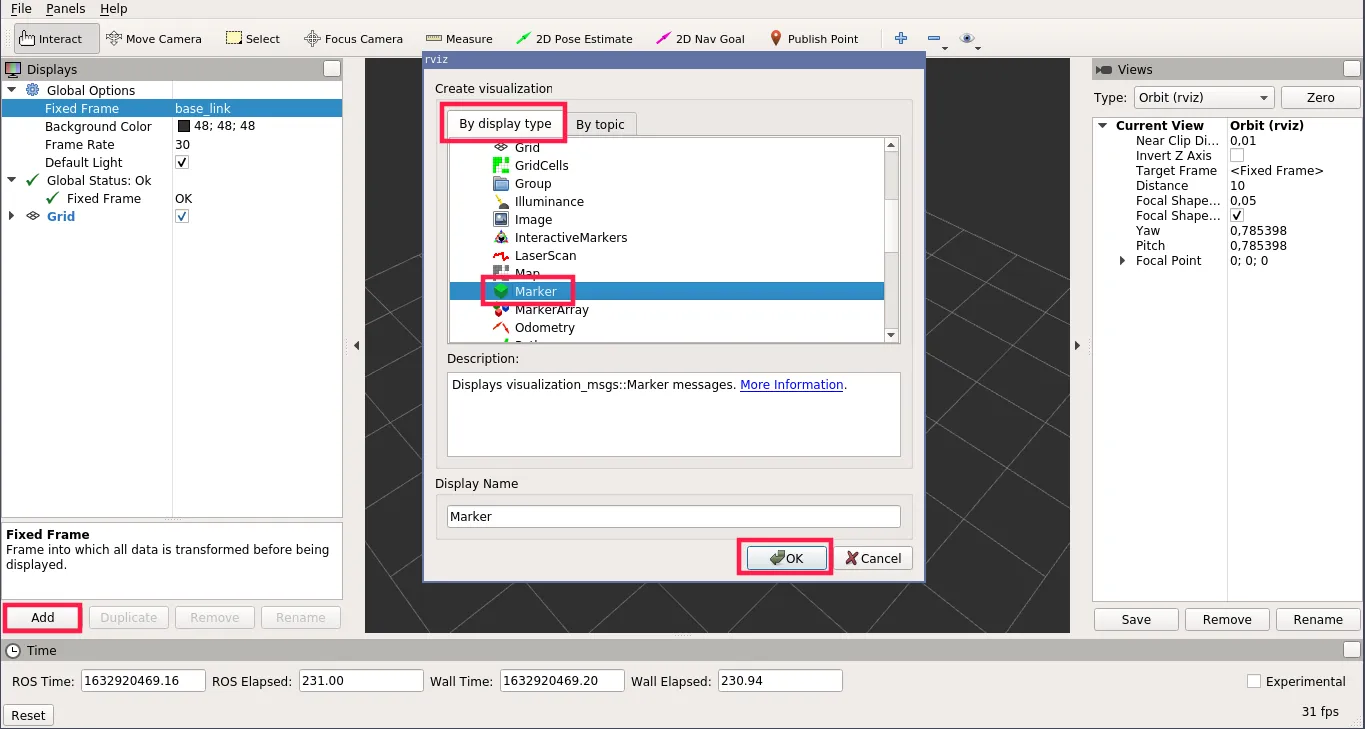
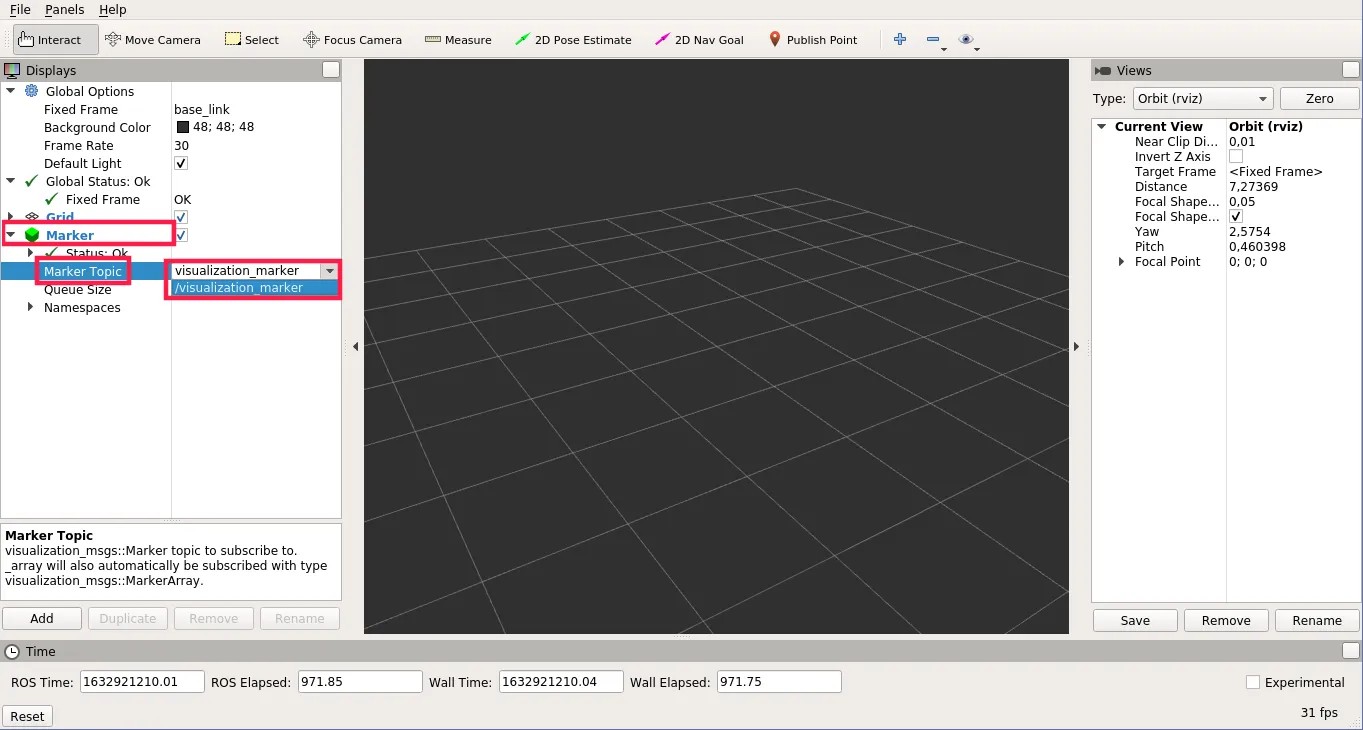
- Click Add -> Marker and set Marker Topic to
visualization_marker
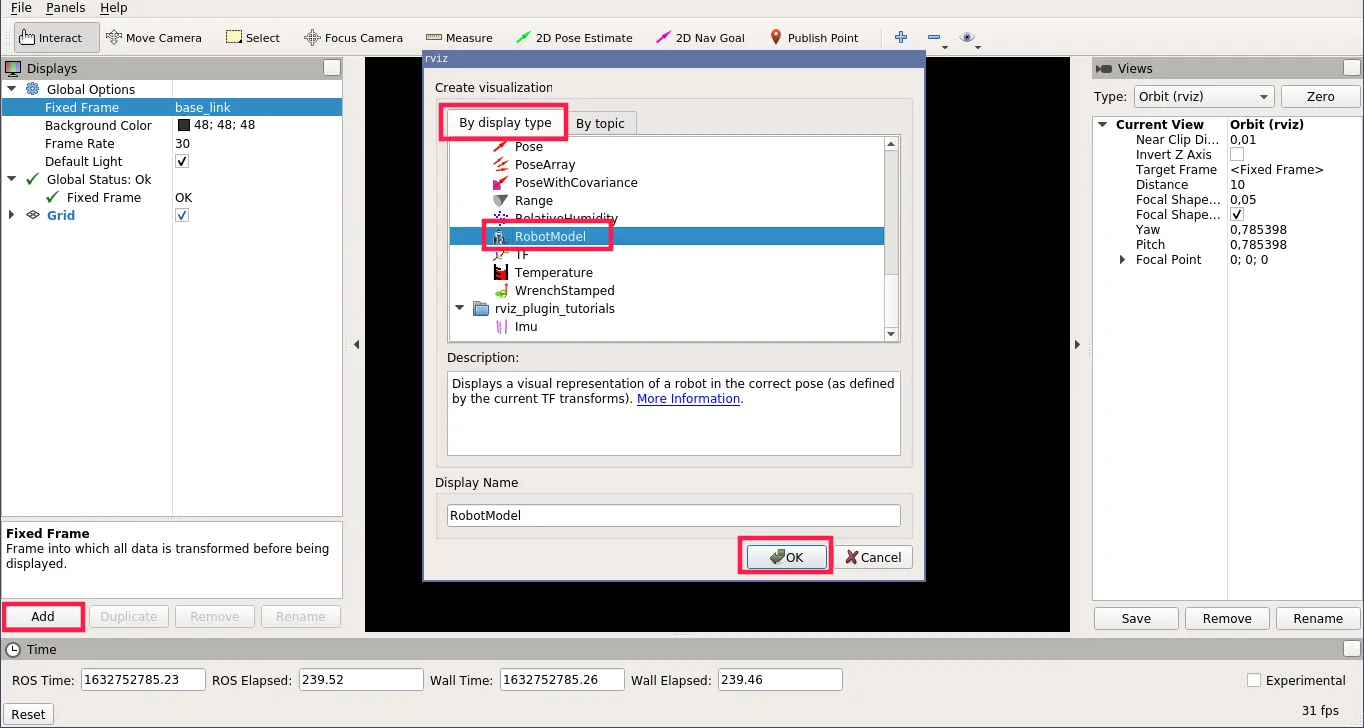
- (optionally) Click Add -> RobotModel to visualize the Rover
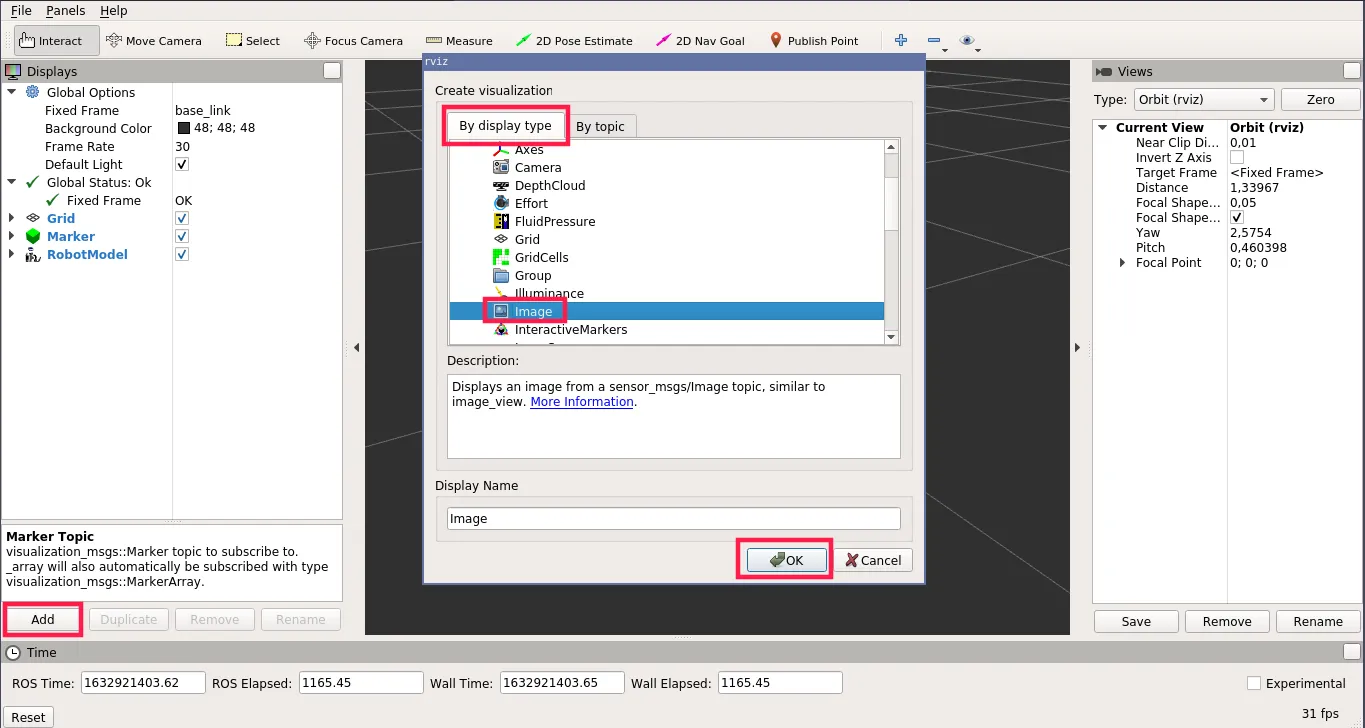
- (optionally) Click Add -> Image, set Image Topic to
/camera/image_rawand Transport Hint tocompressedto open the image stream
What next?
With this tutorial completed you may be wondering what to do next. Our pick would be the ARTag follower. However, you can check out other examples from leo_examples repository (like line follower and object detection). You can also check out other integrations from our Integrations site.