Task 0: Initial Information
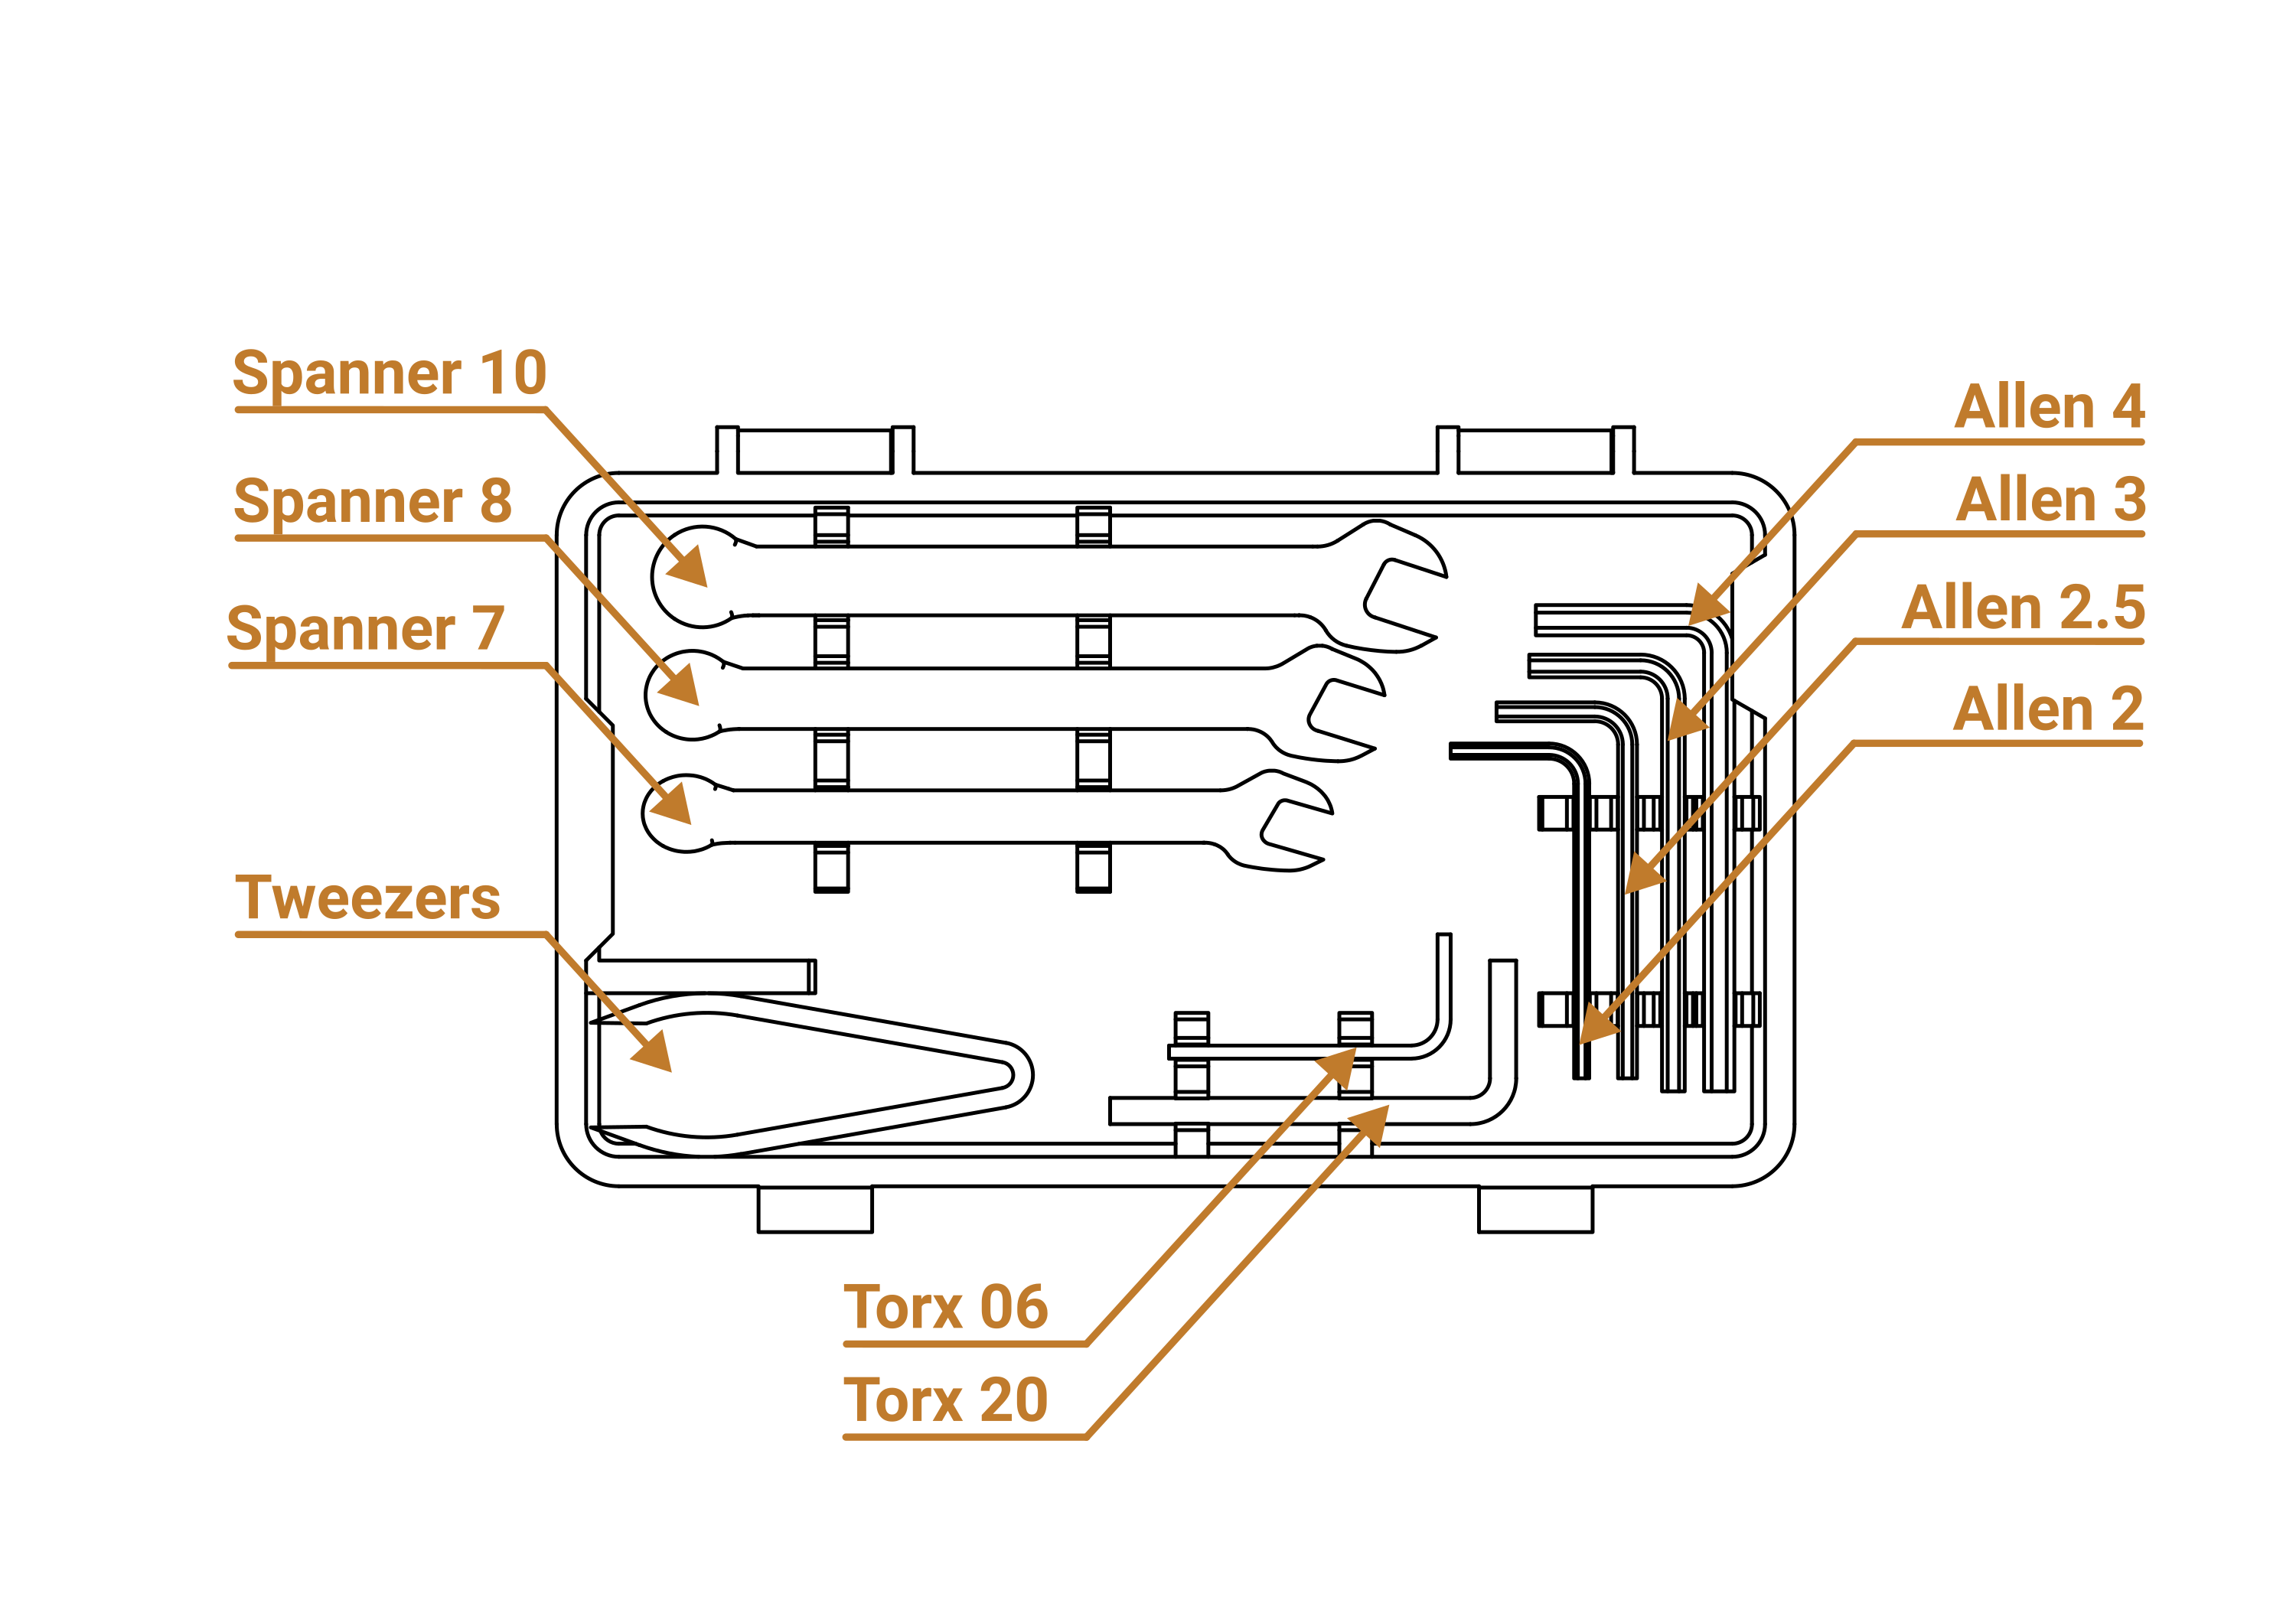
Tools provided


Keep in mind:
T-nuts


note
When attaching T-nuts at any point during the assembly, ensure both sides are seated on the flanges of the groove.
Notes

note
Some concepts are difficult to convey with images alone, so additional information is provided in boxes like this one, located below the images.
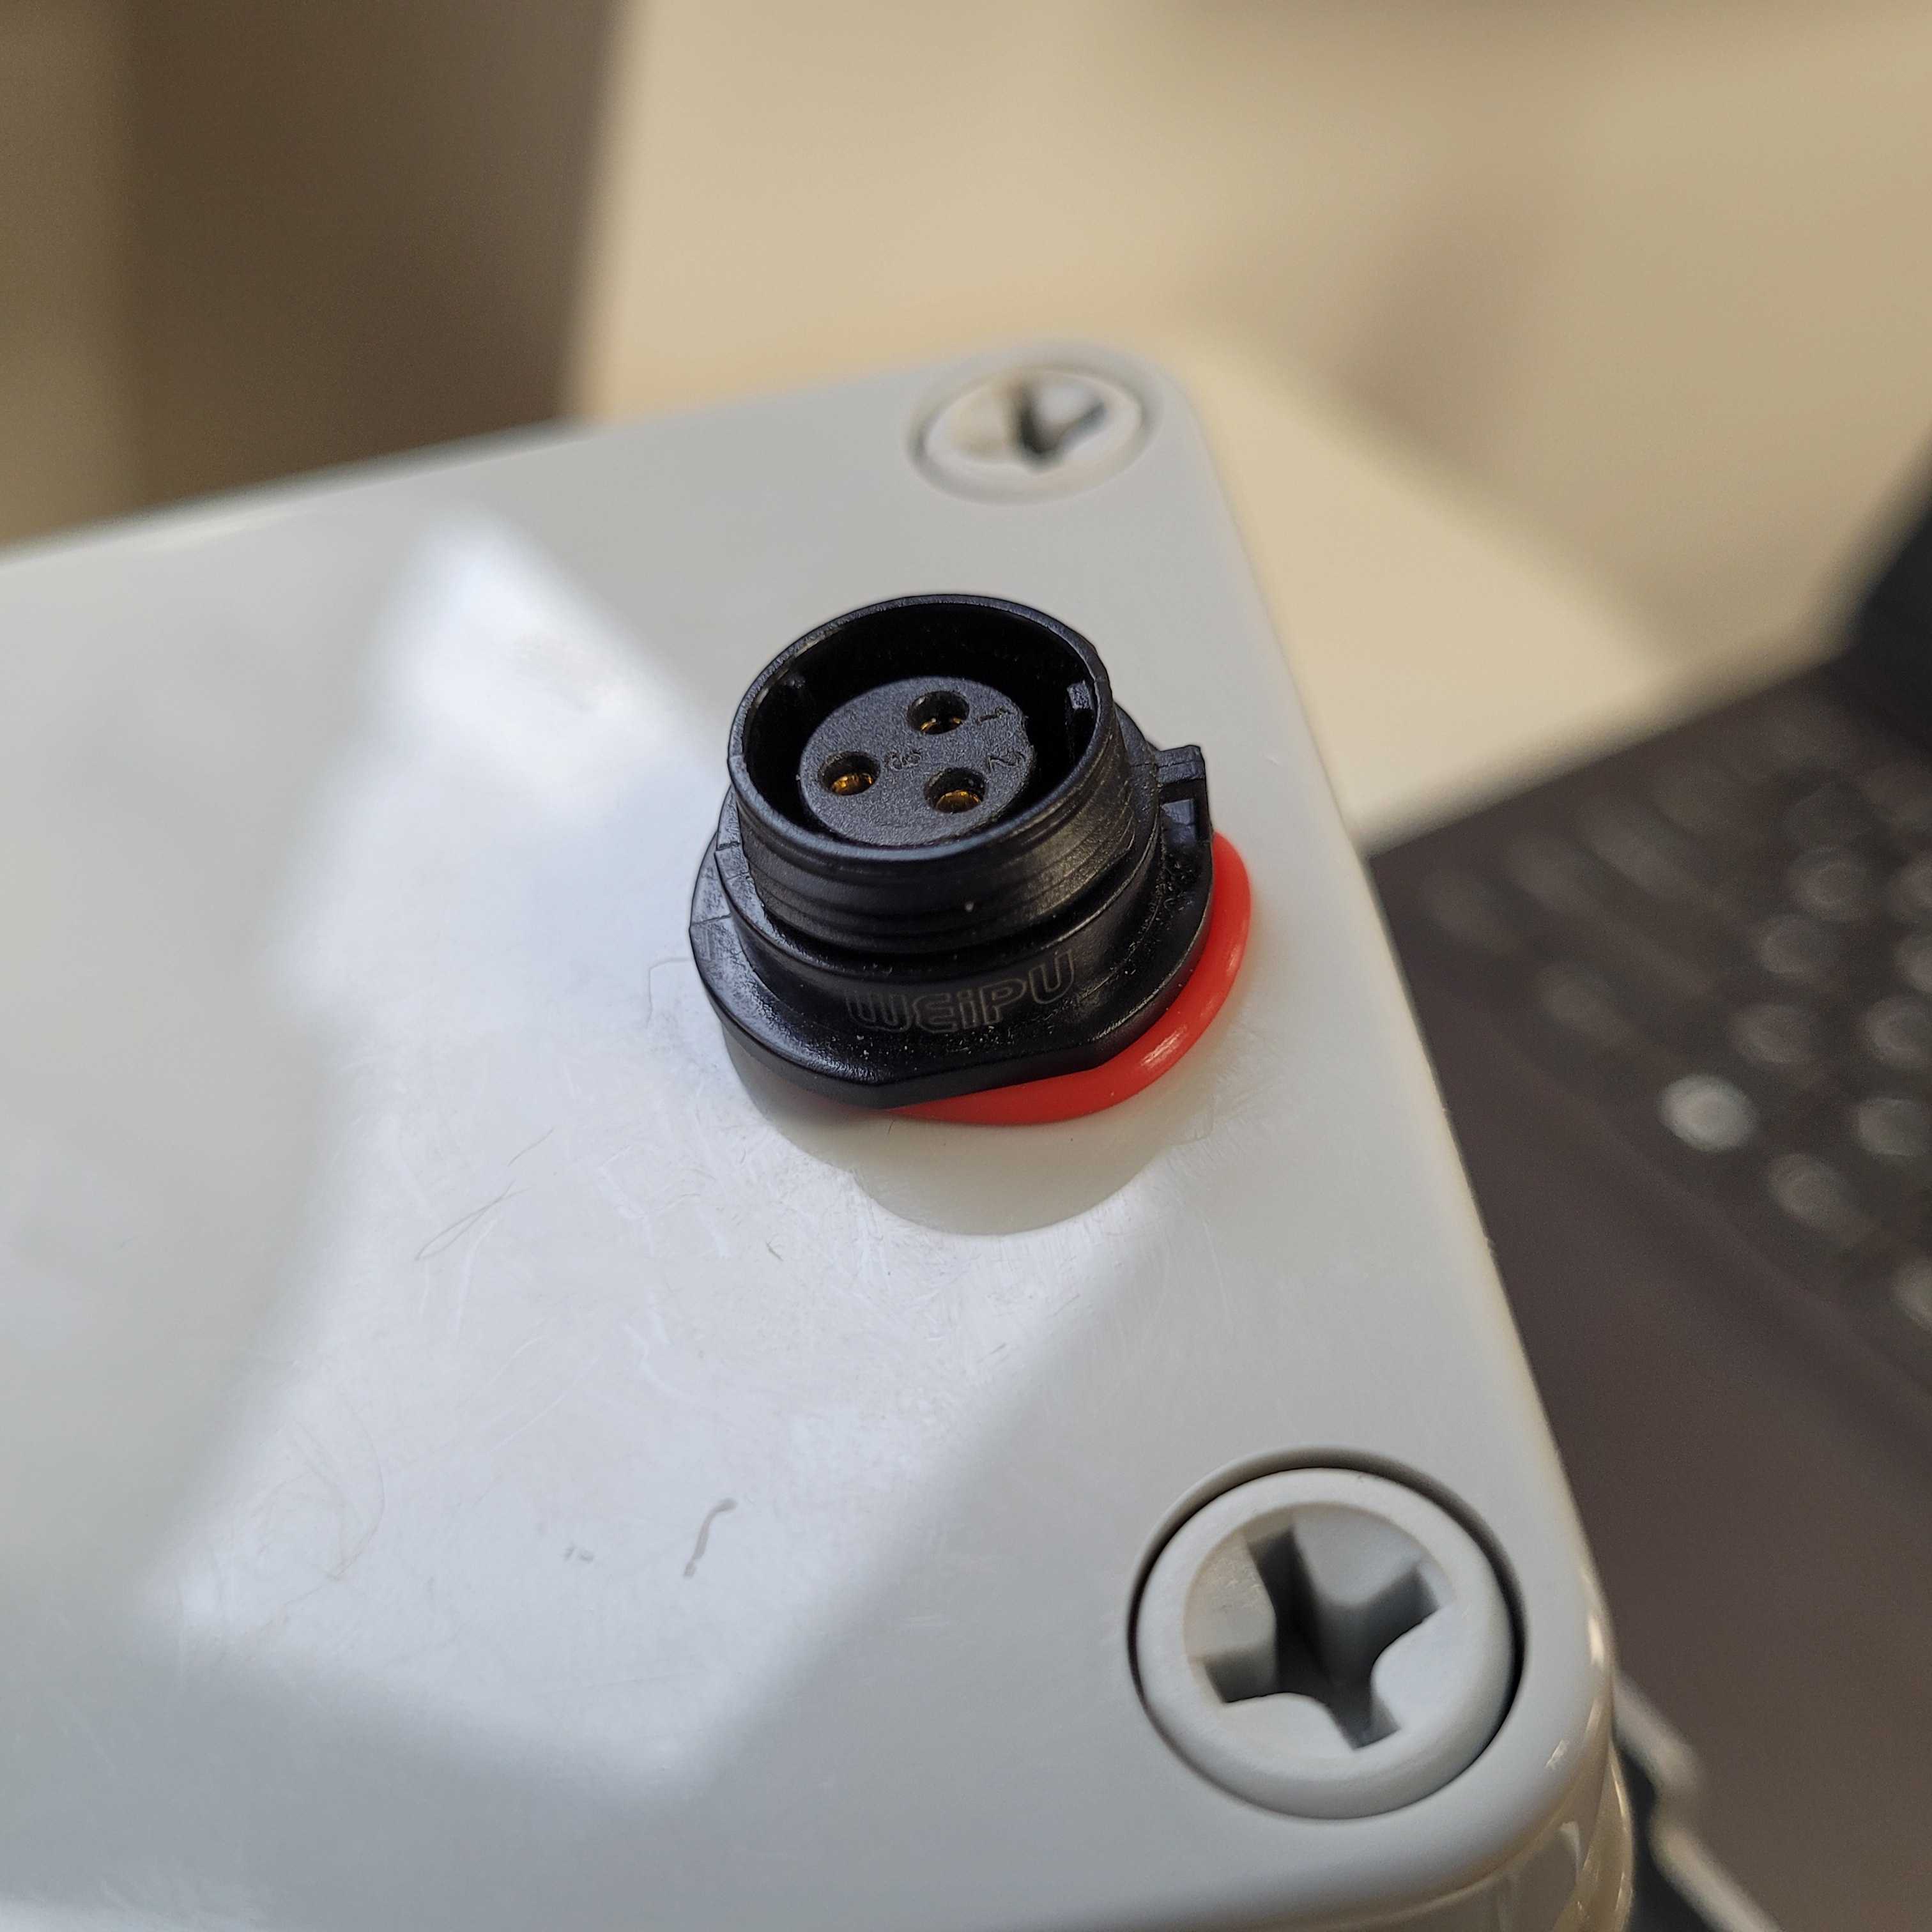
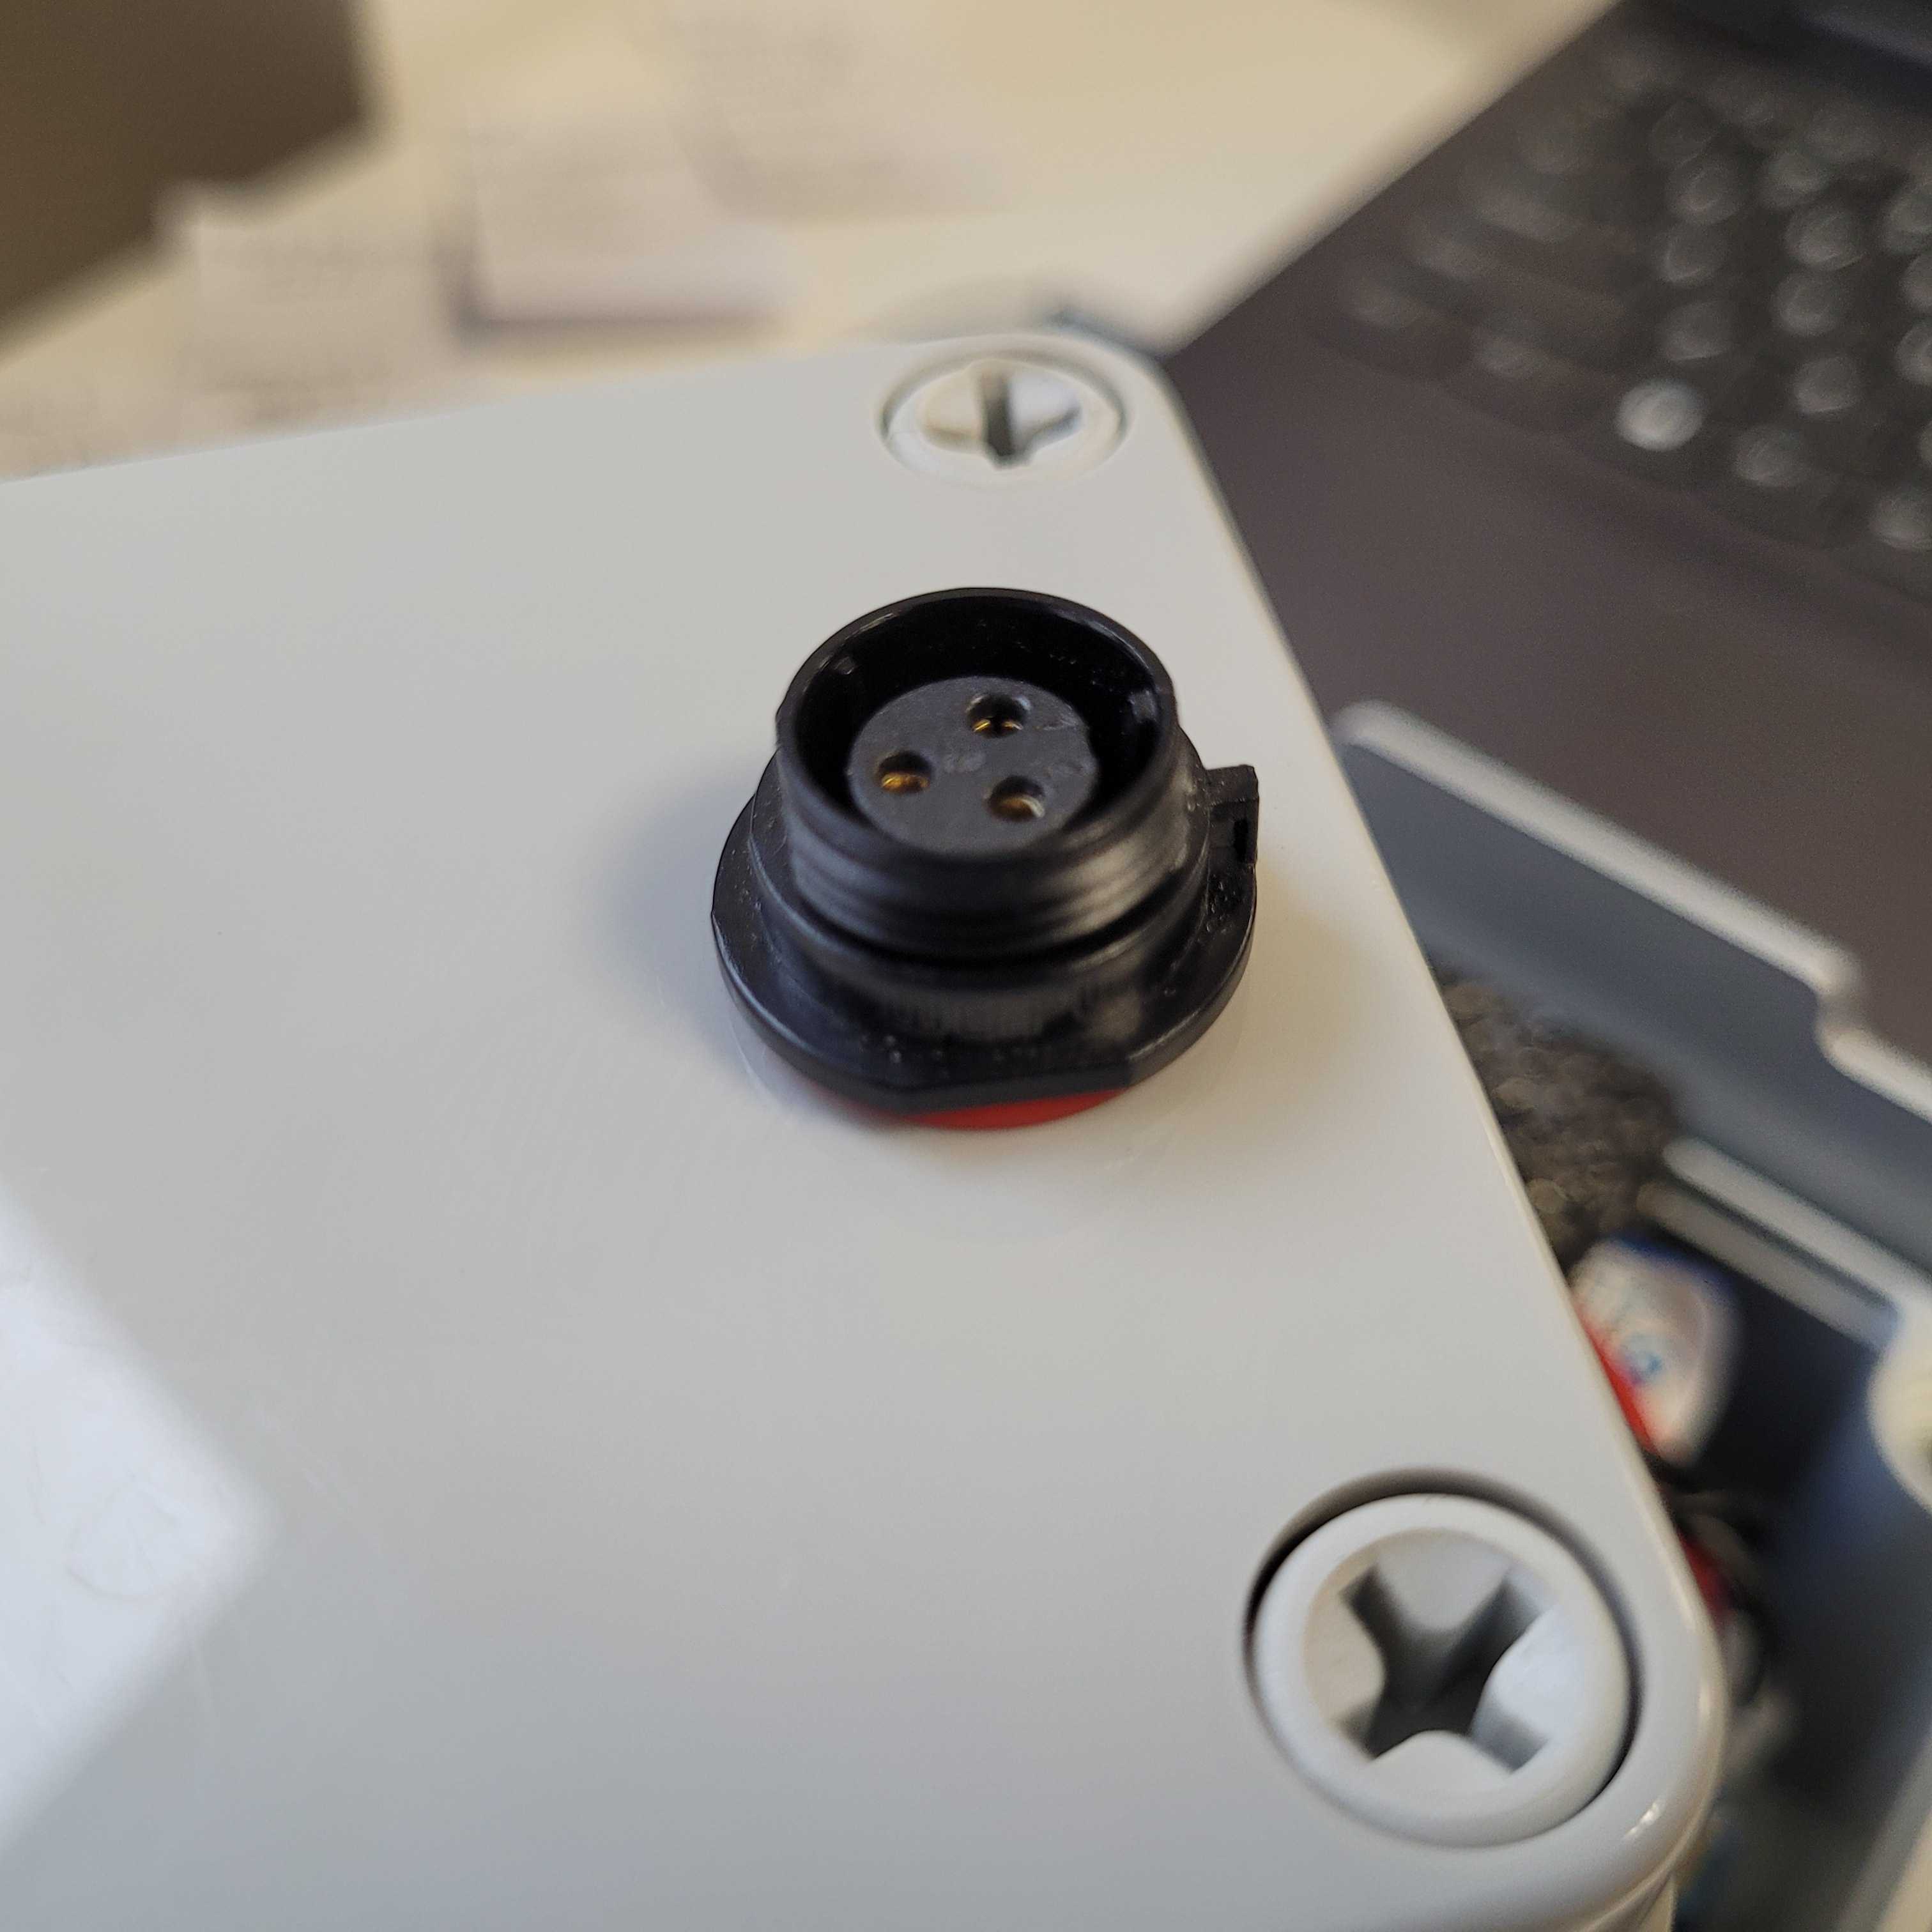
Seals
NOT
OK
OK
OK
note
Ensure all seals are properly aligned.
Wires
note
No tools are provided for tightening the panel mount sockets to the sides of
electronics box or battery.
Panel socket nuts should be hand-tight only, as excessive force can damage the
seals.
warning
Be careful not to crush the wires during assembly.