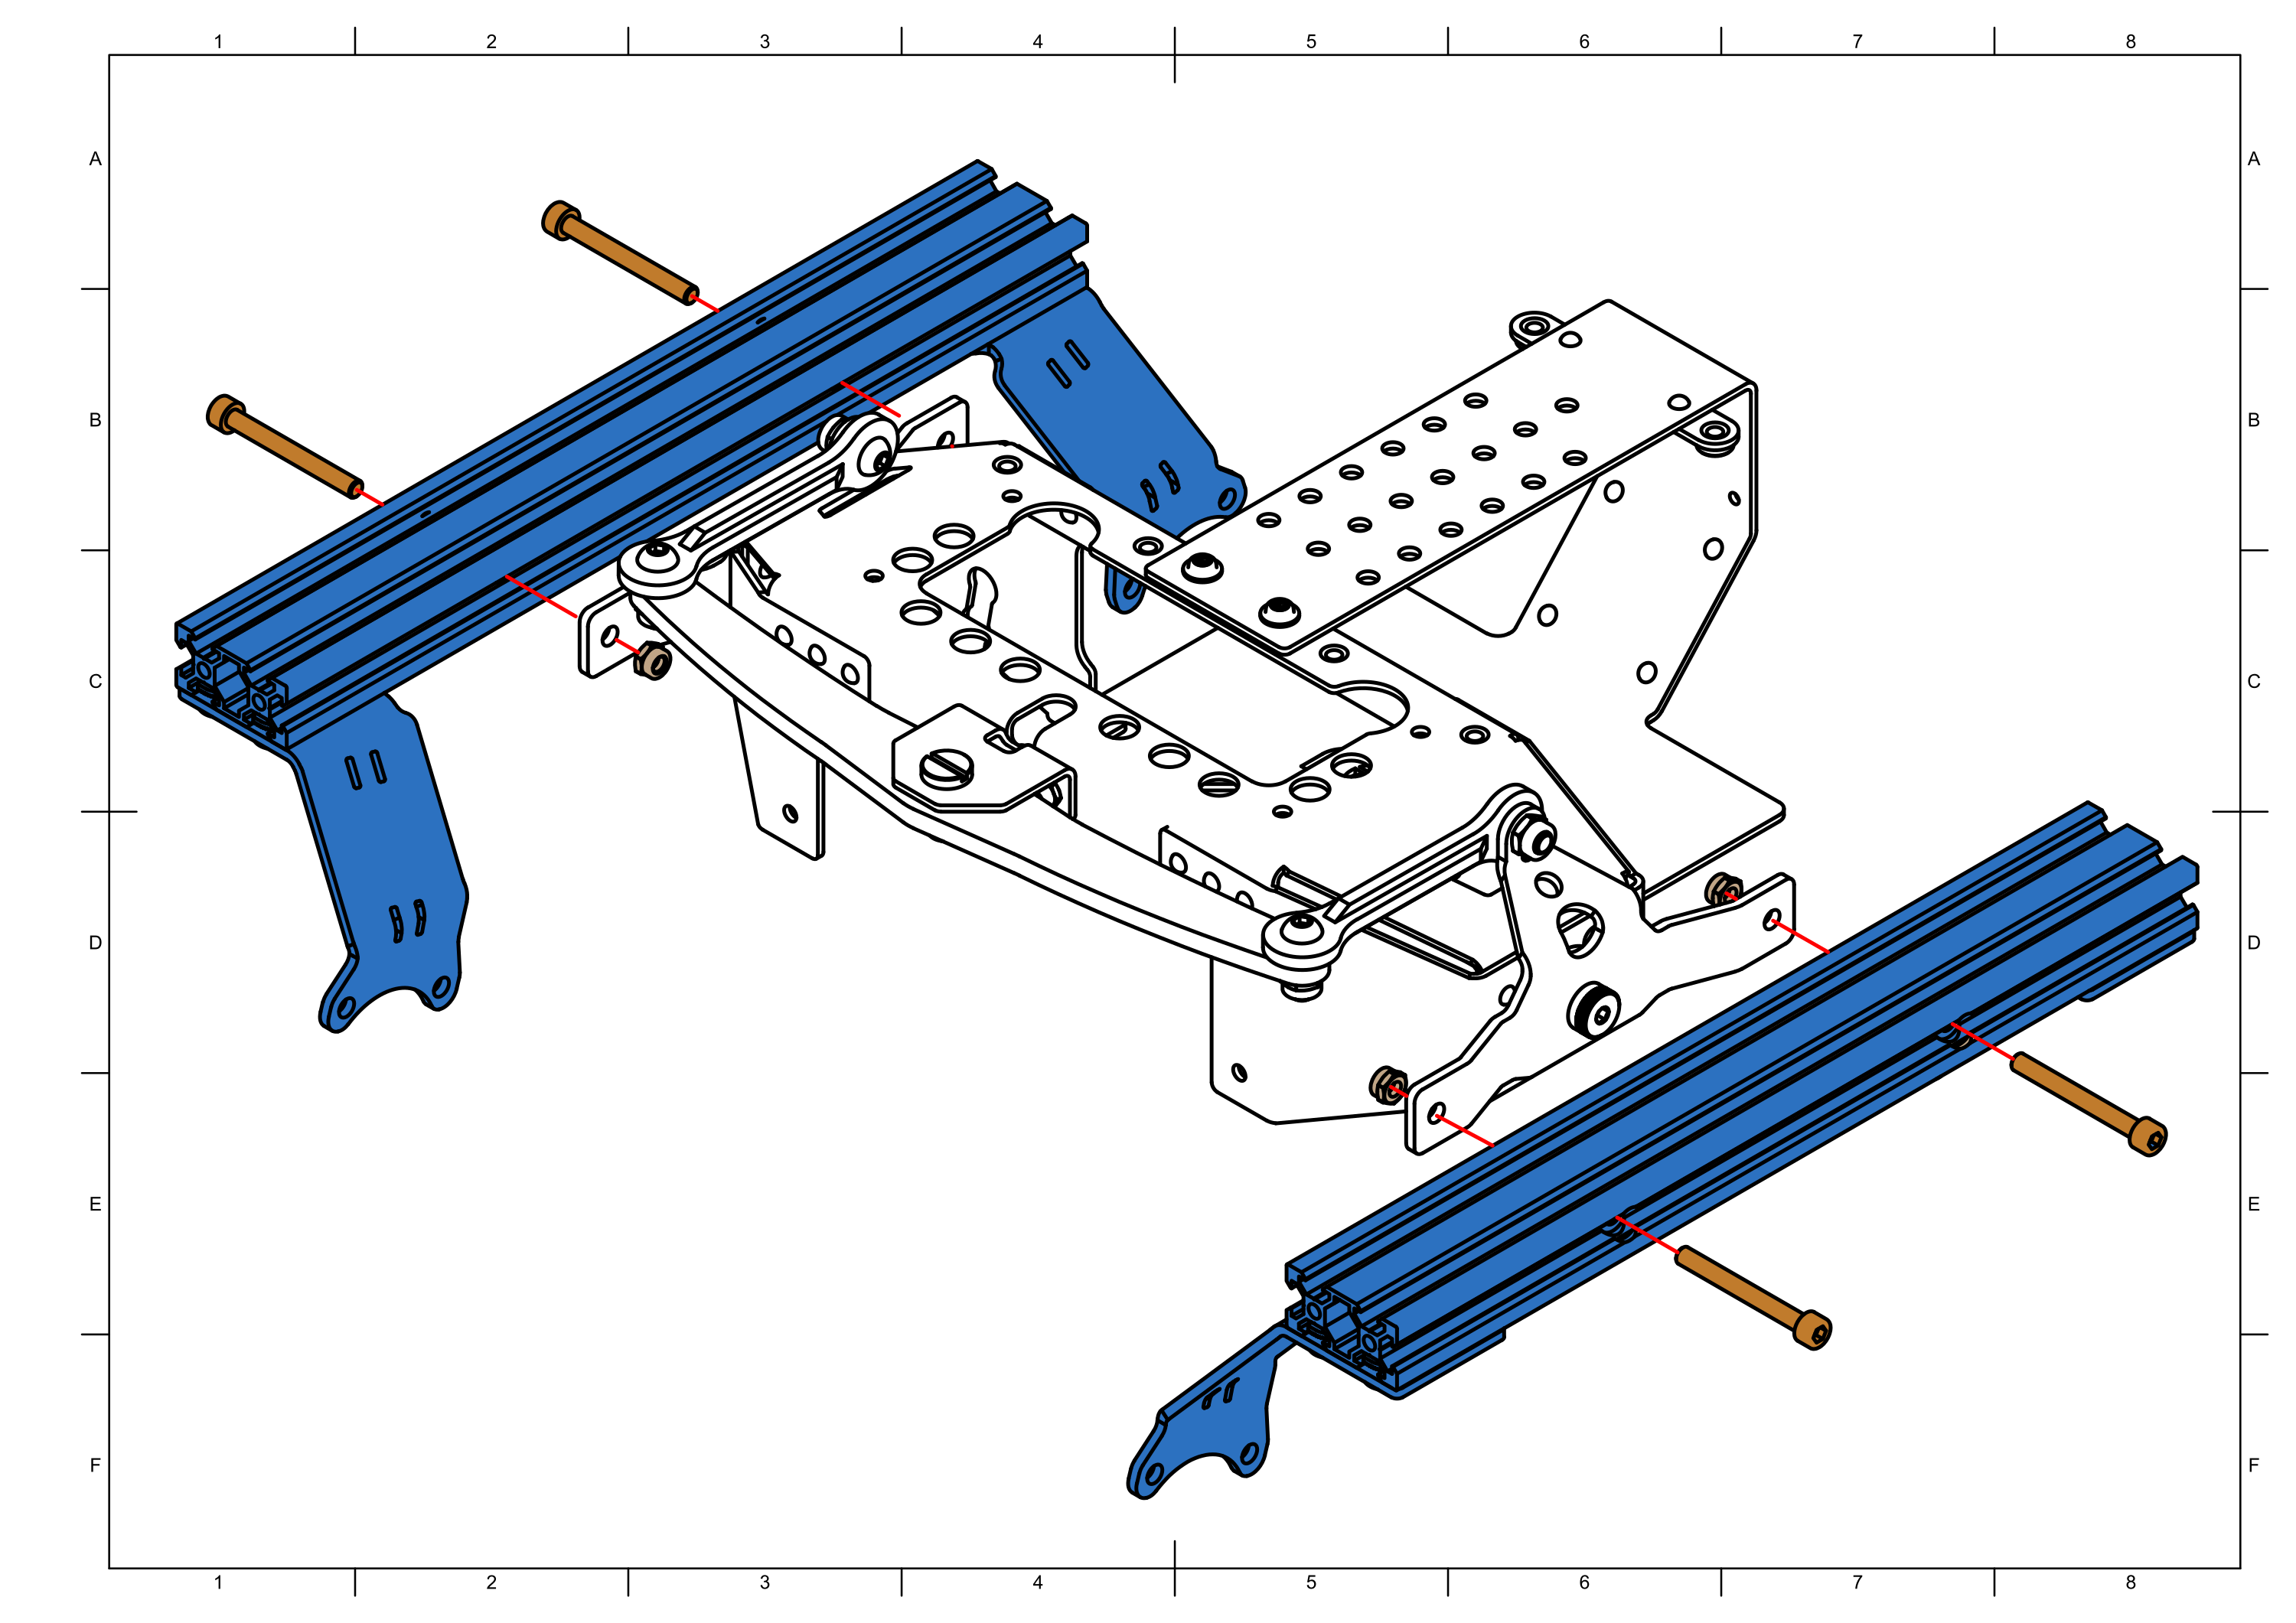
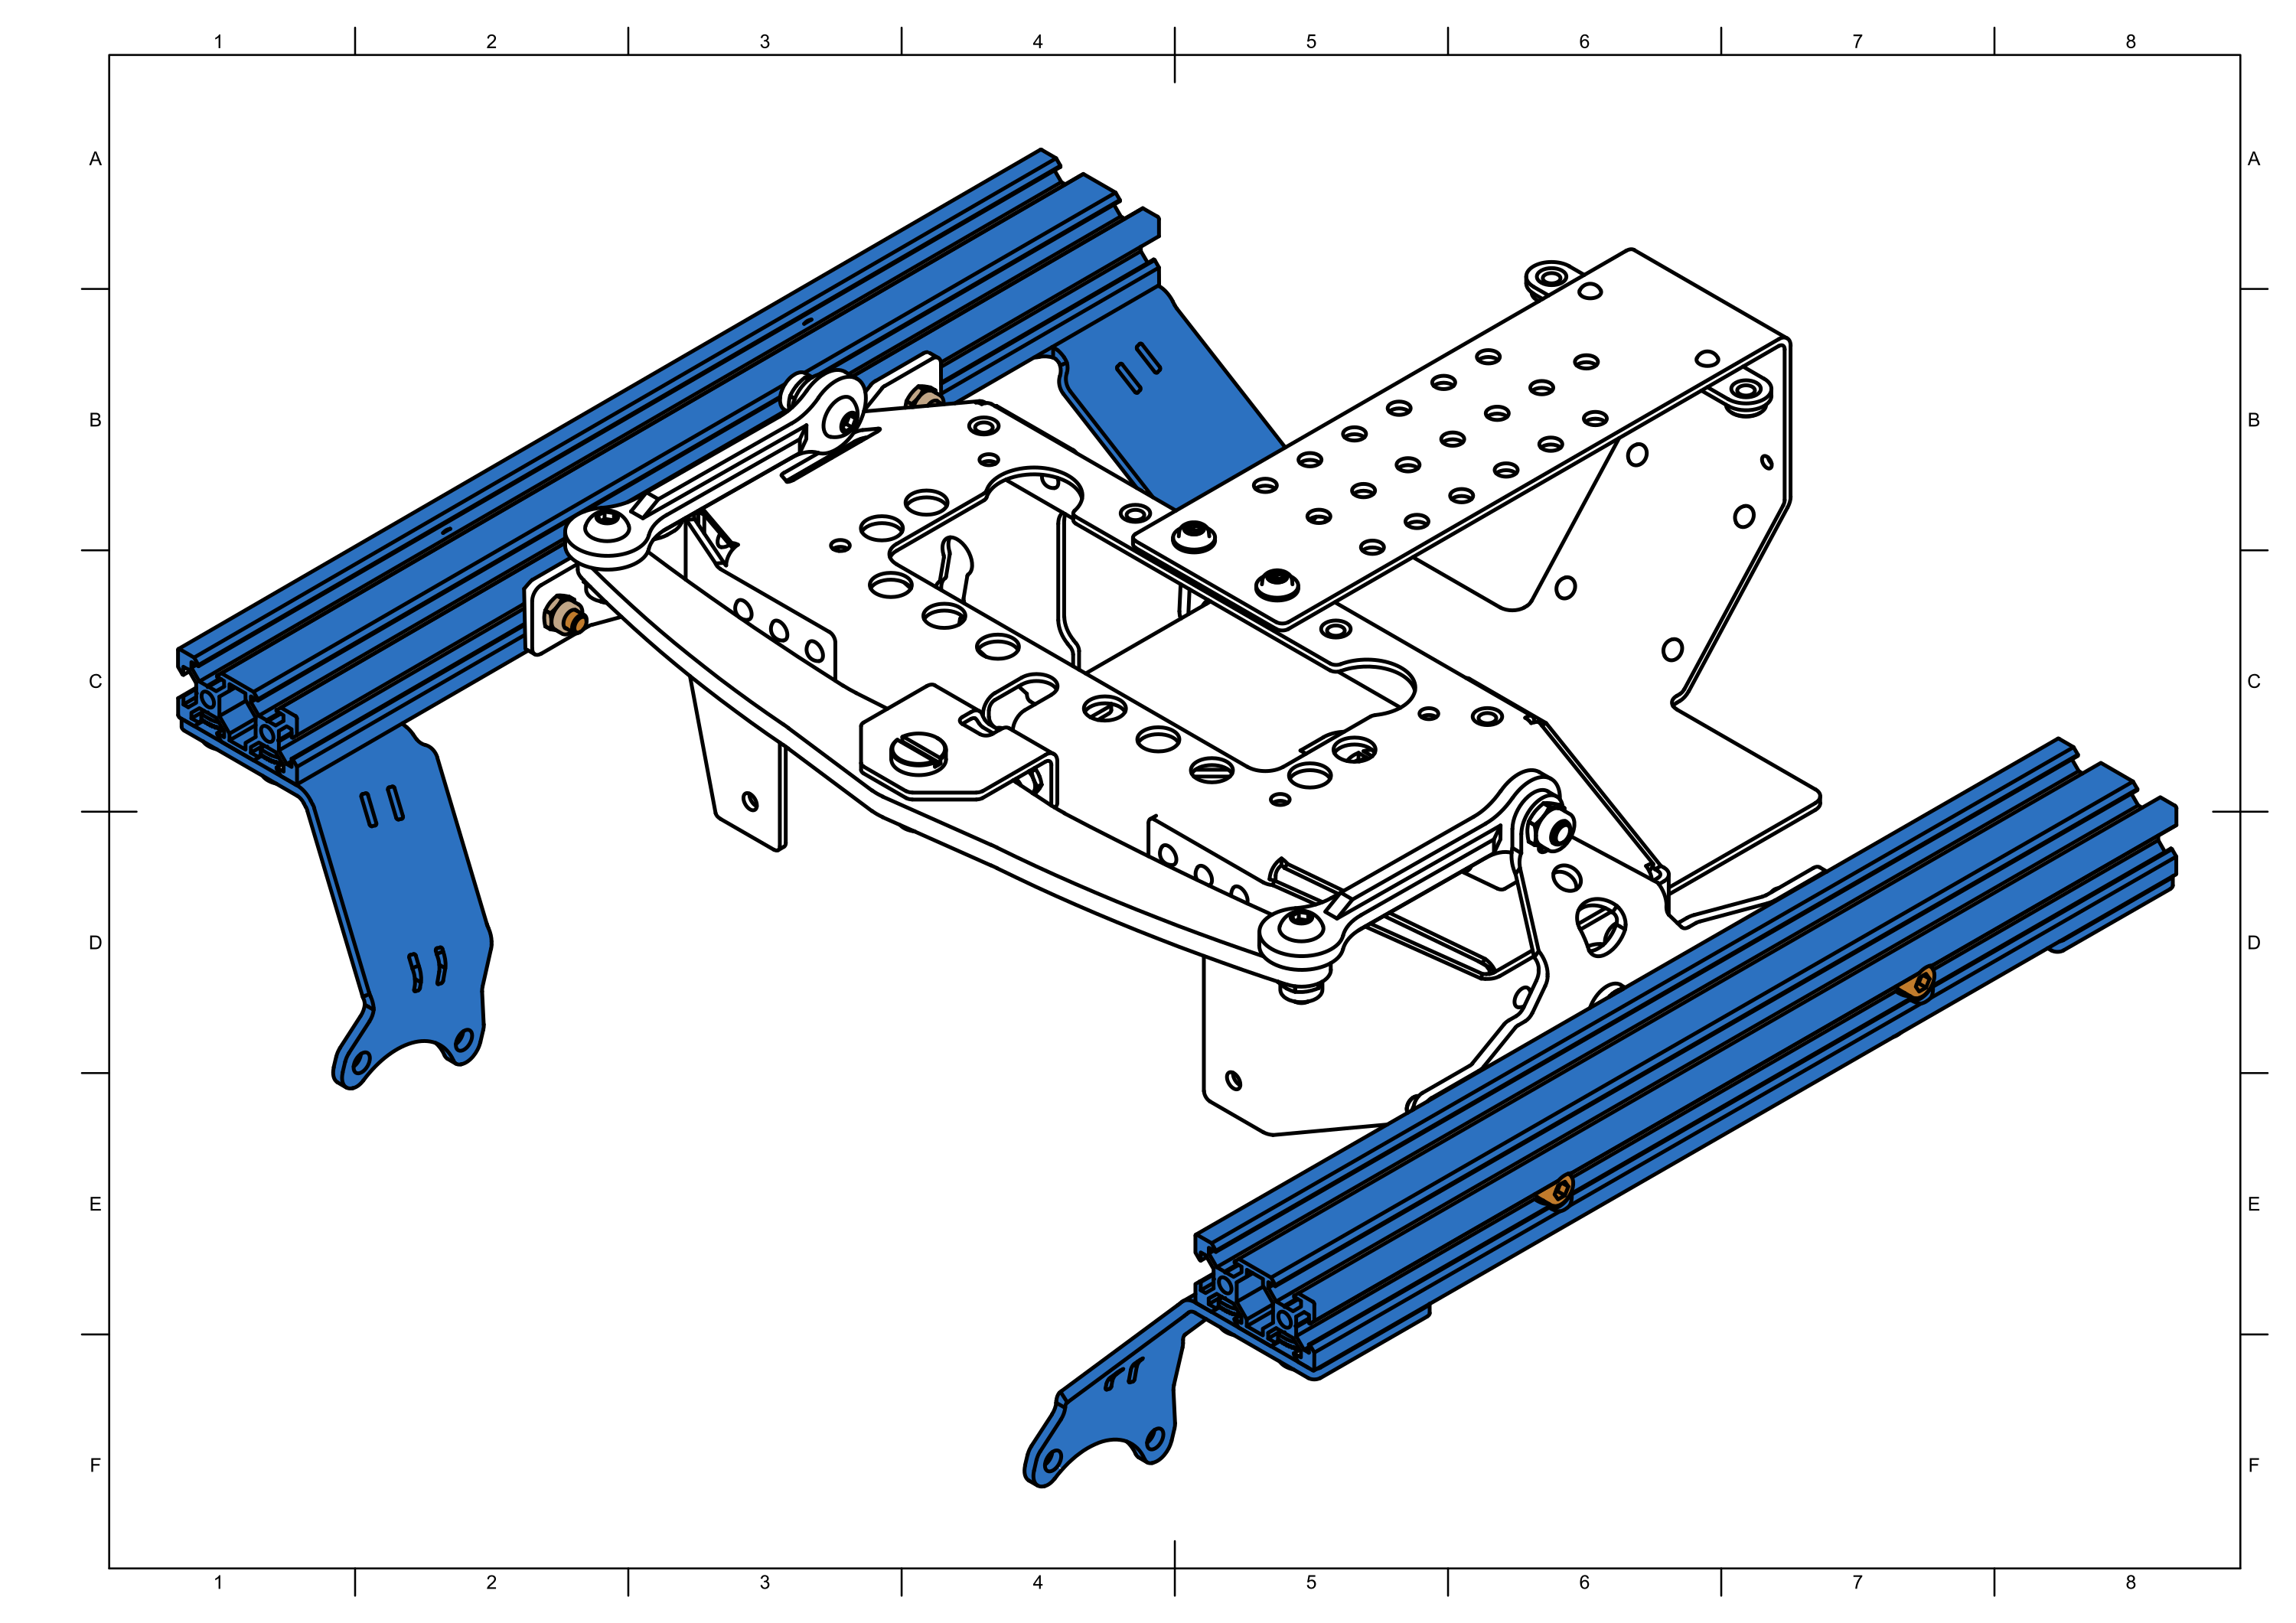
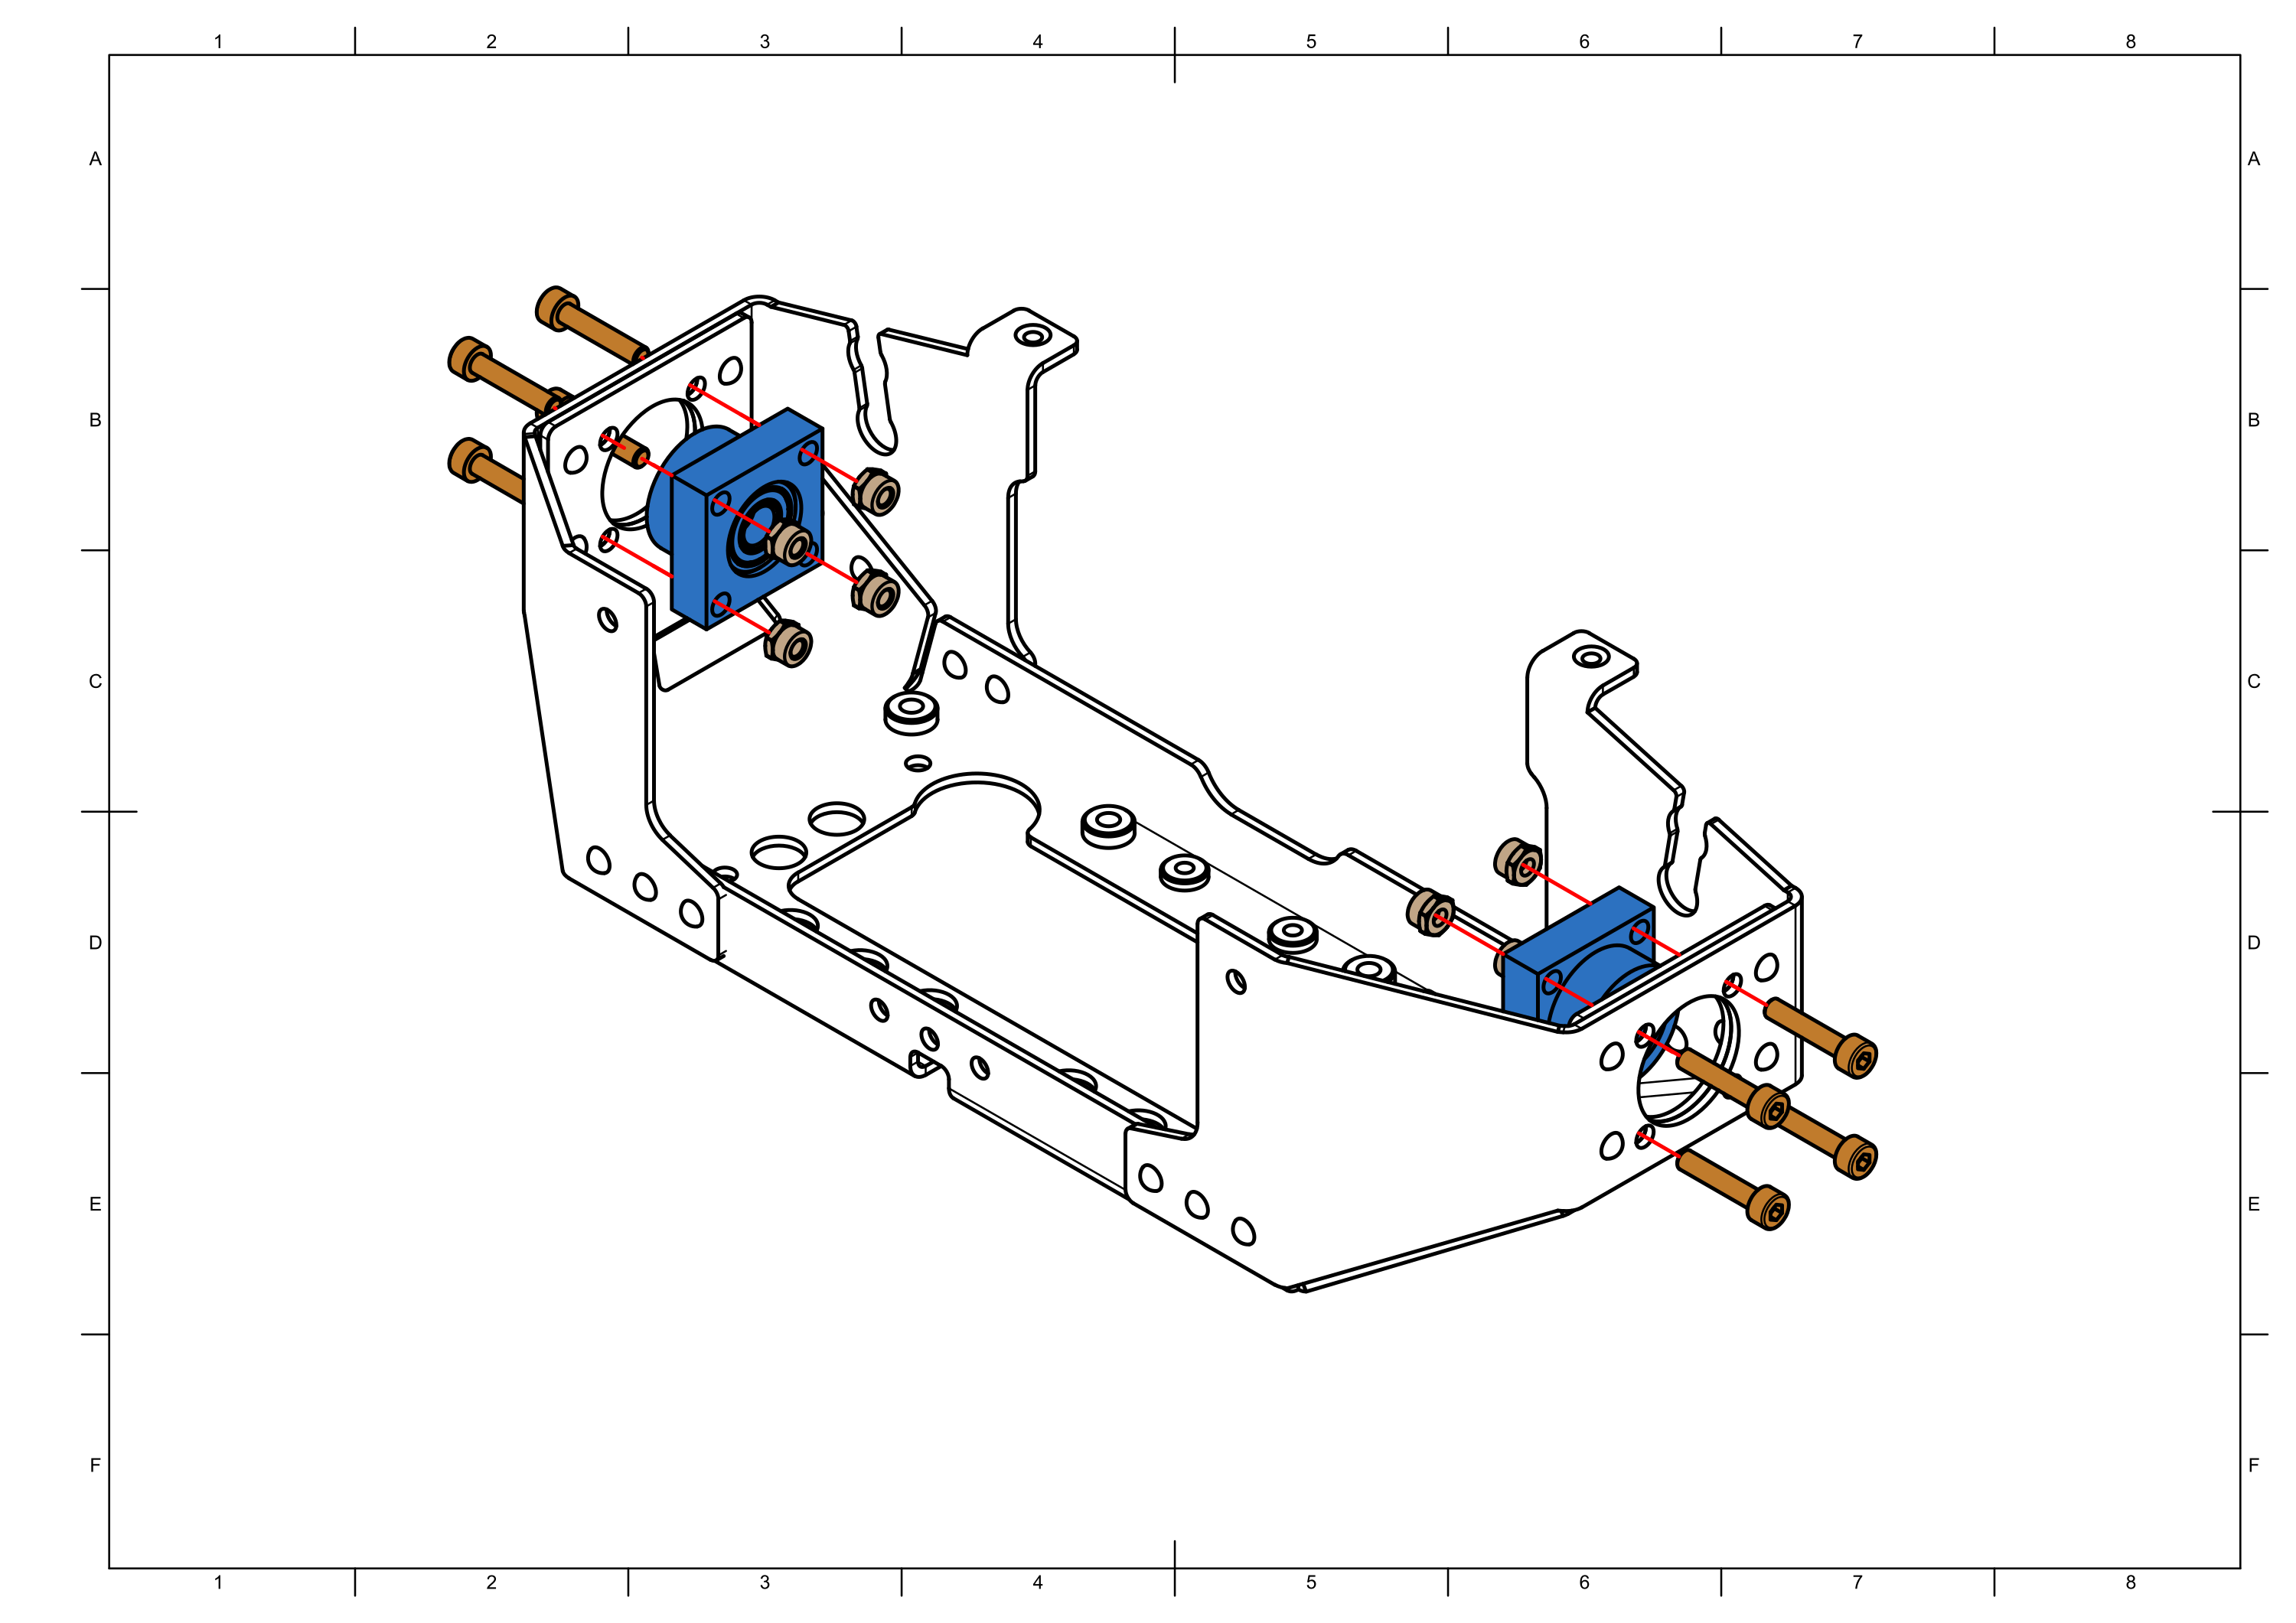
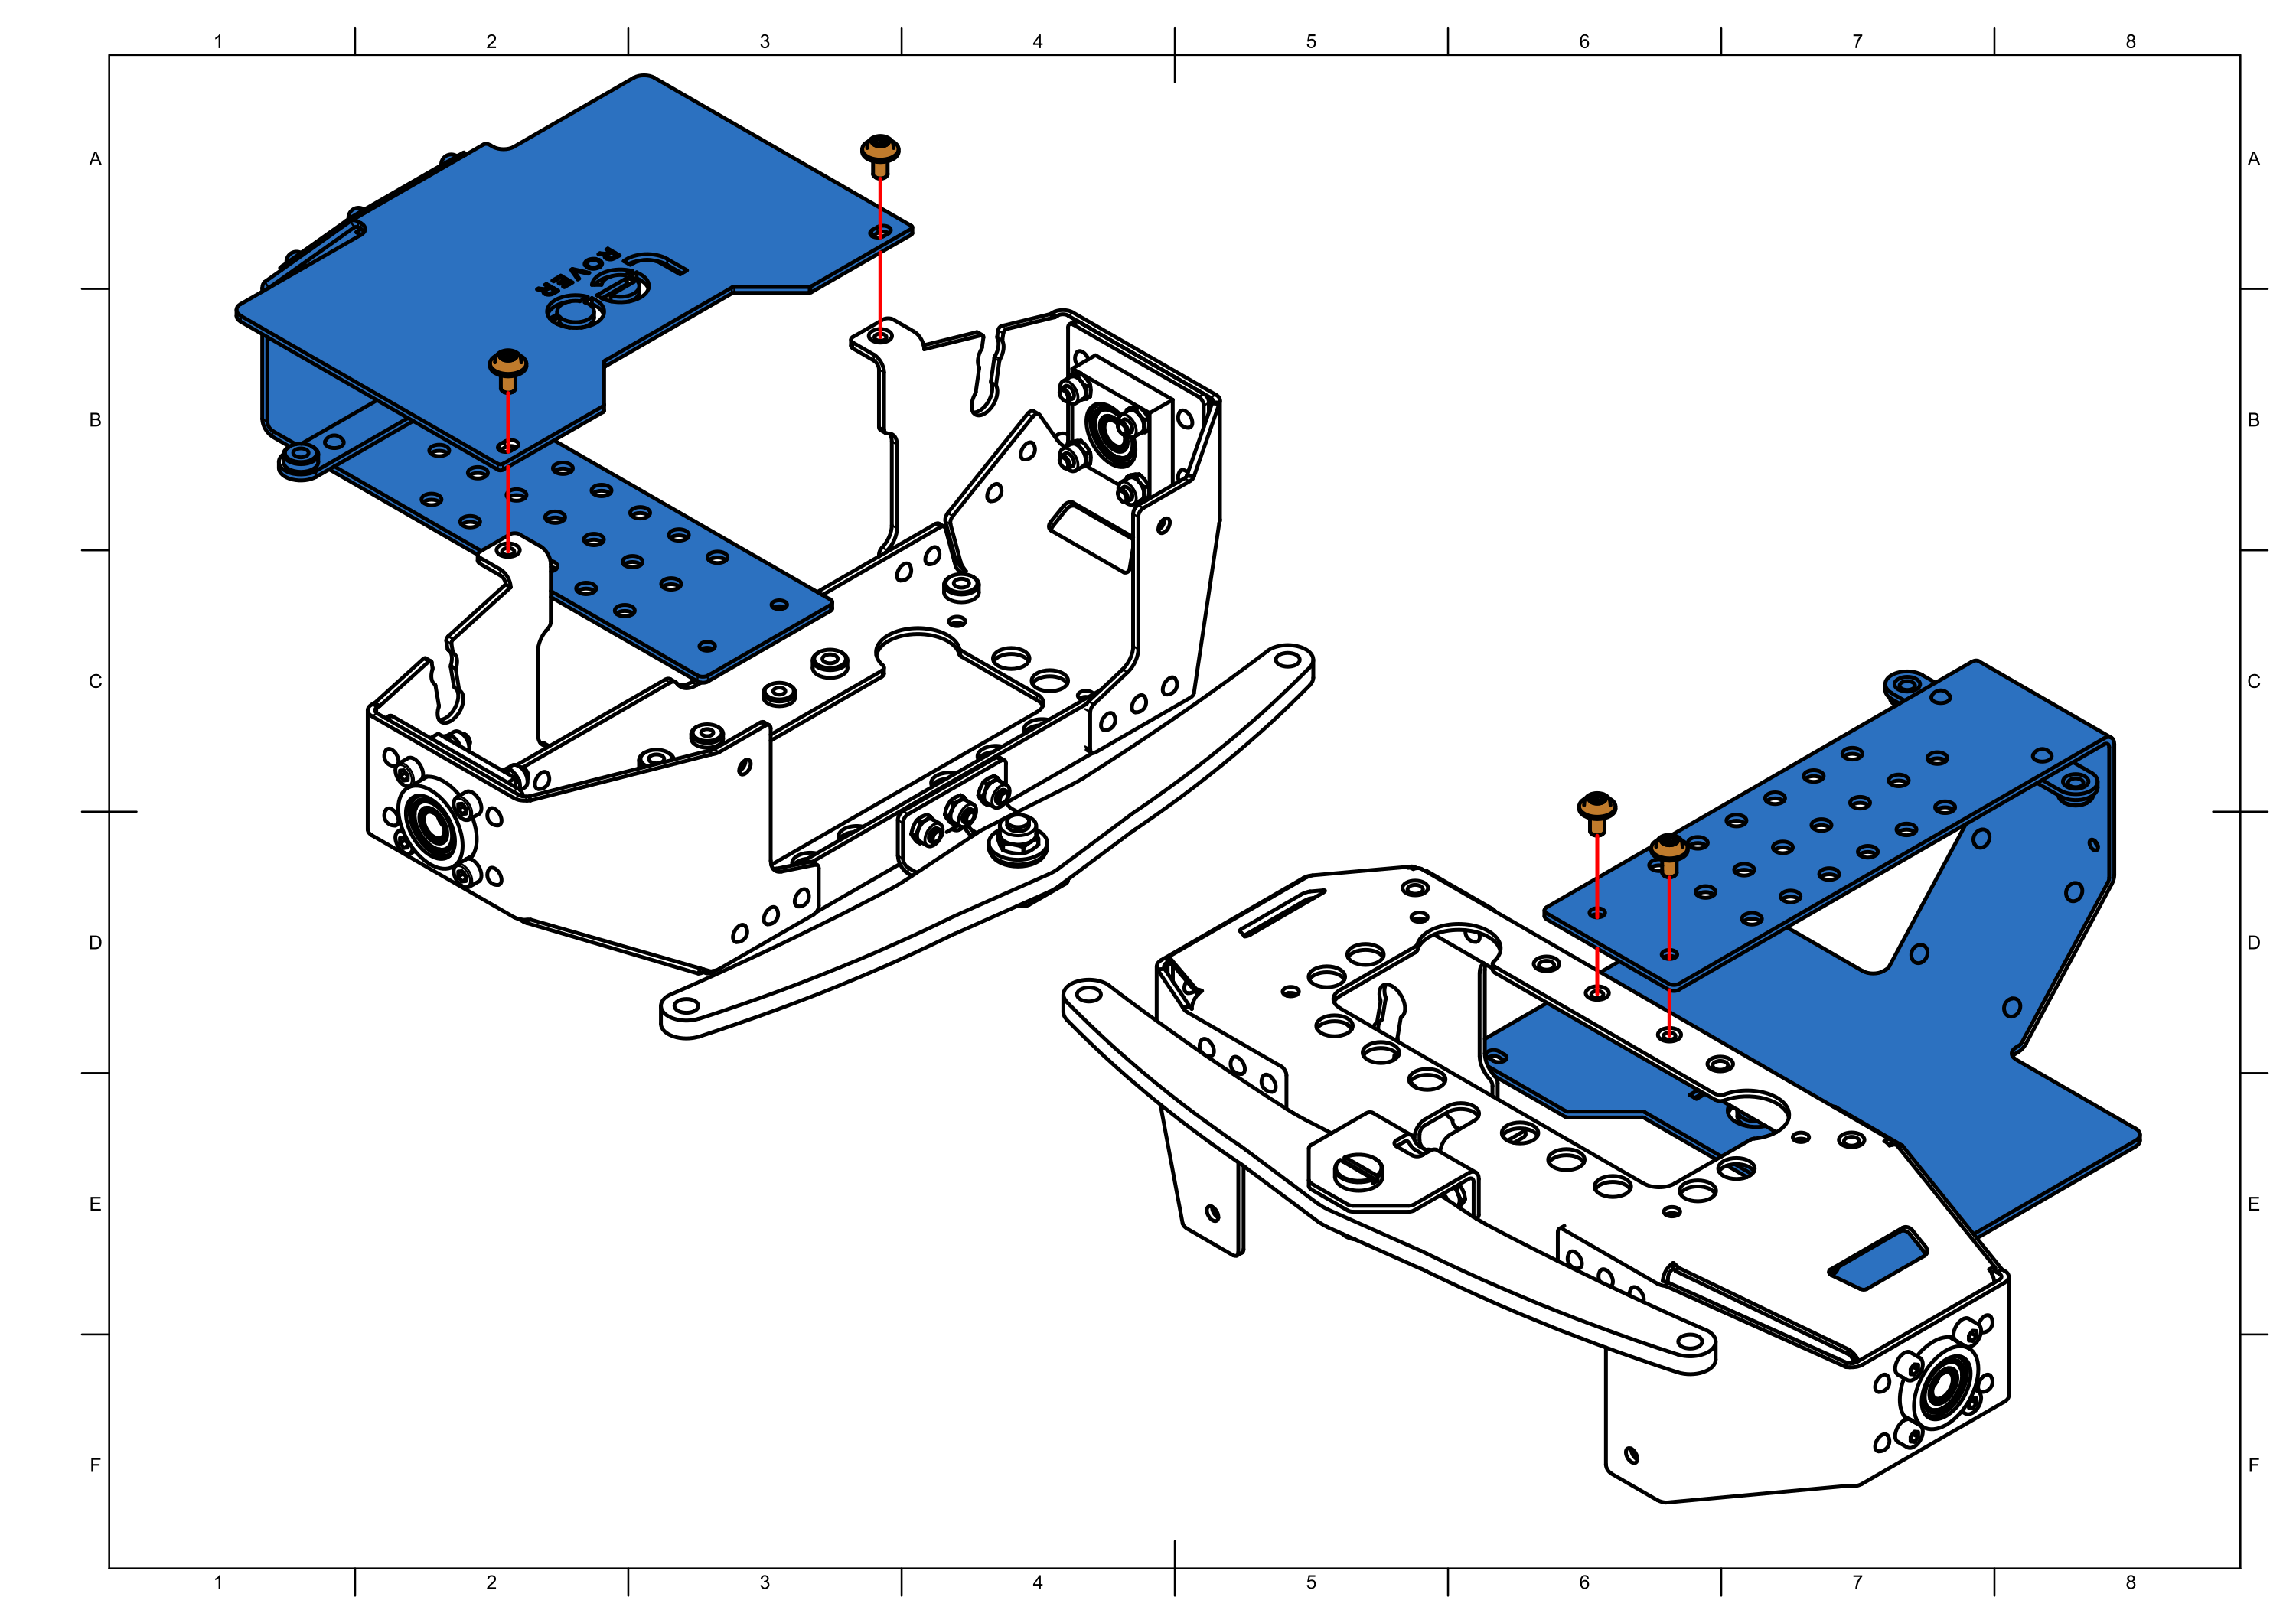
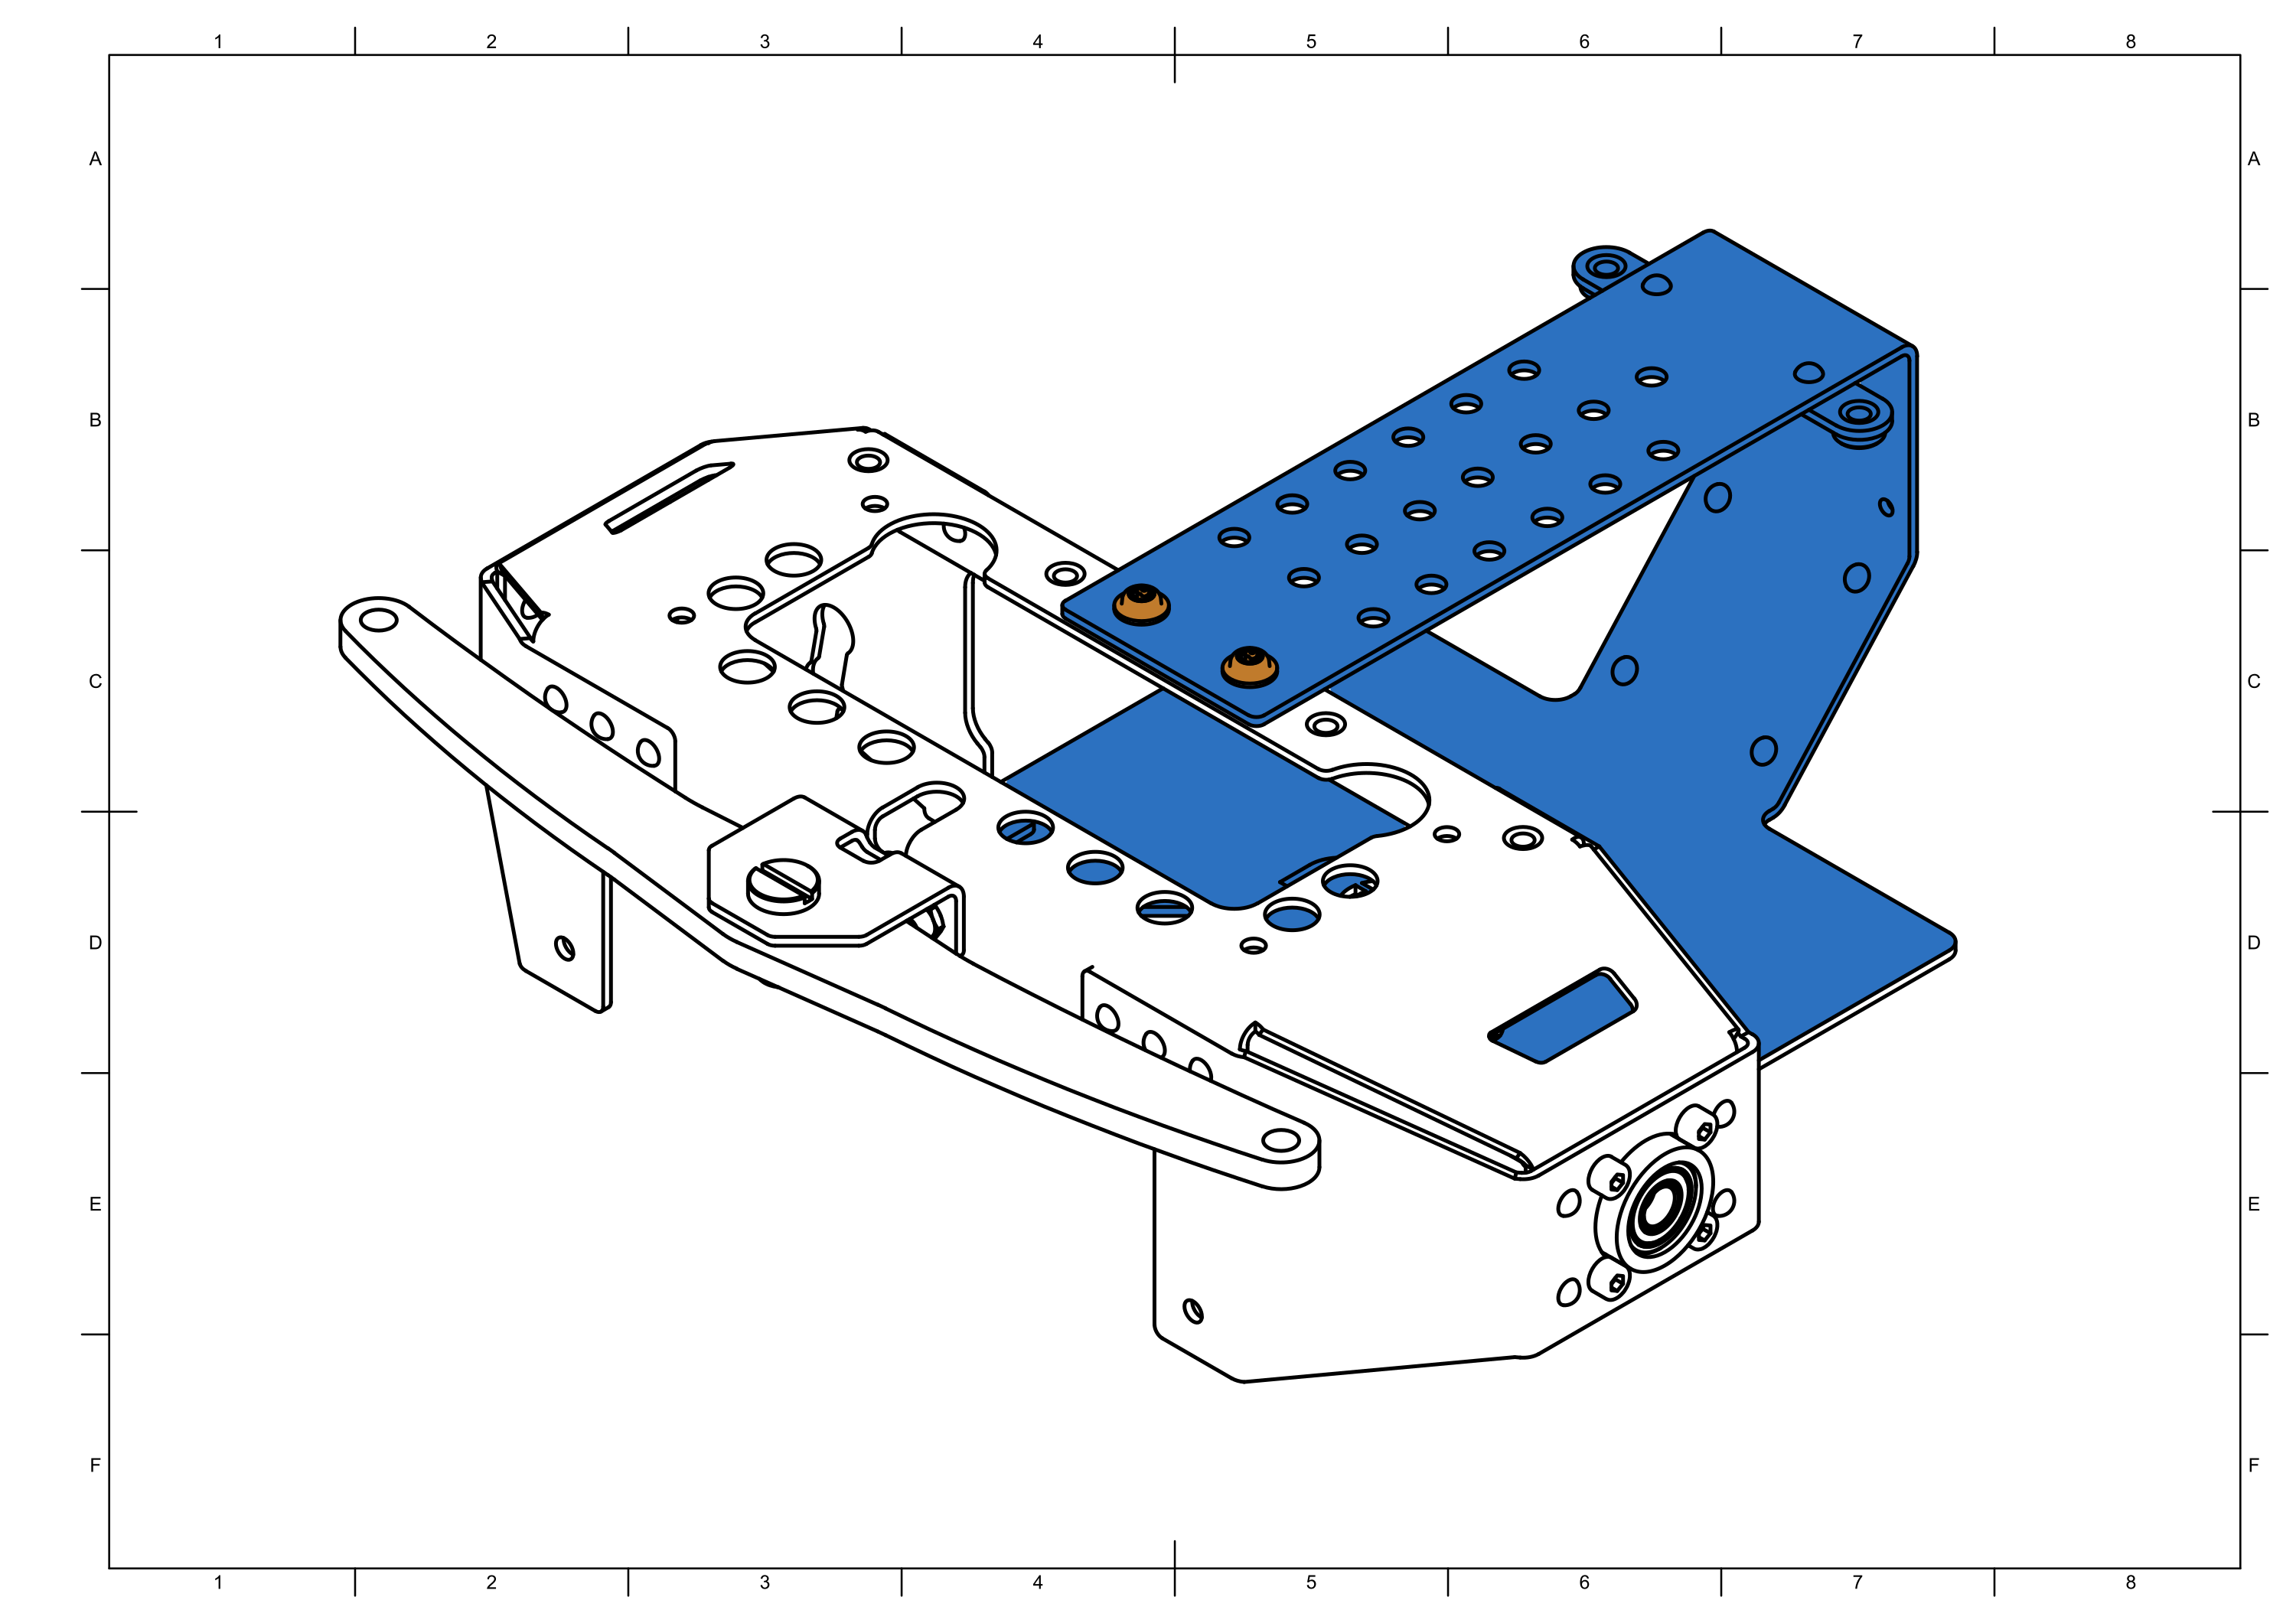
Task 3: Frame and Suspension
Assembly time ≈ 30 minutes


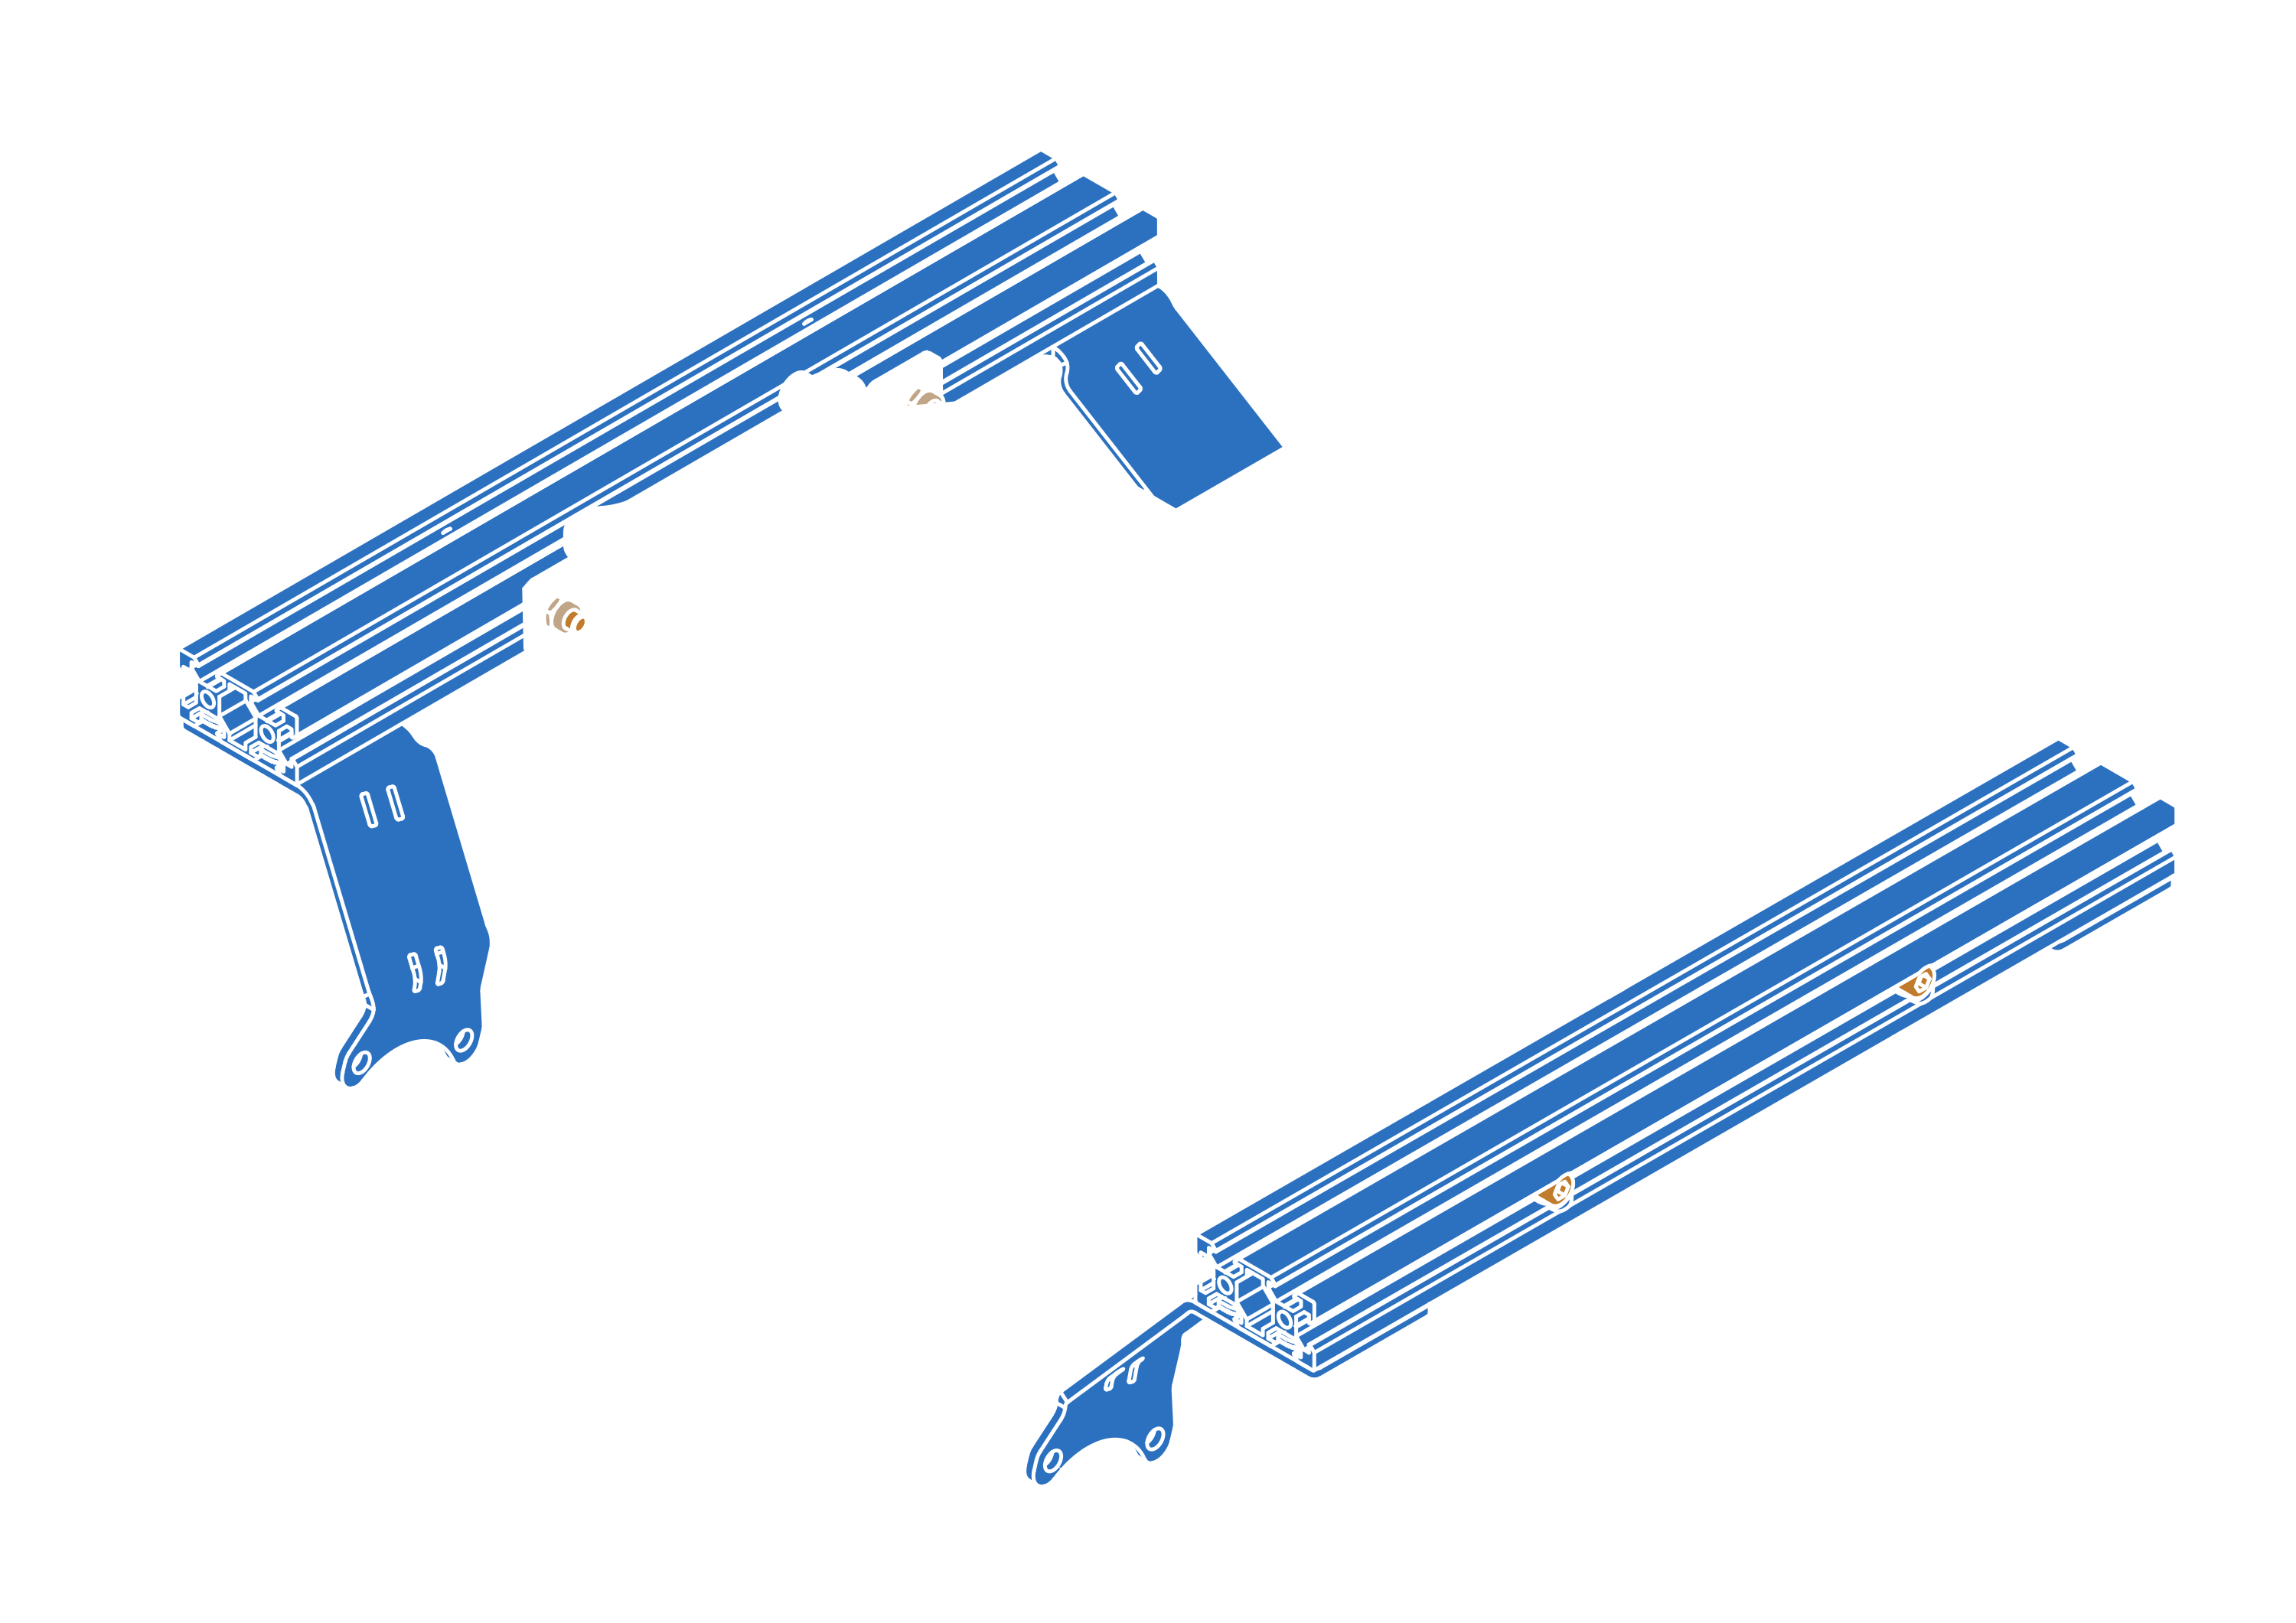
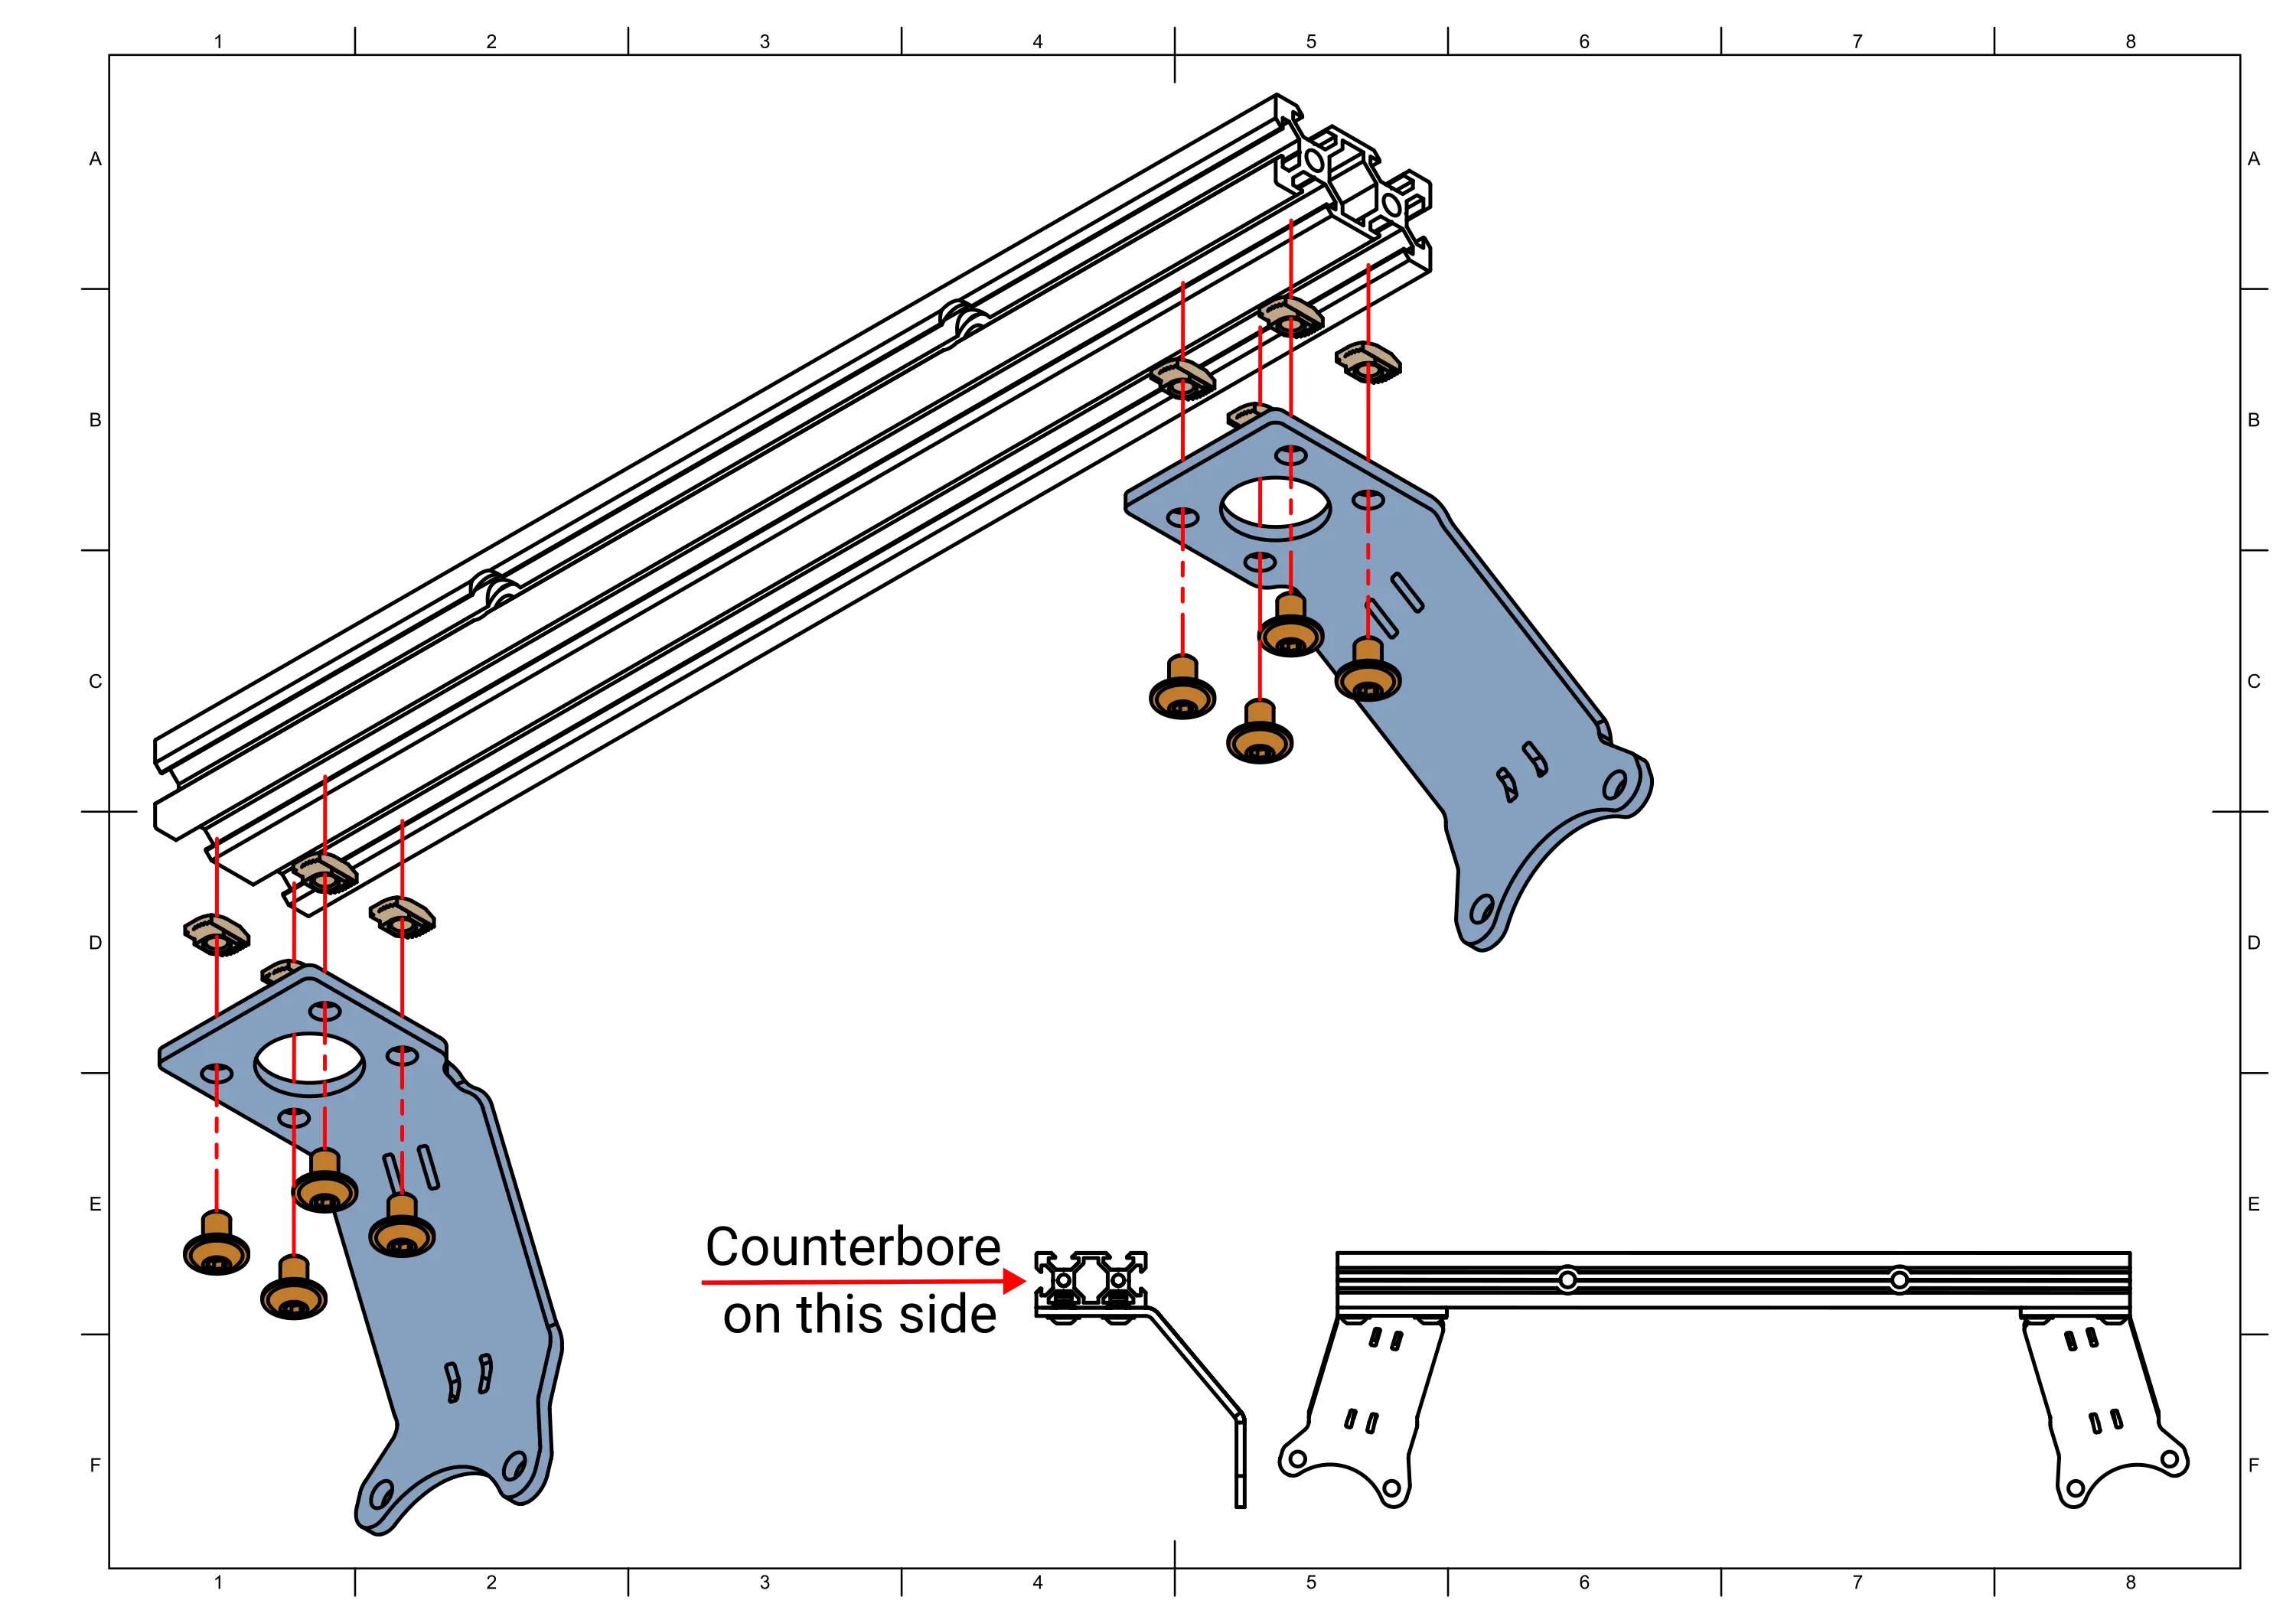
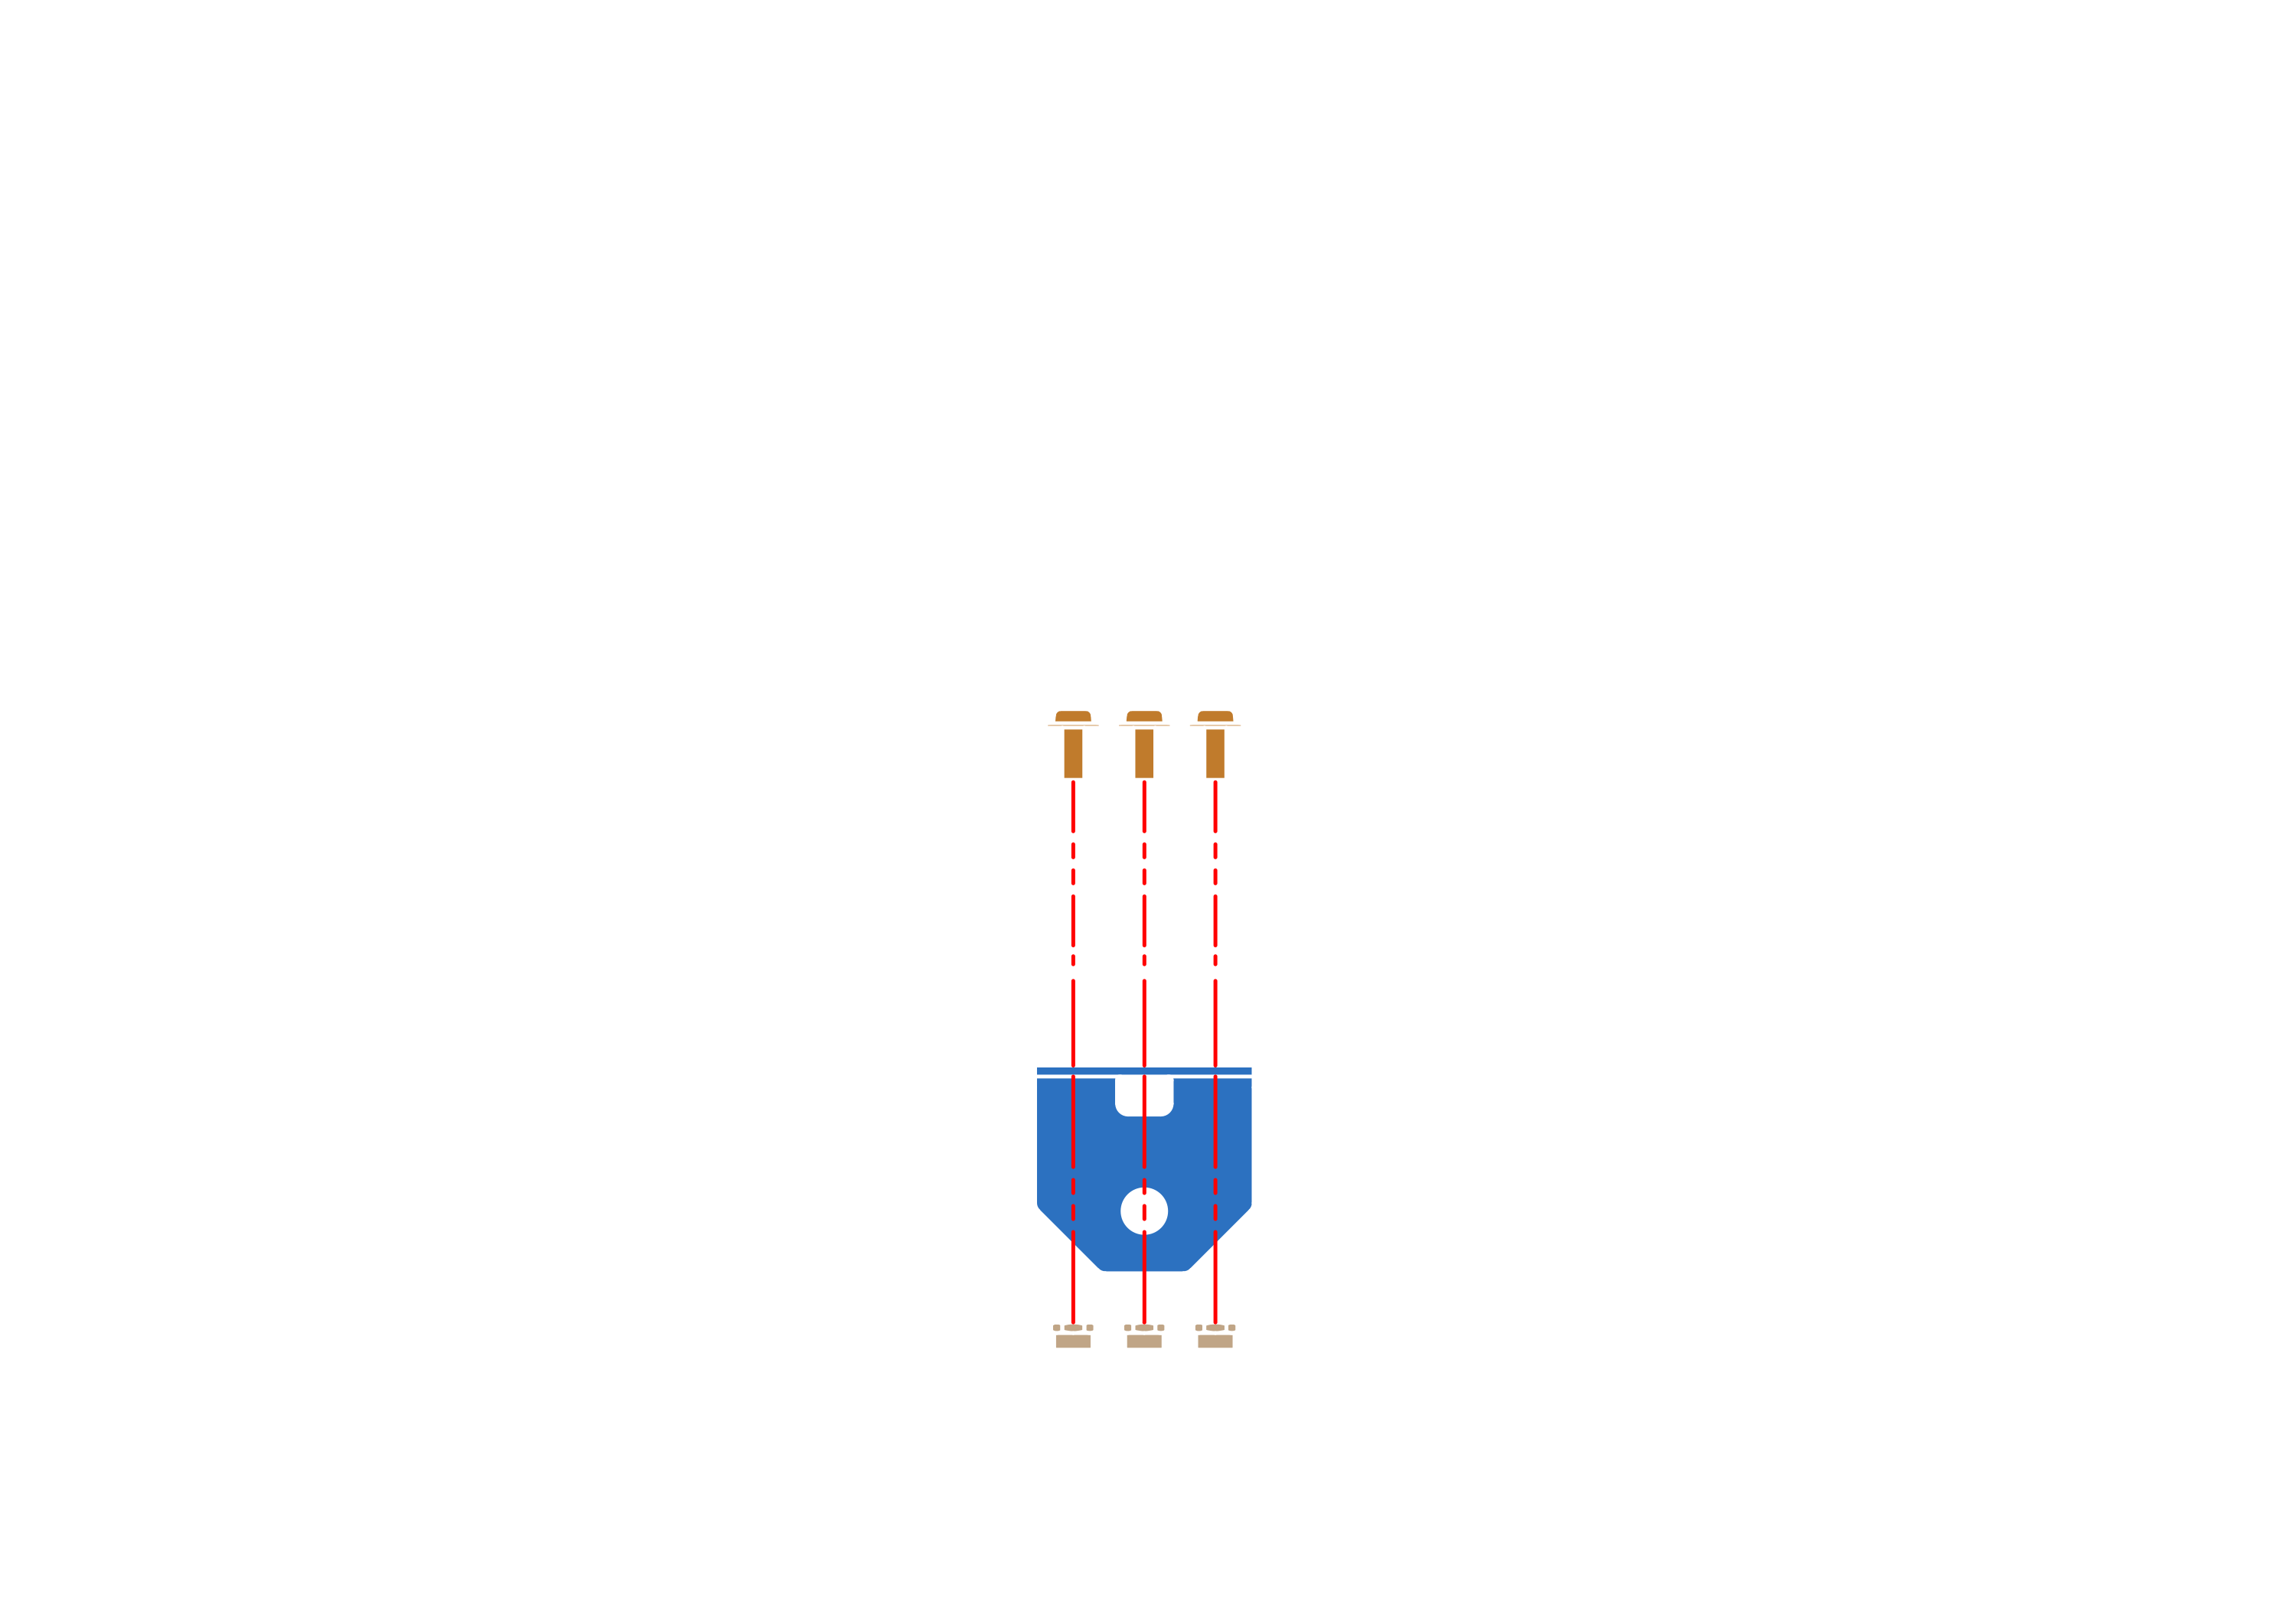
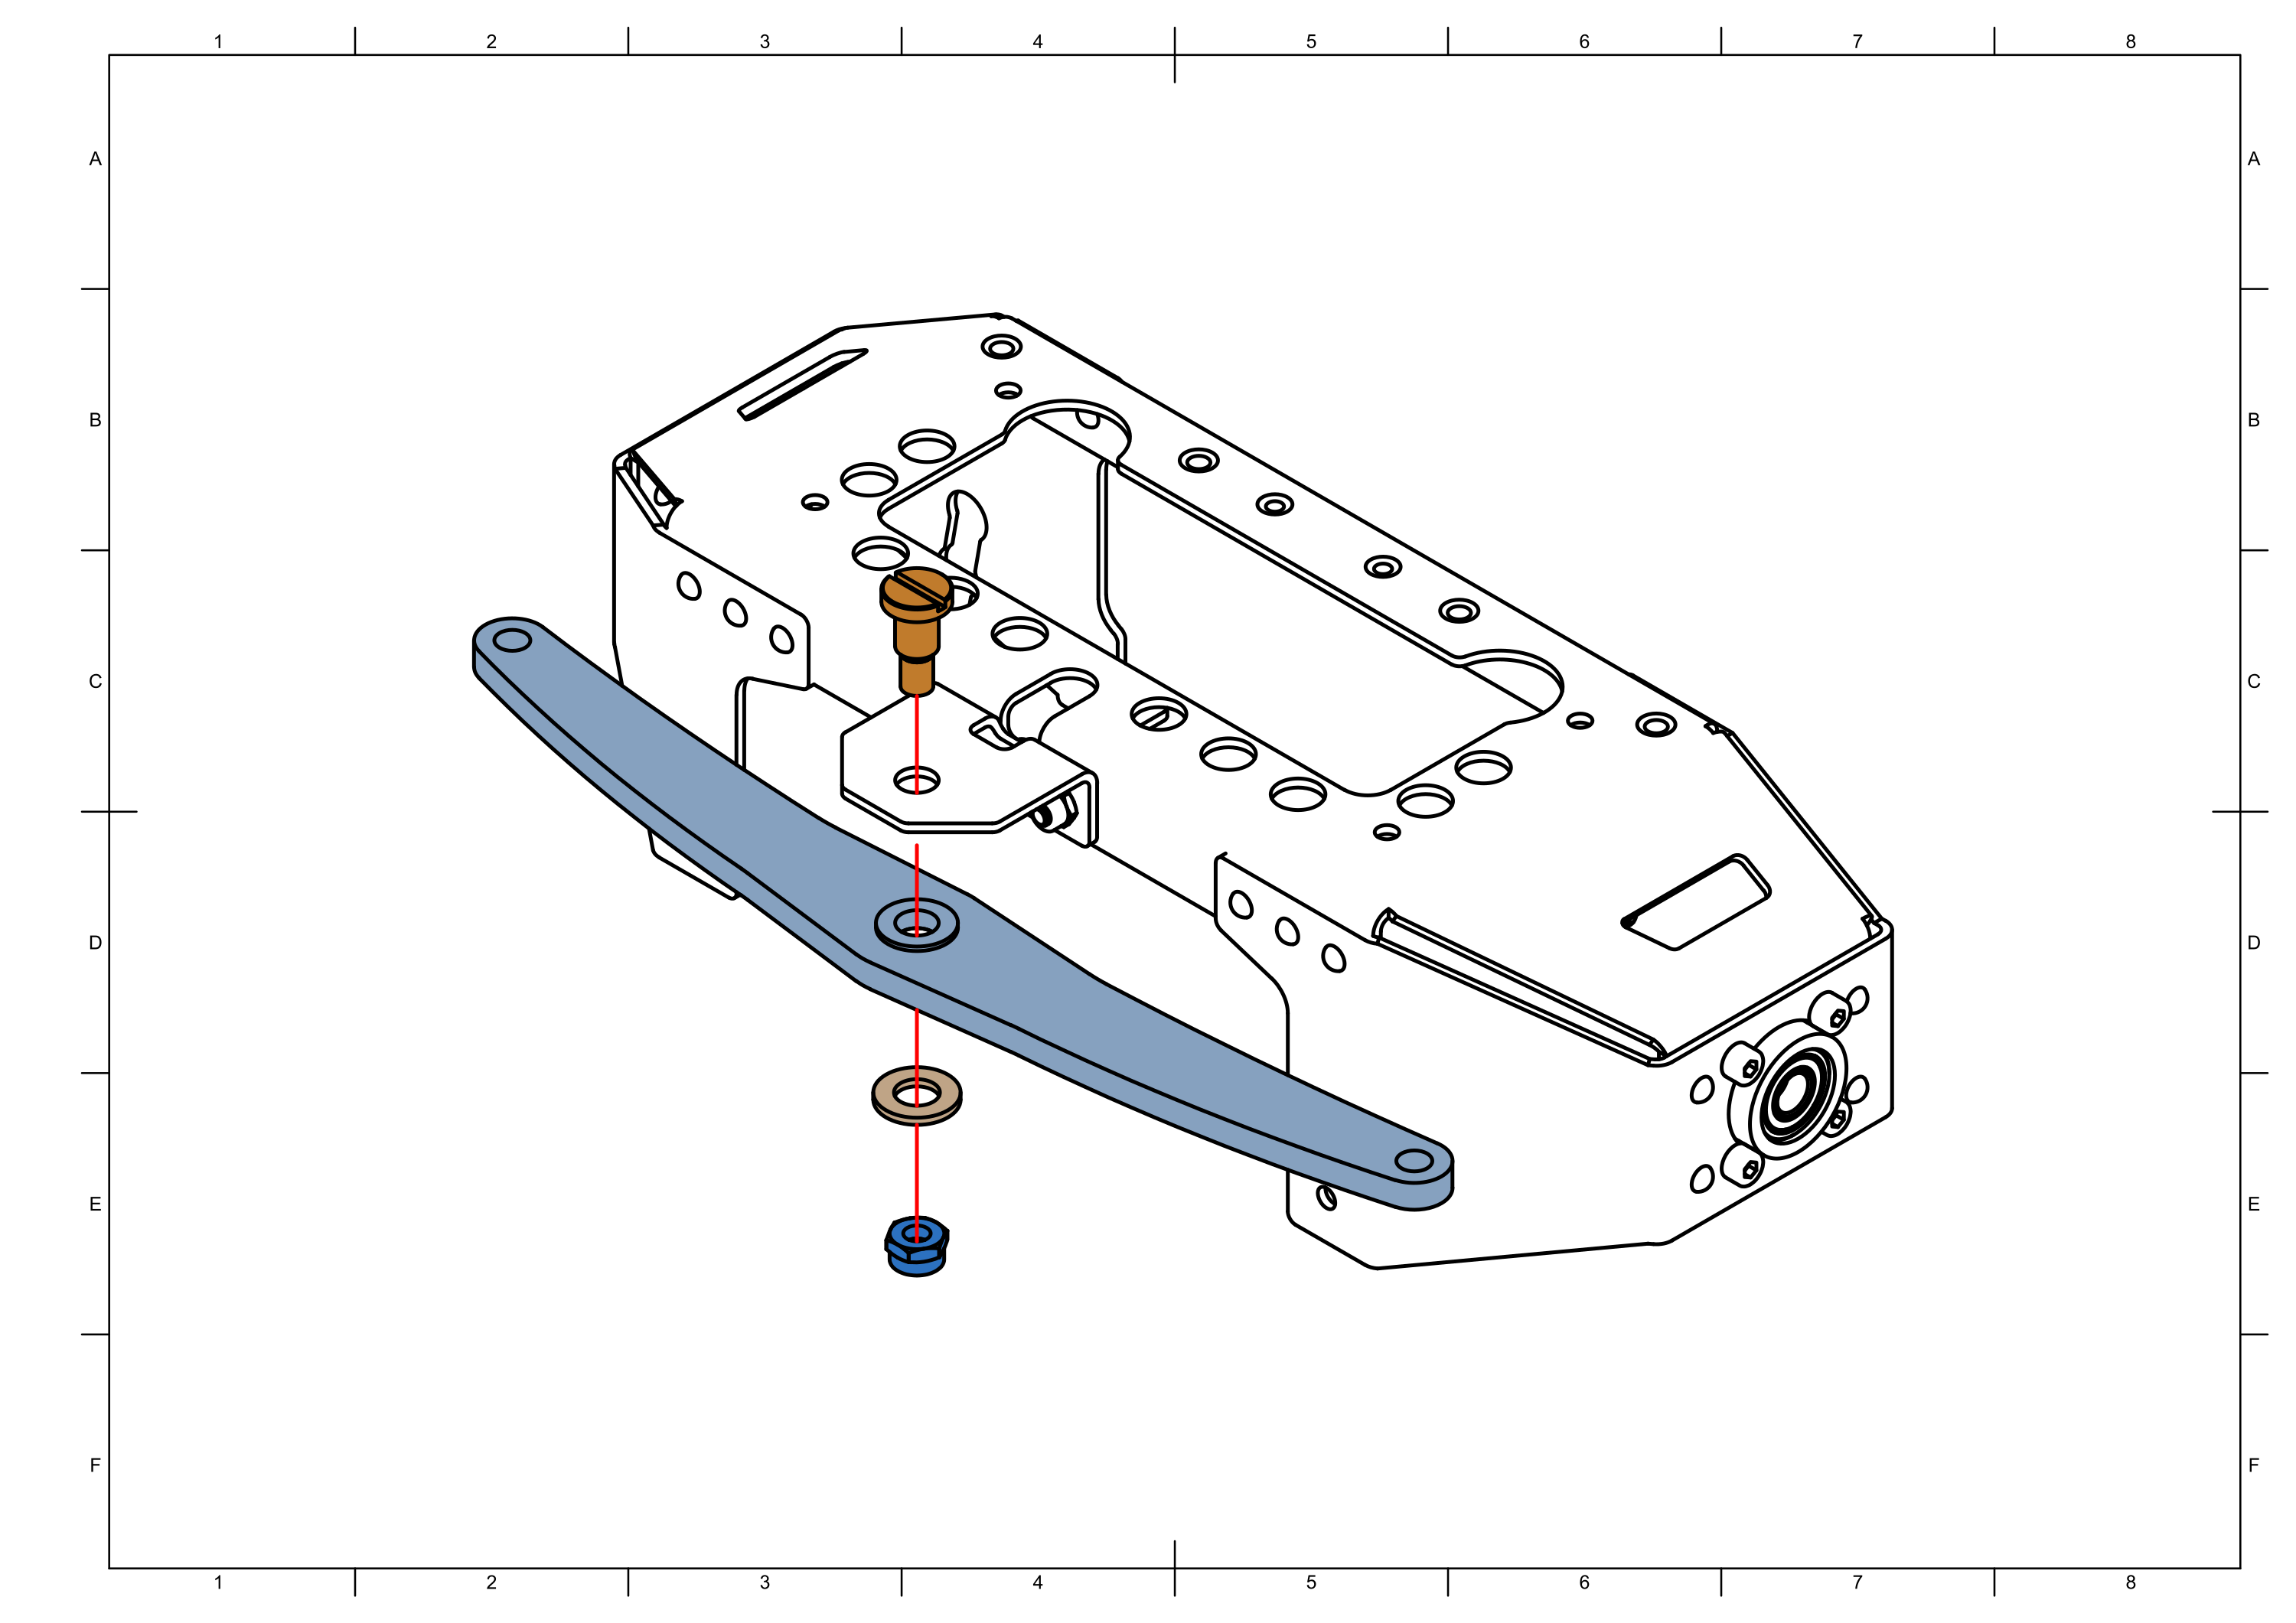
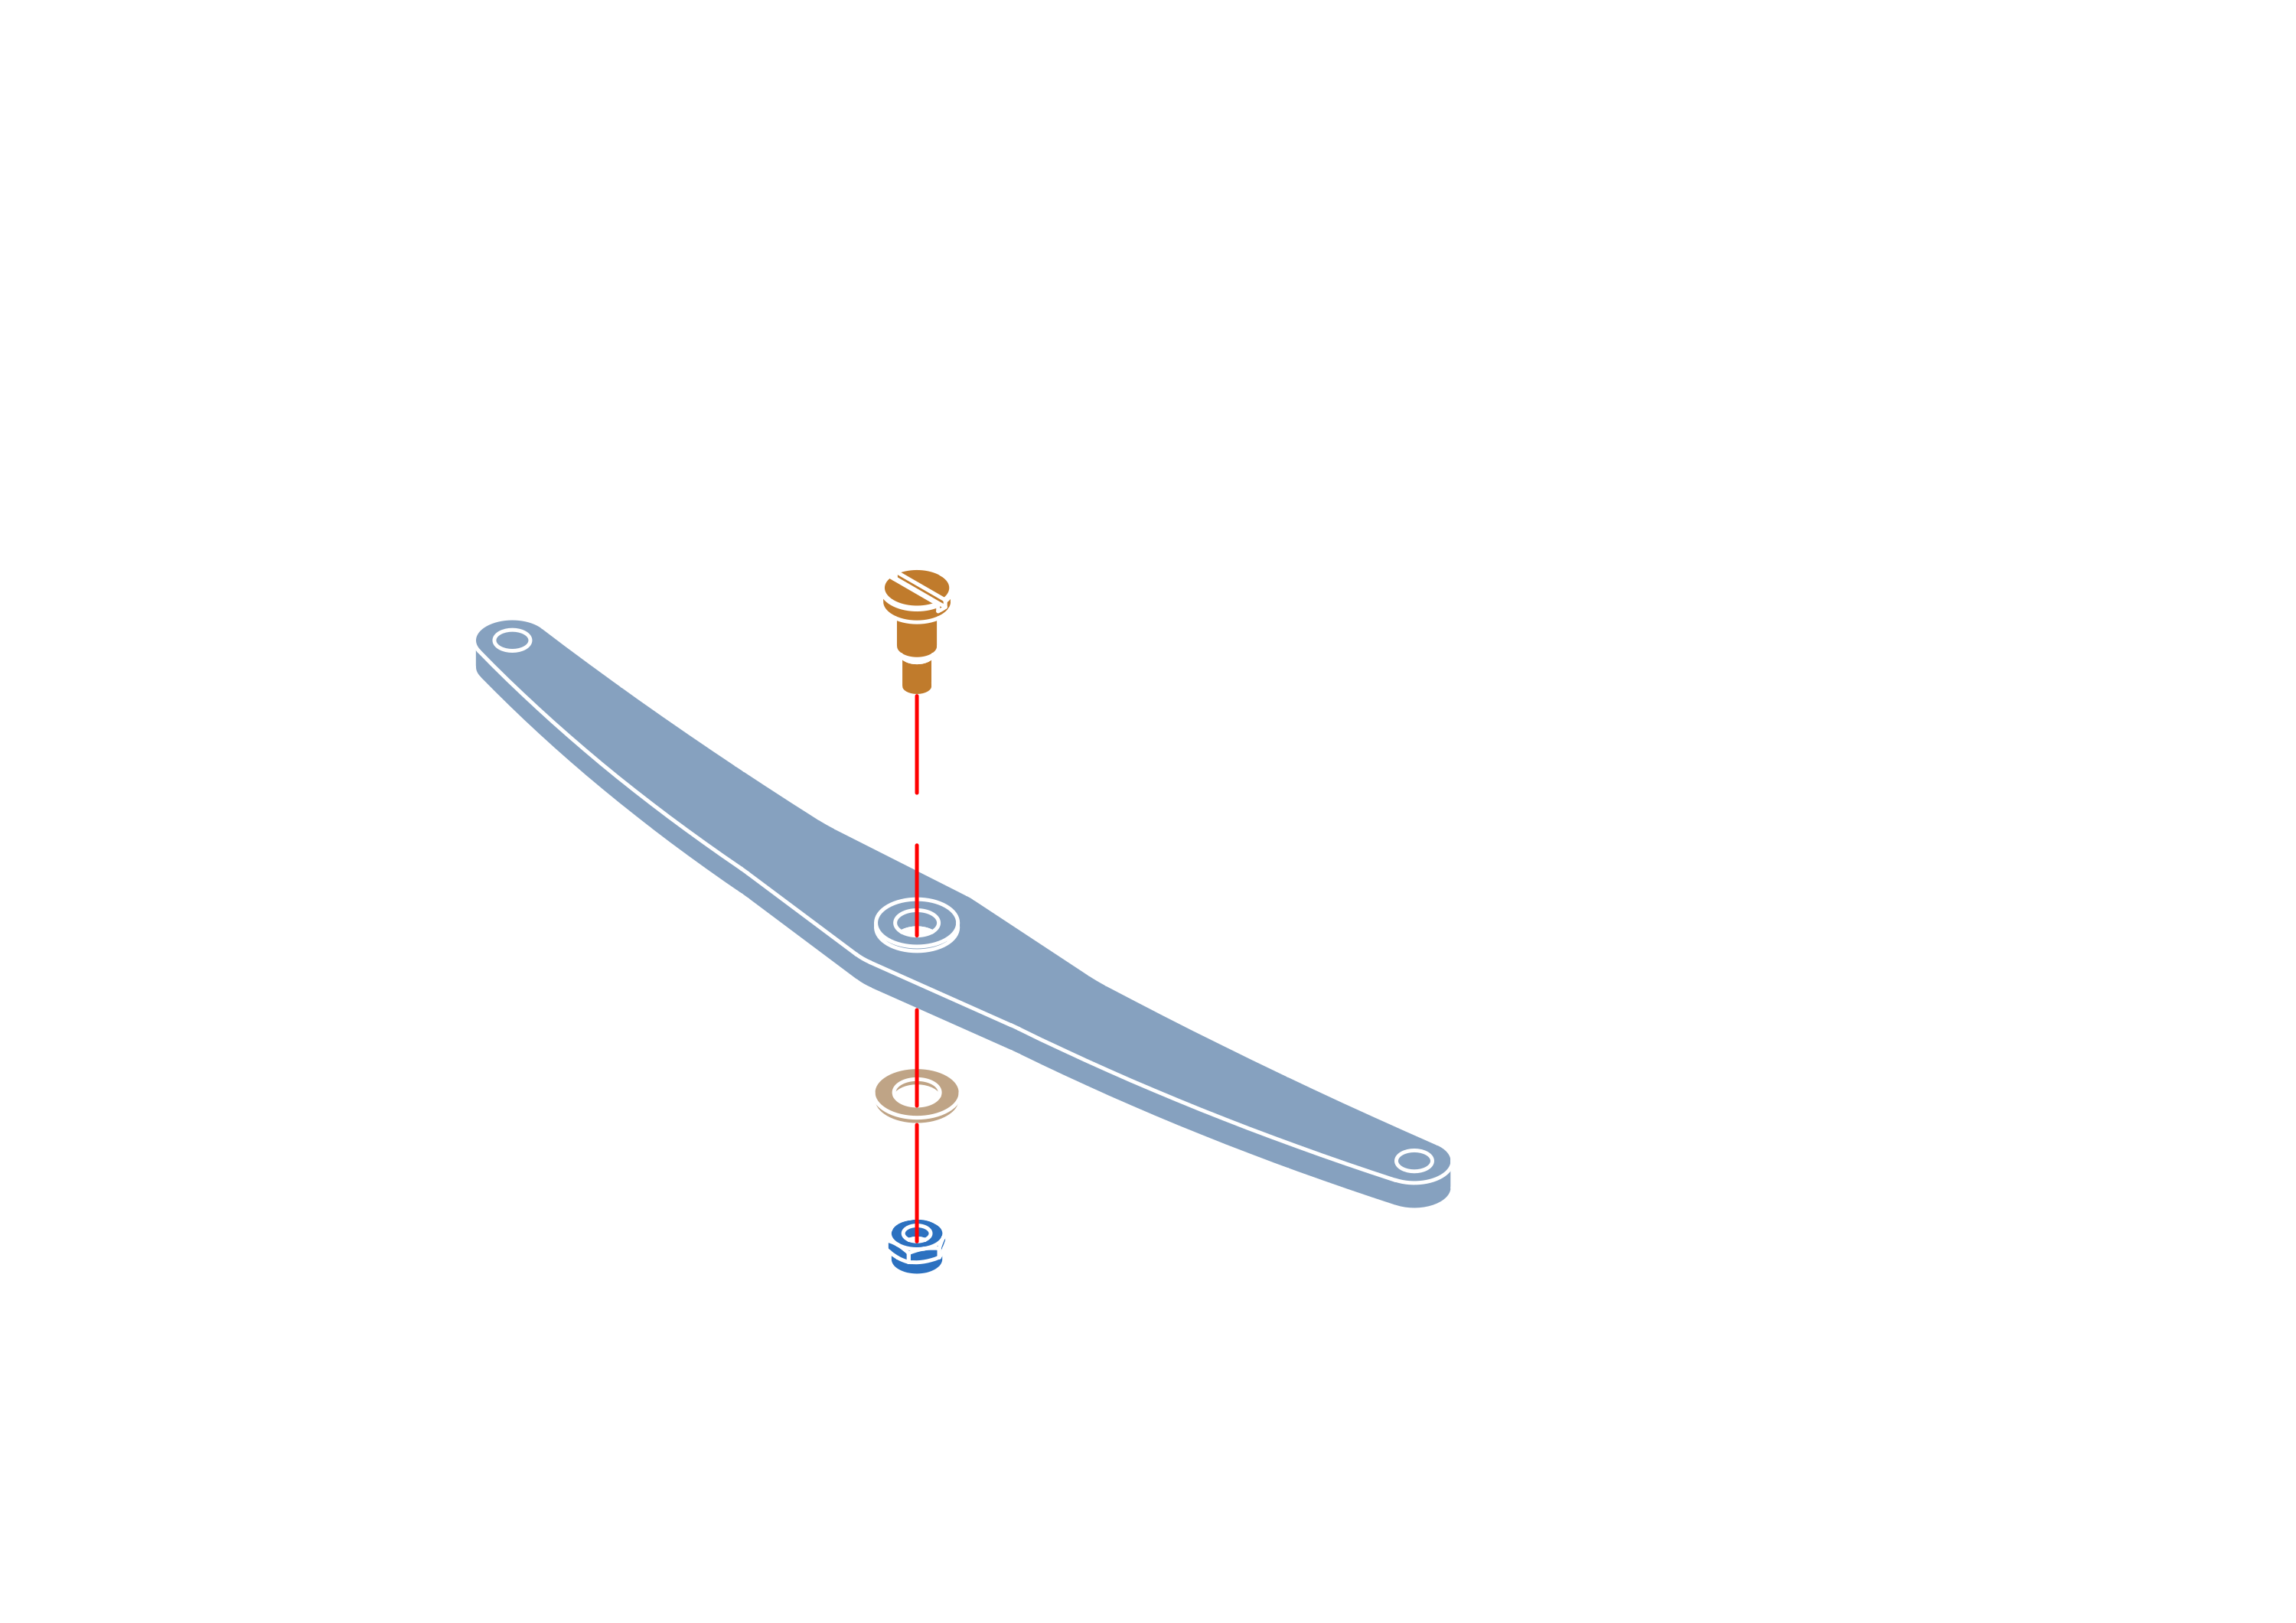
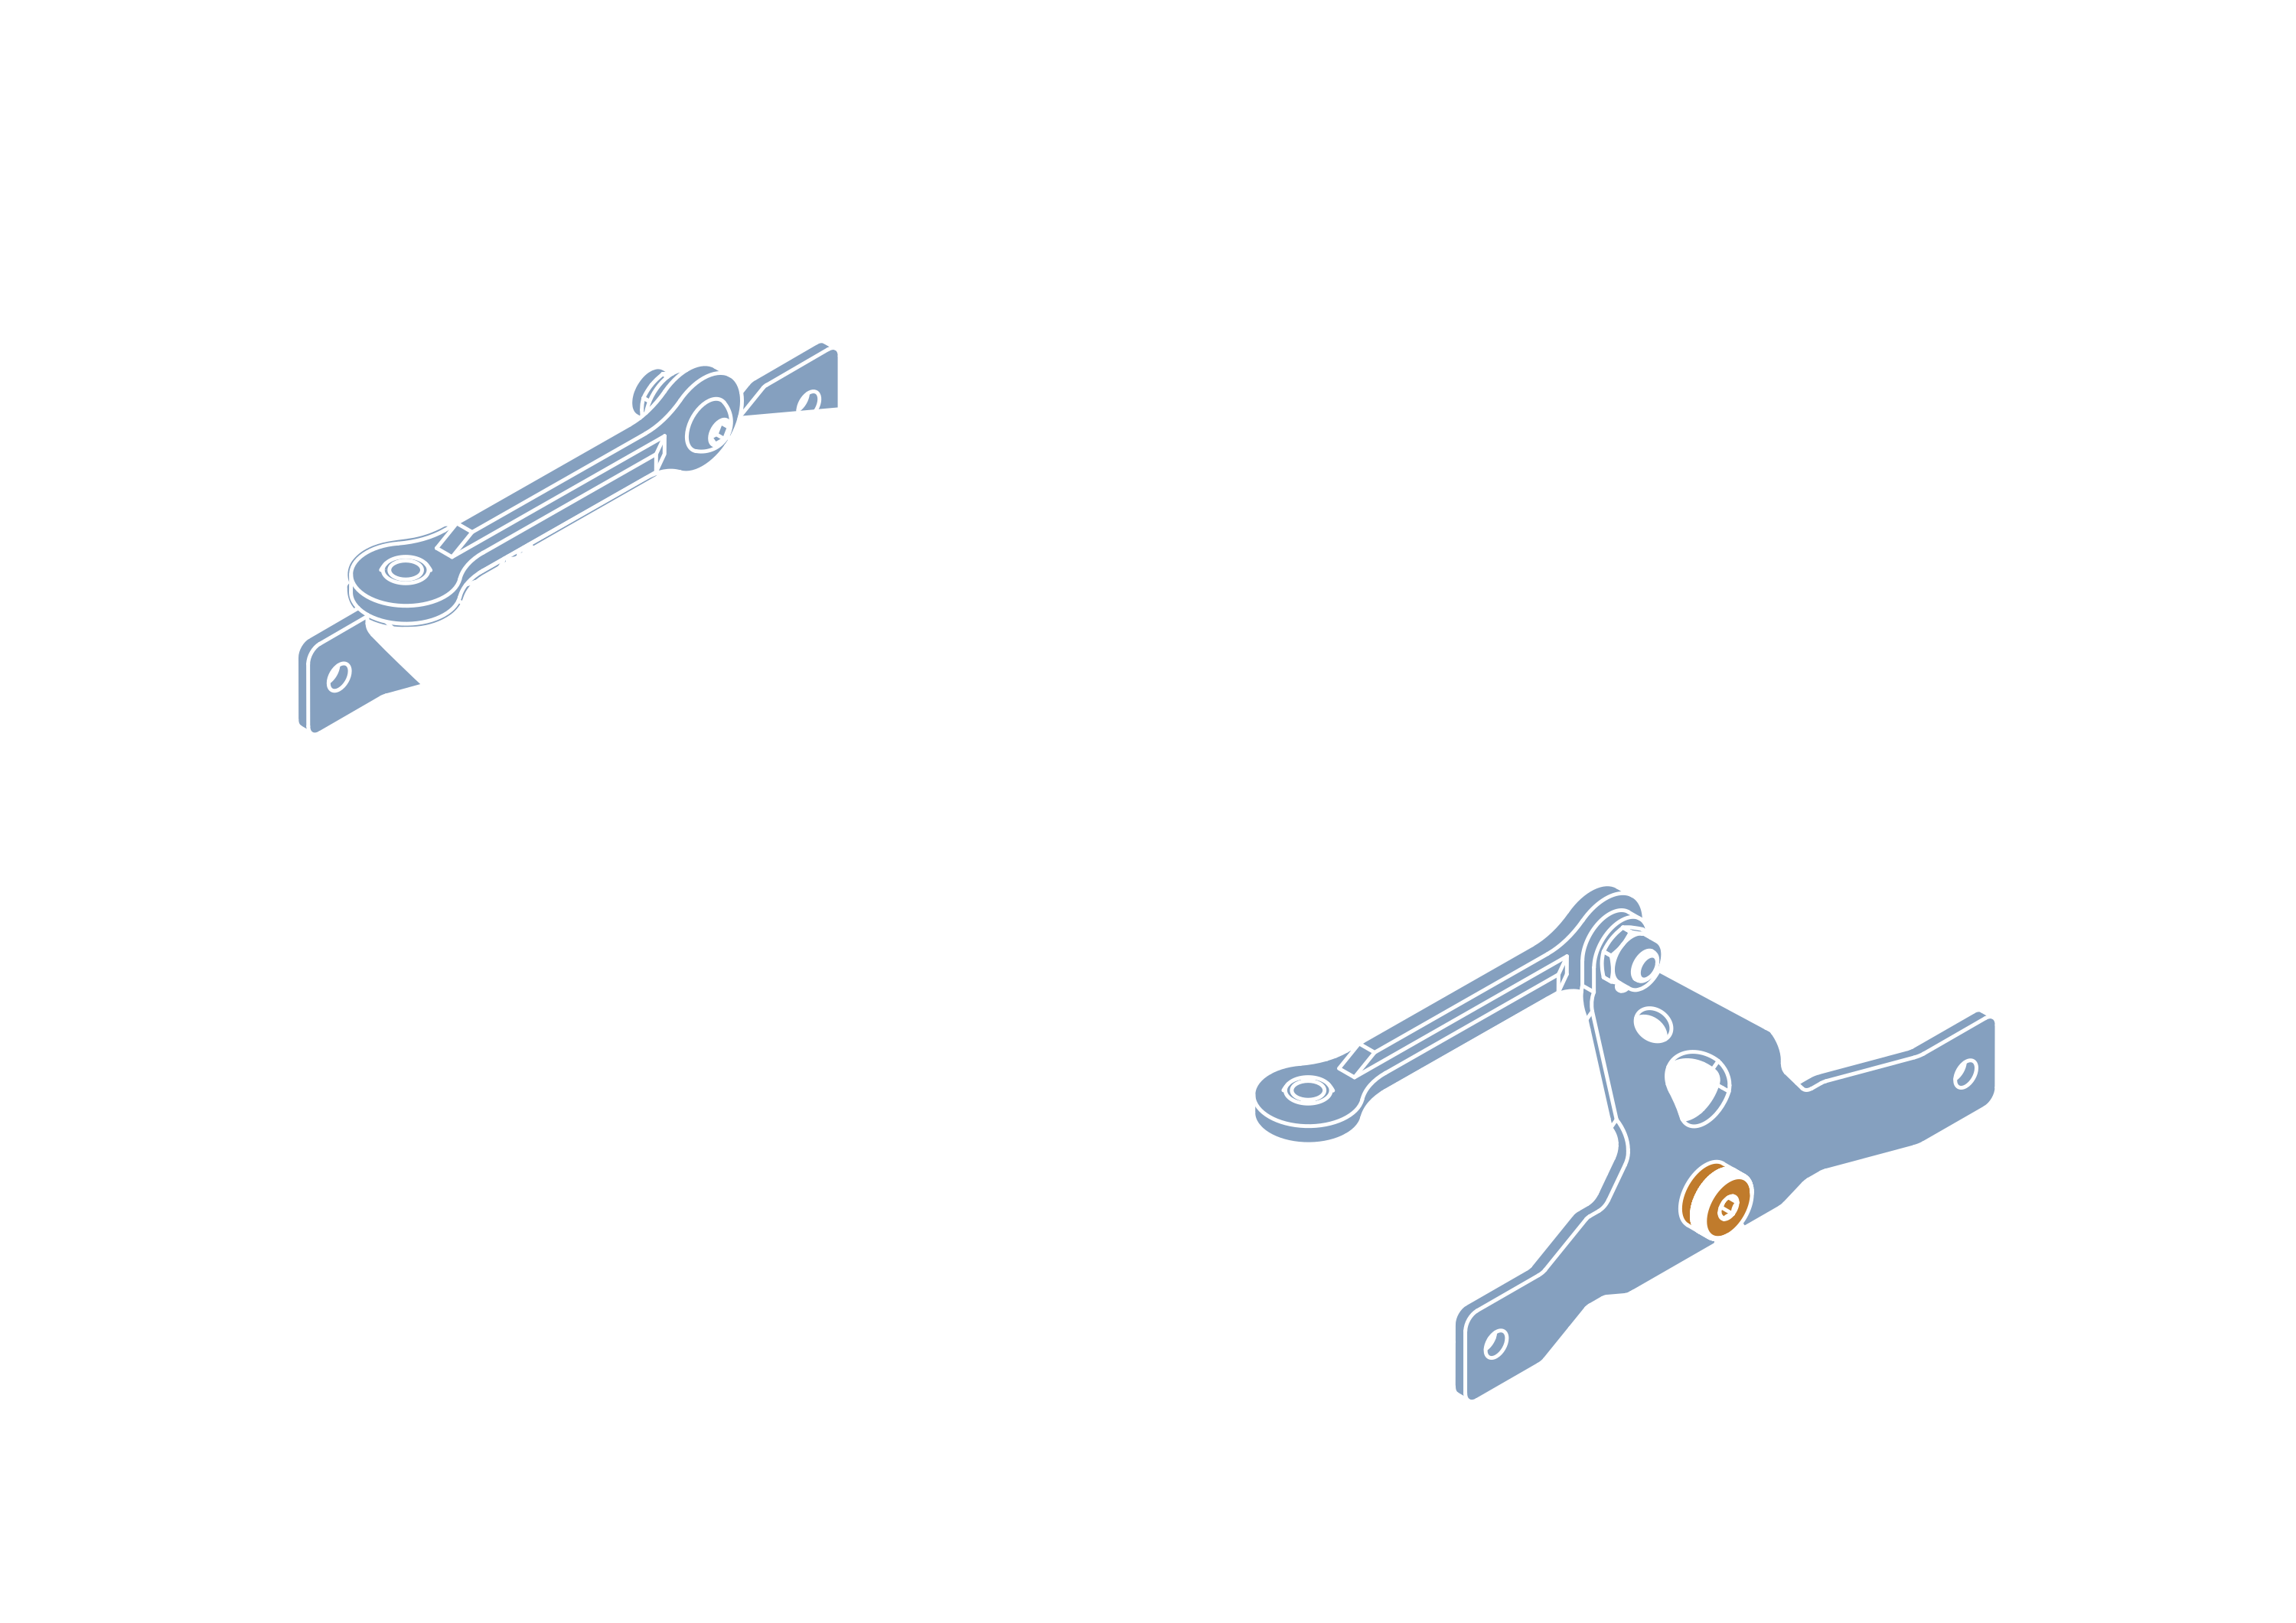
Step 1


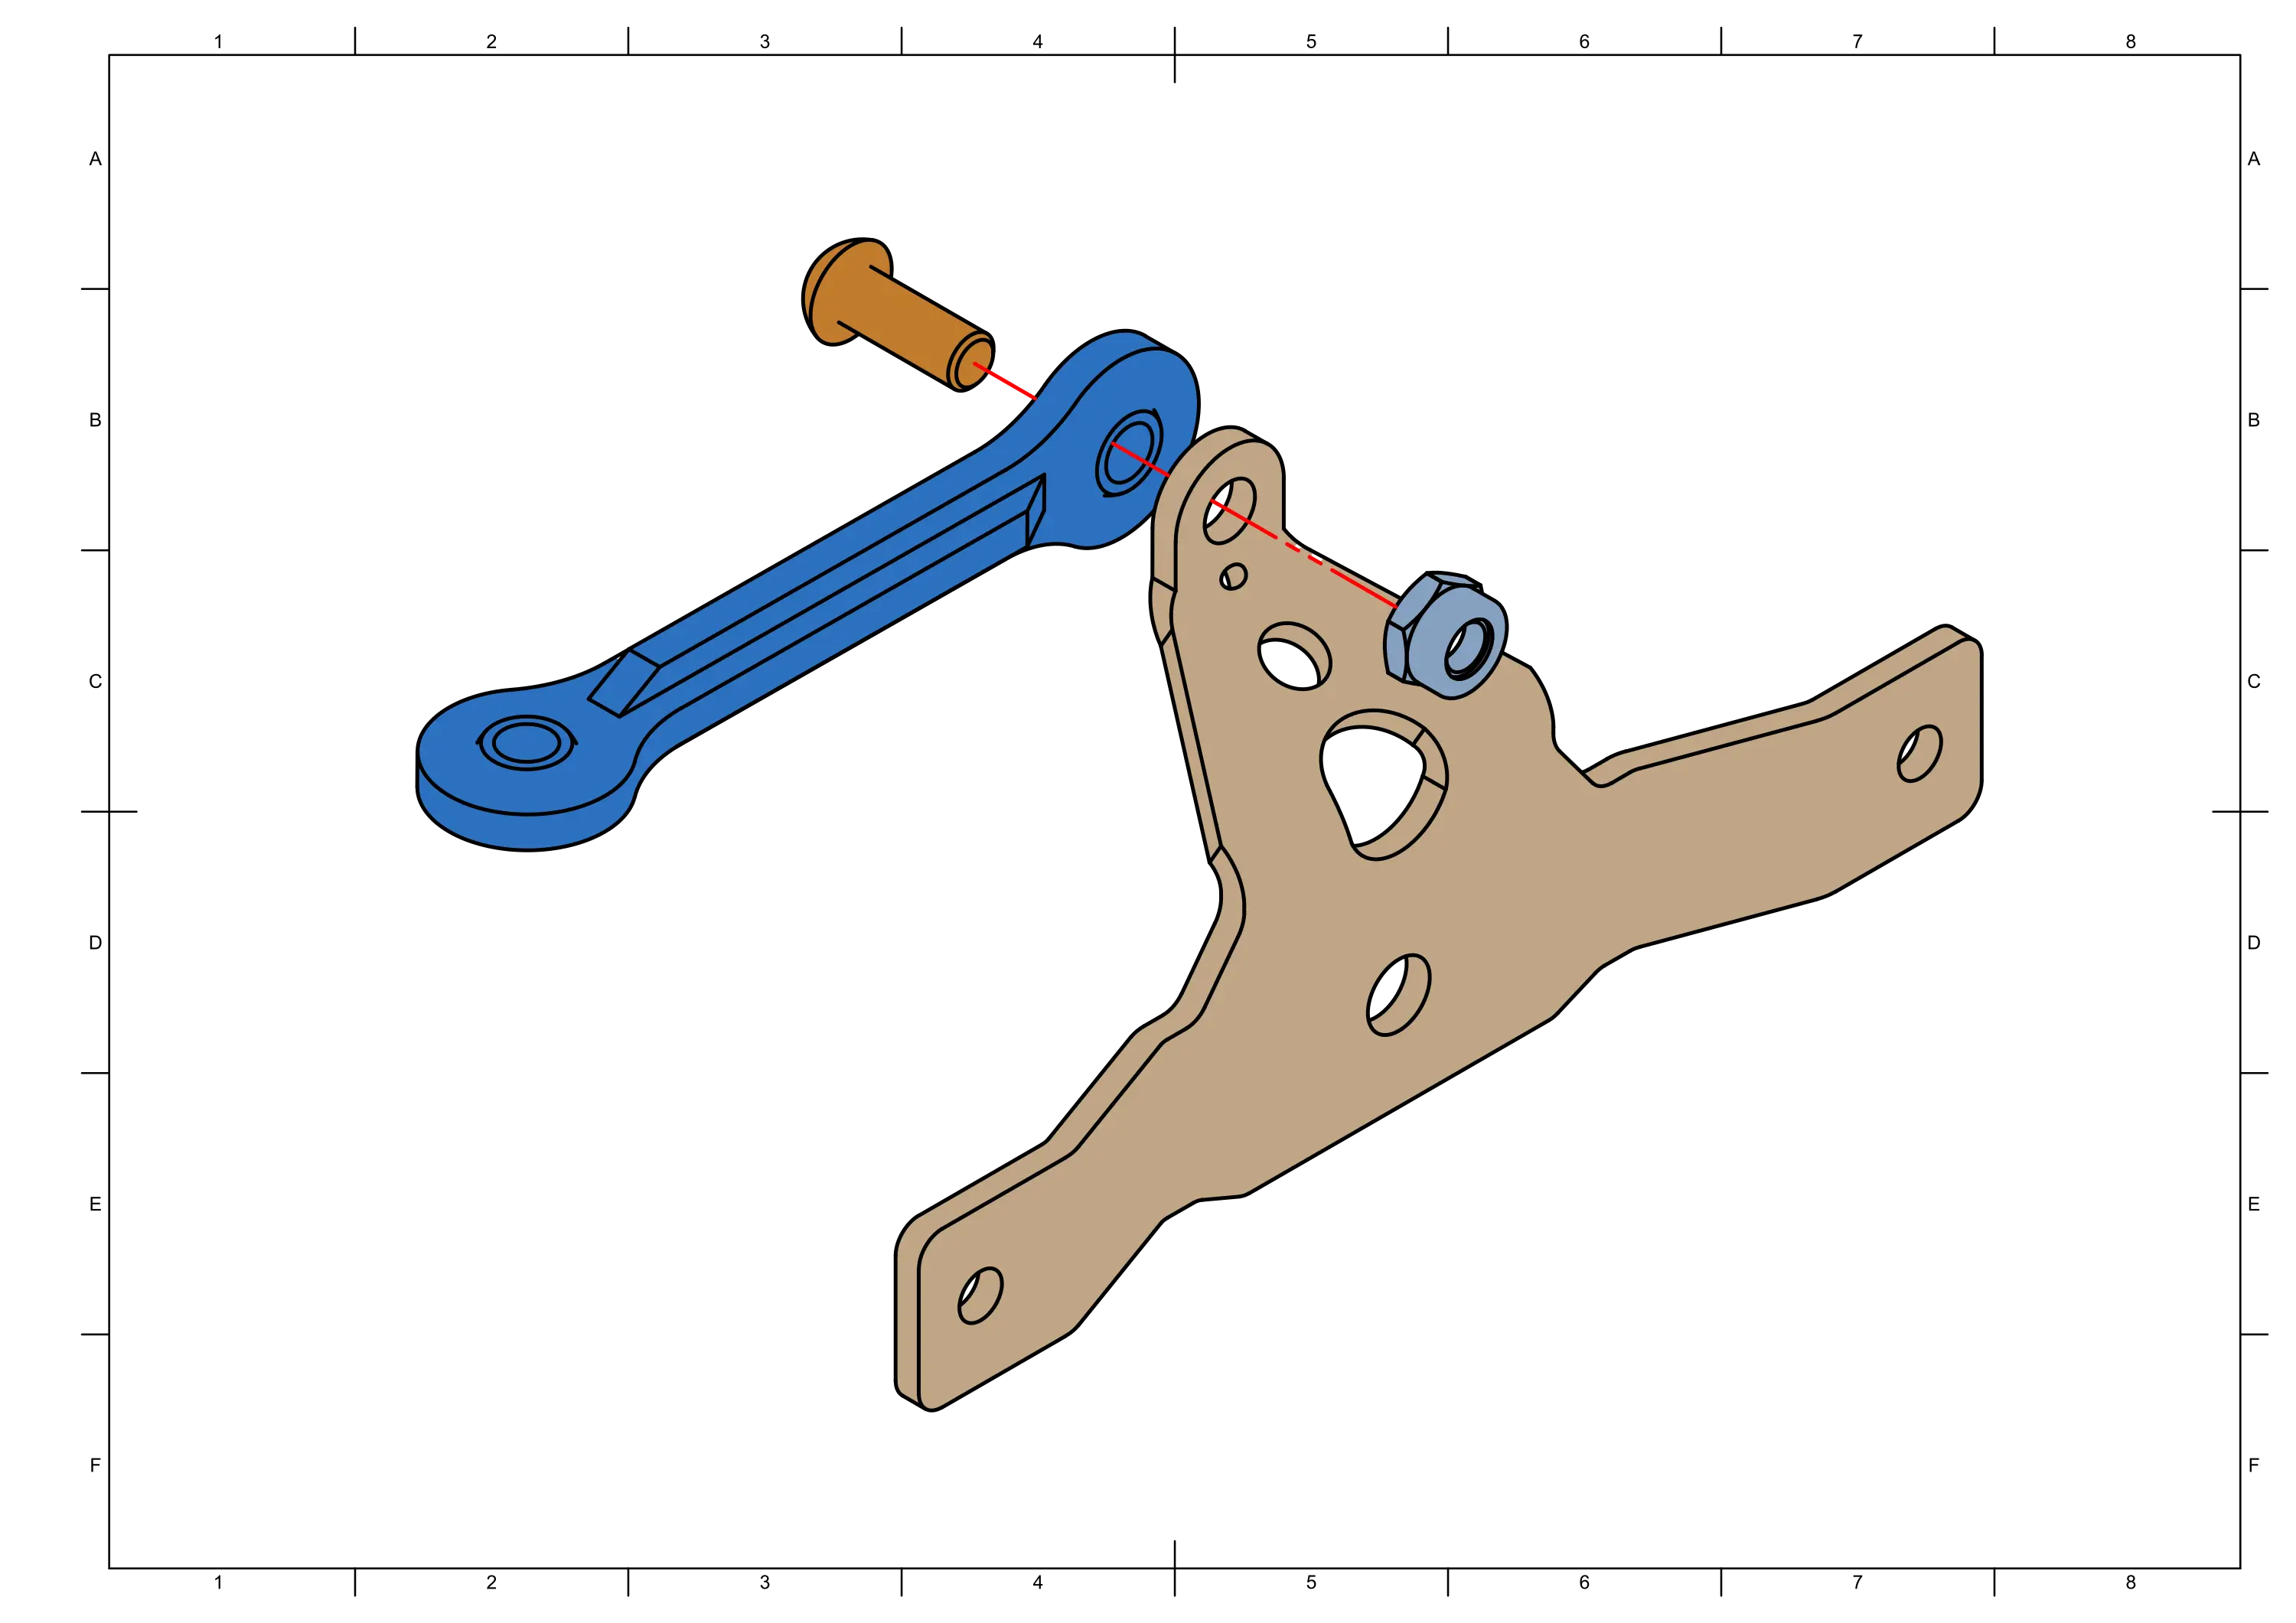
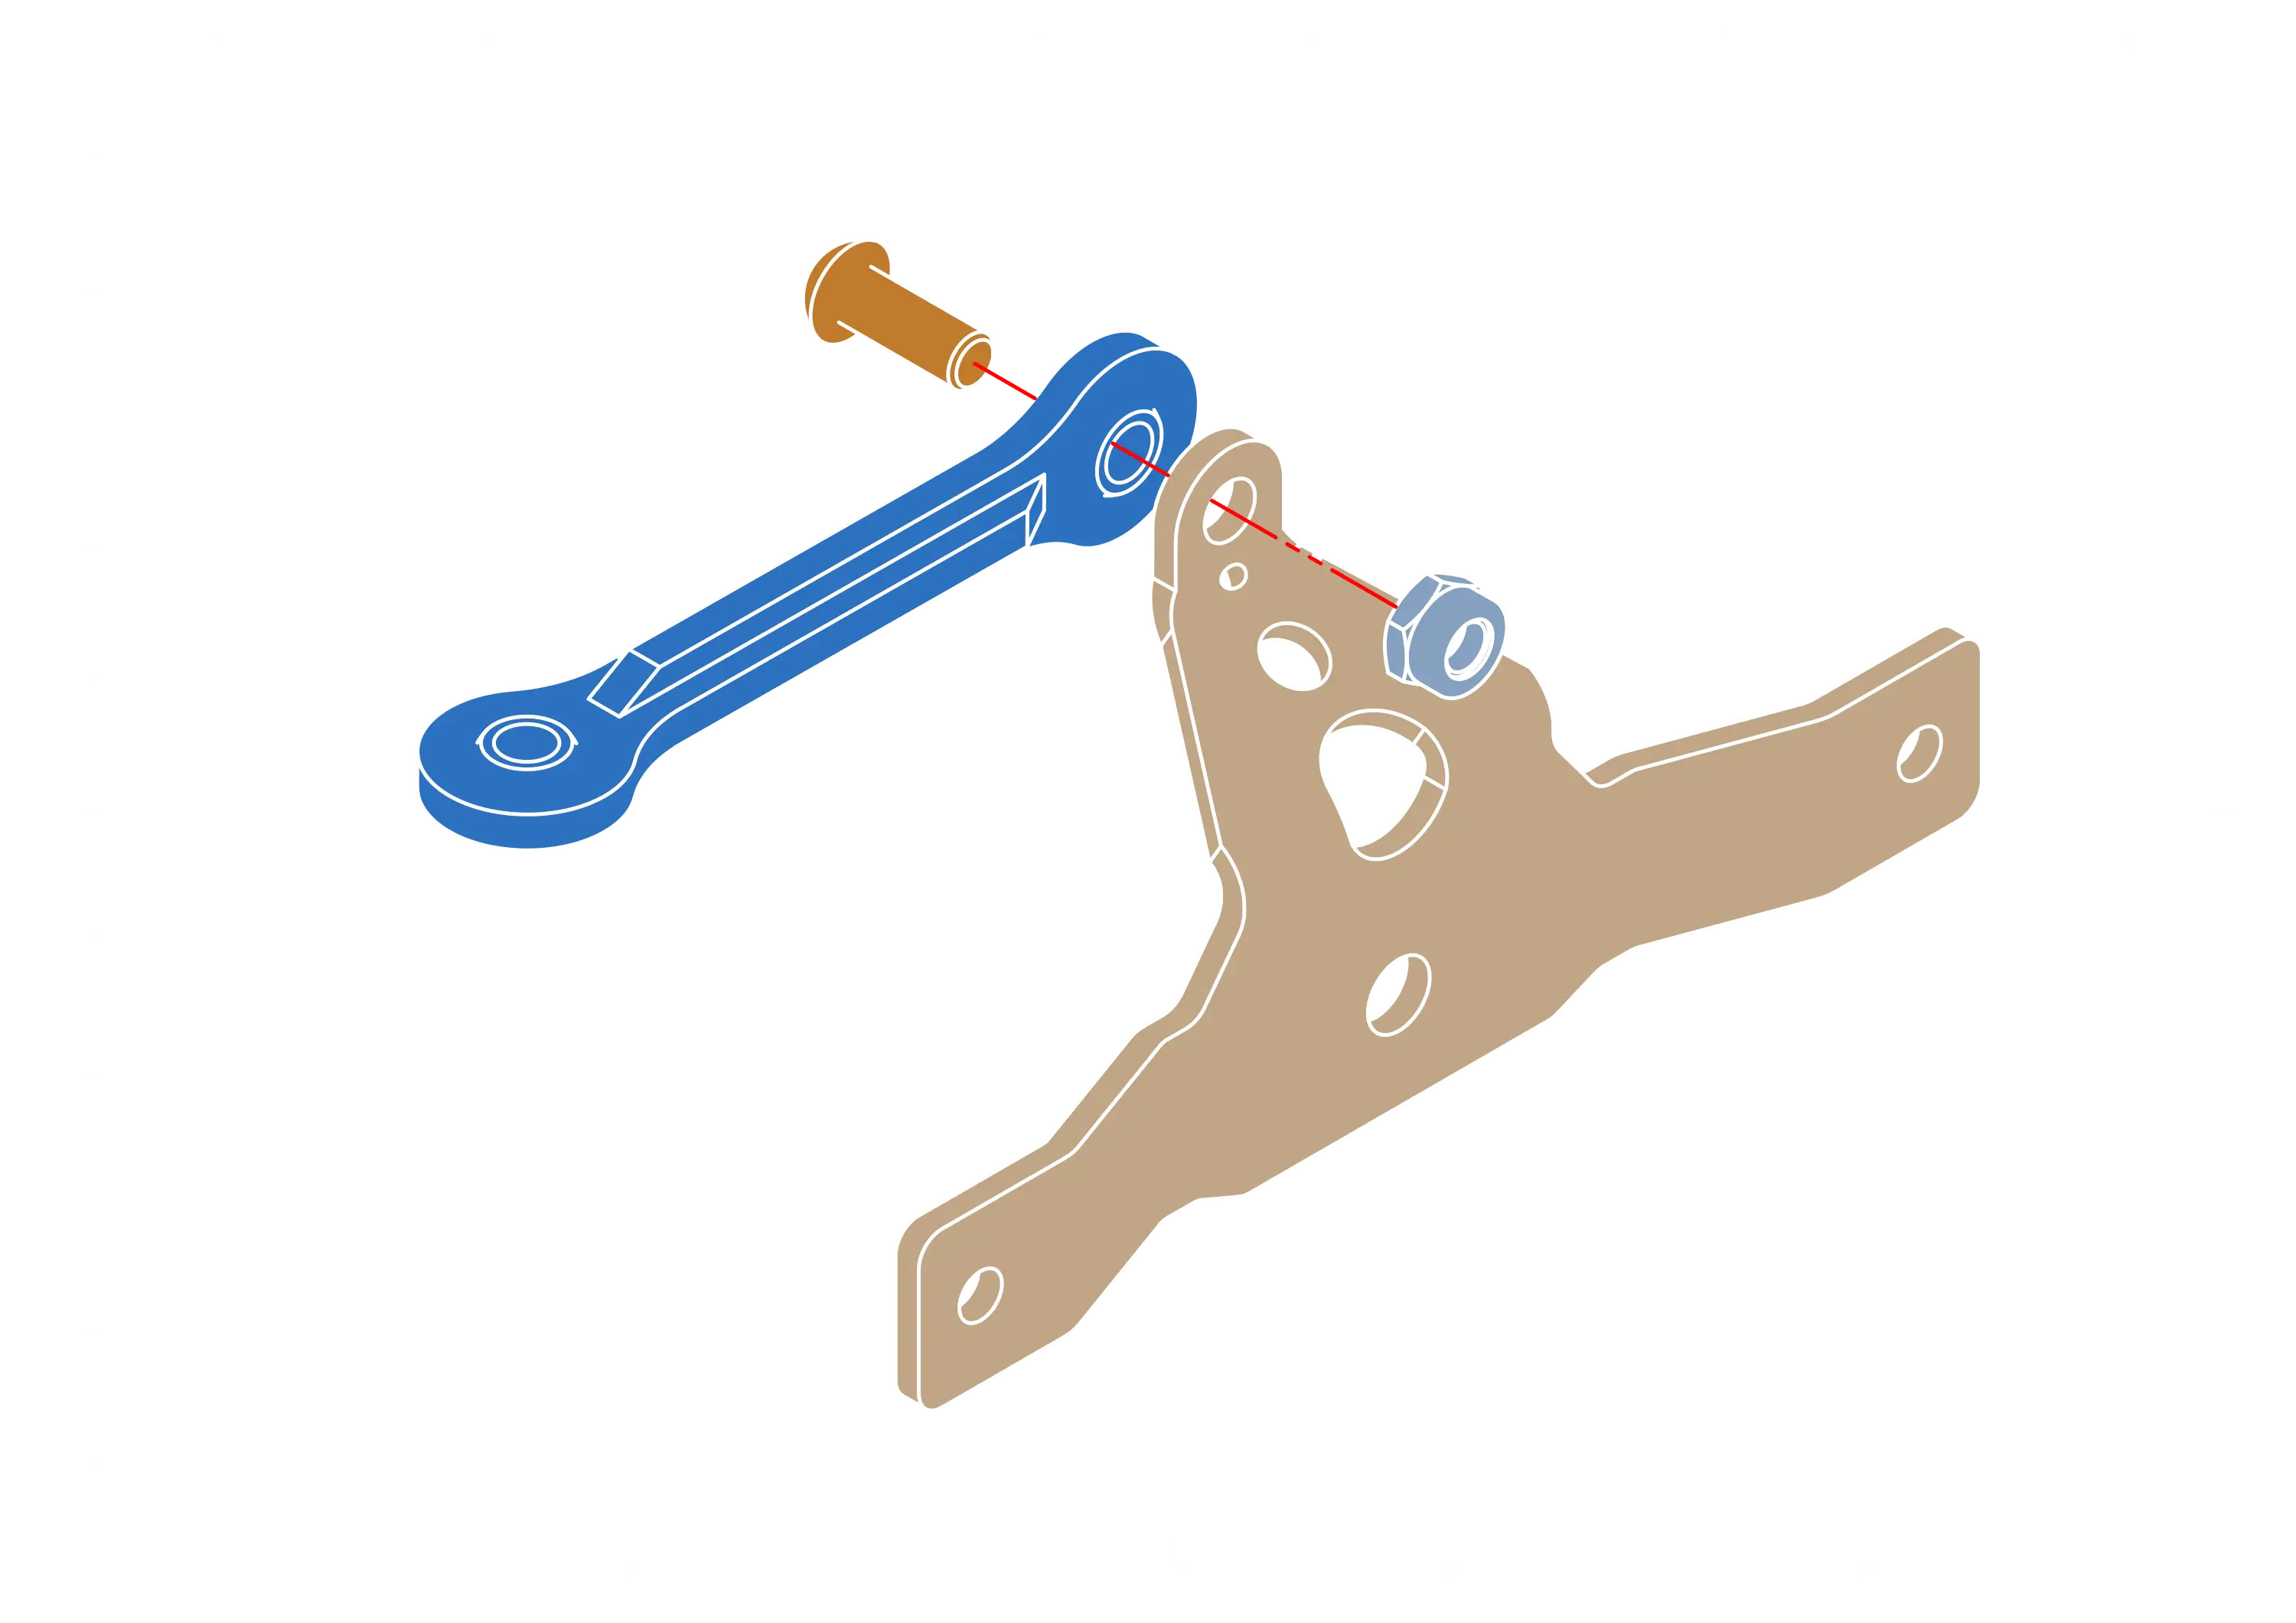
note
Make sure that the screw is tight, but pushrod can move without excess play and resistance.
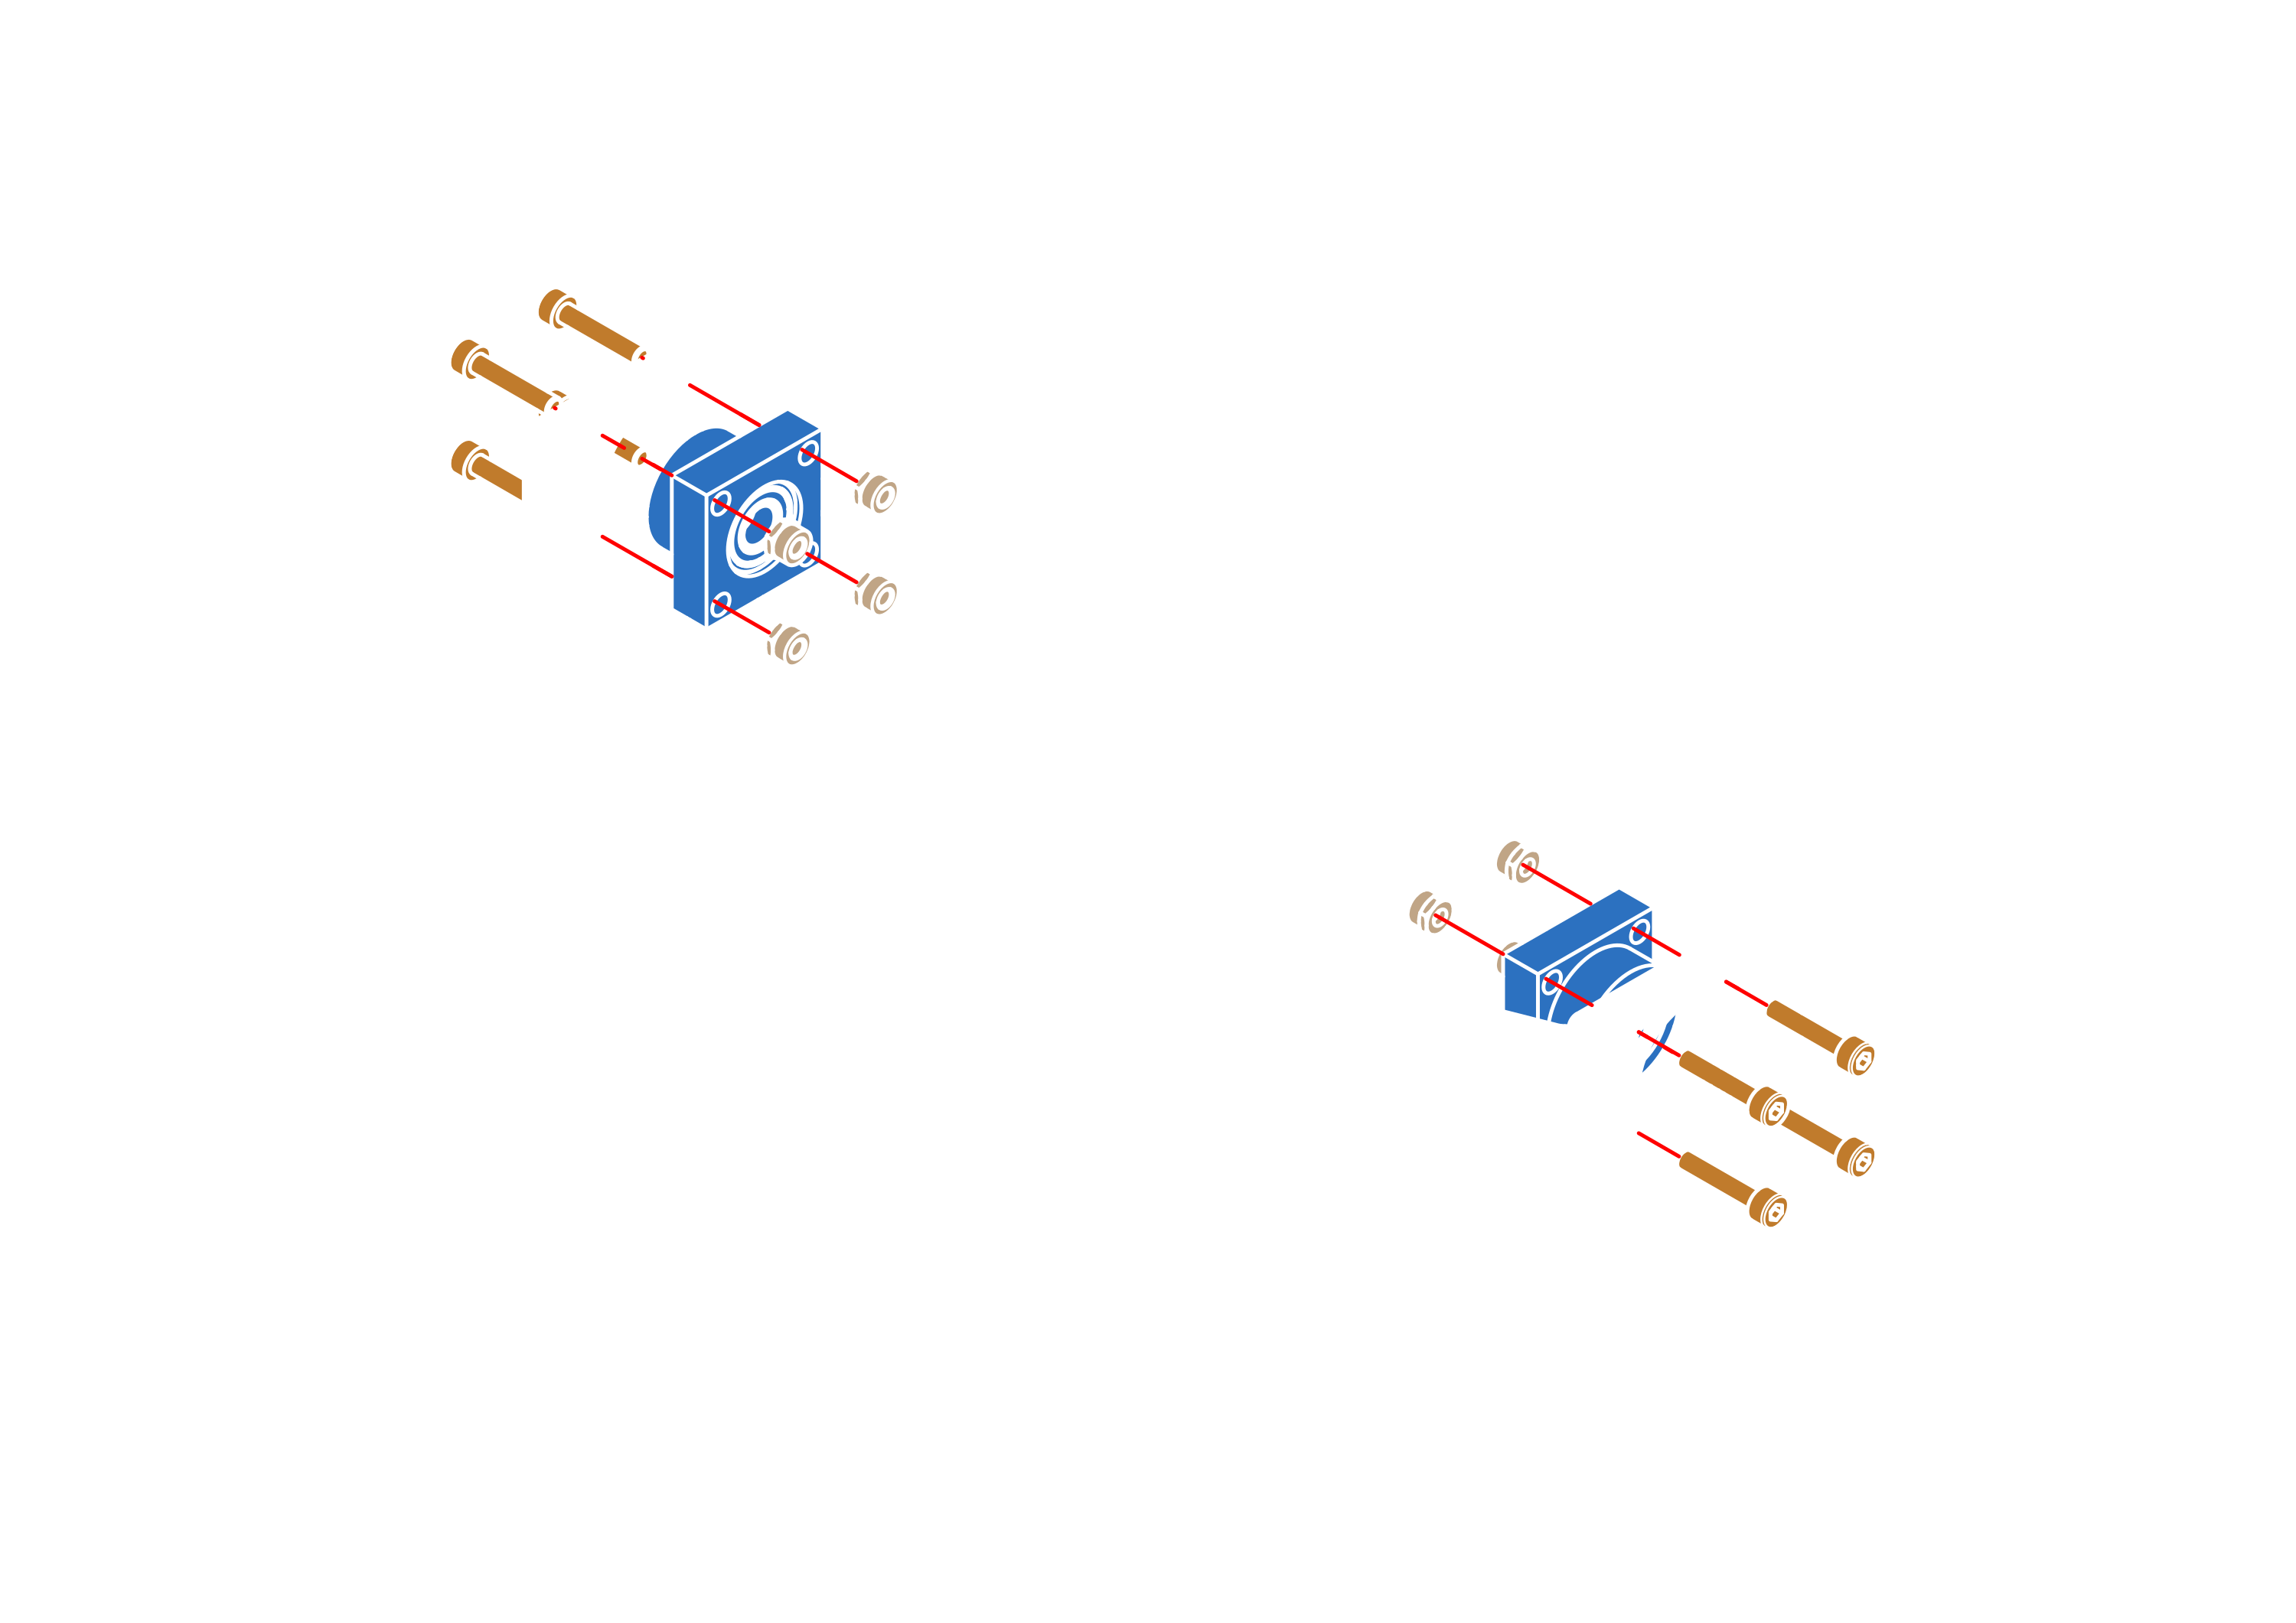
info
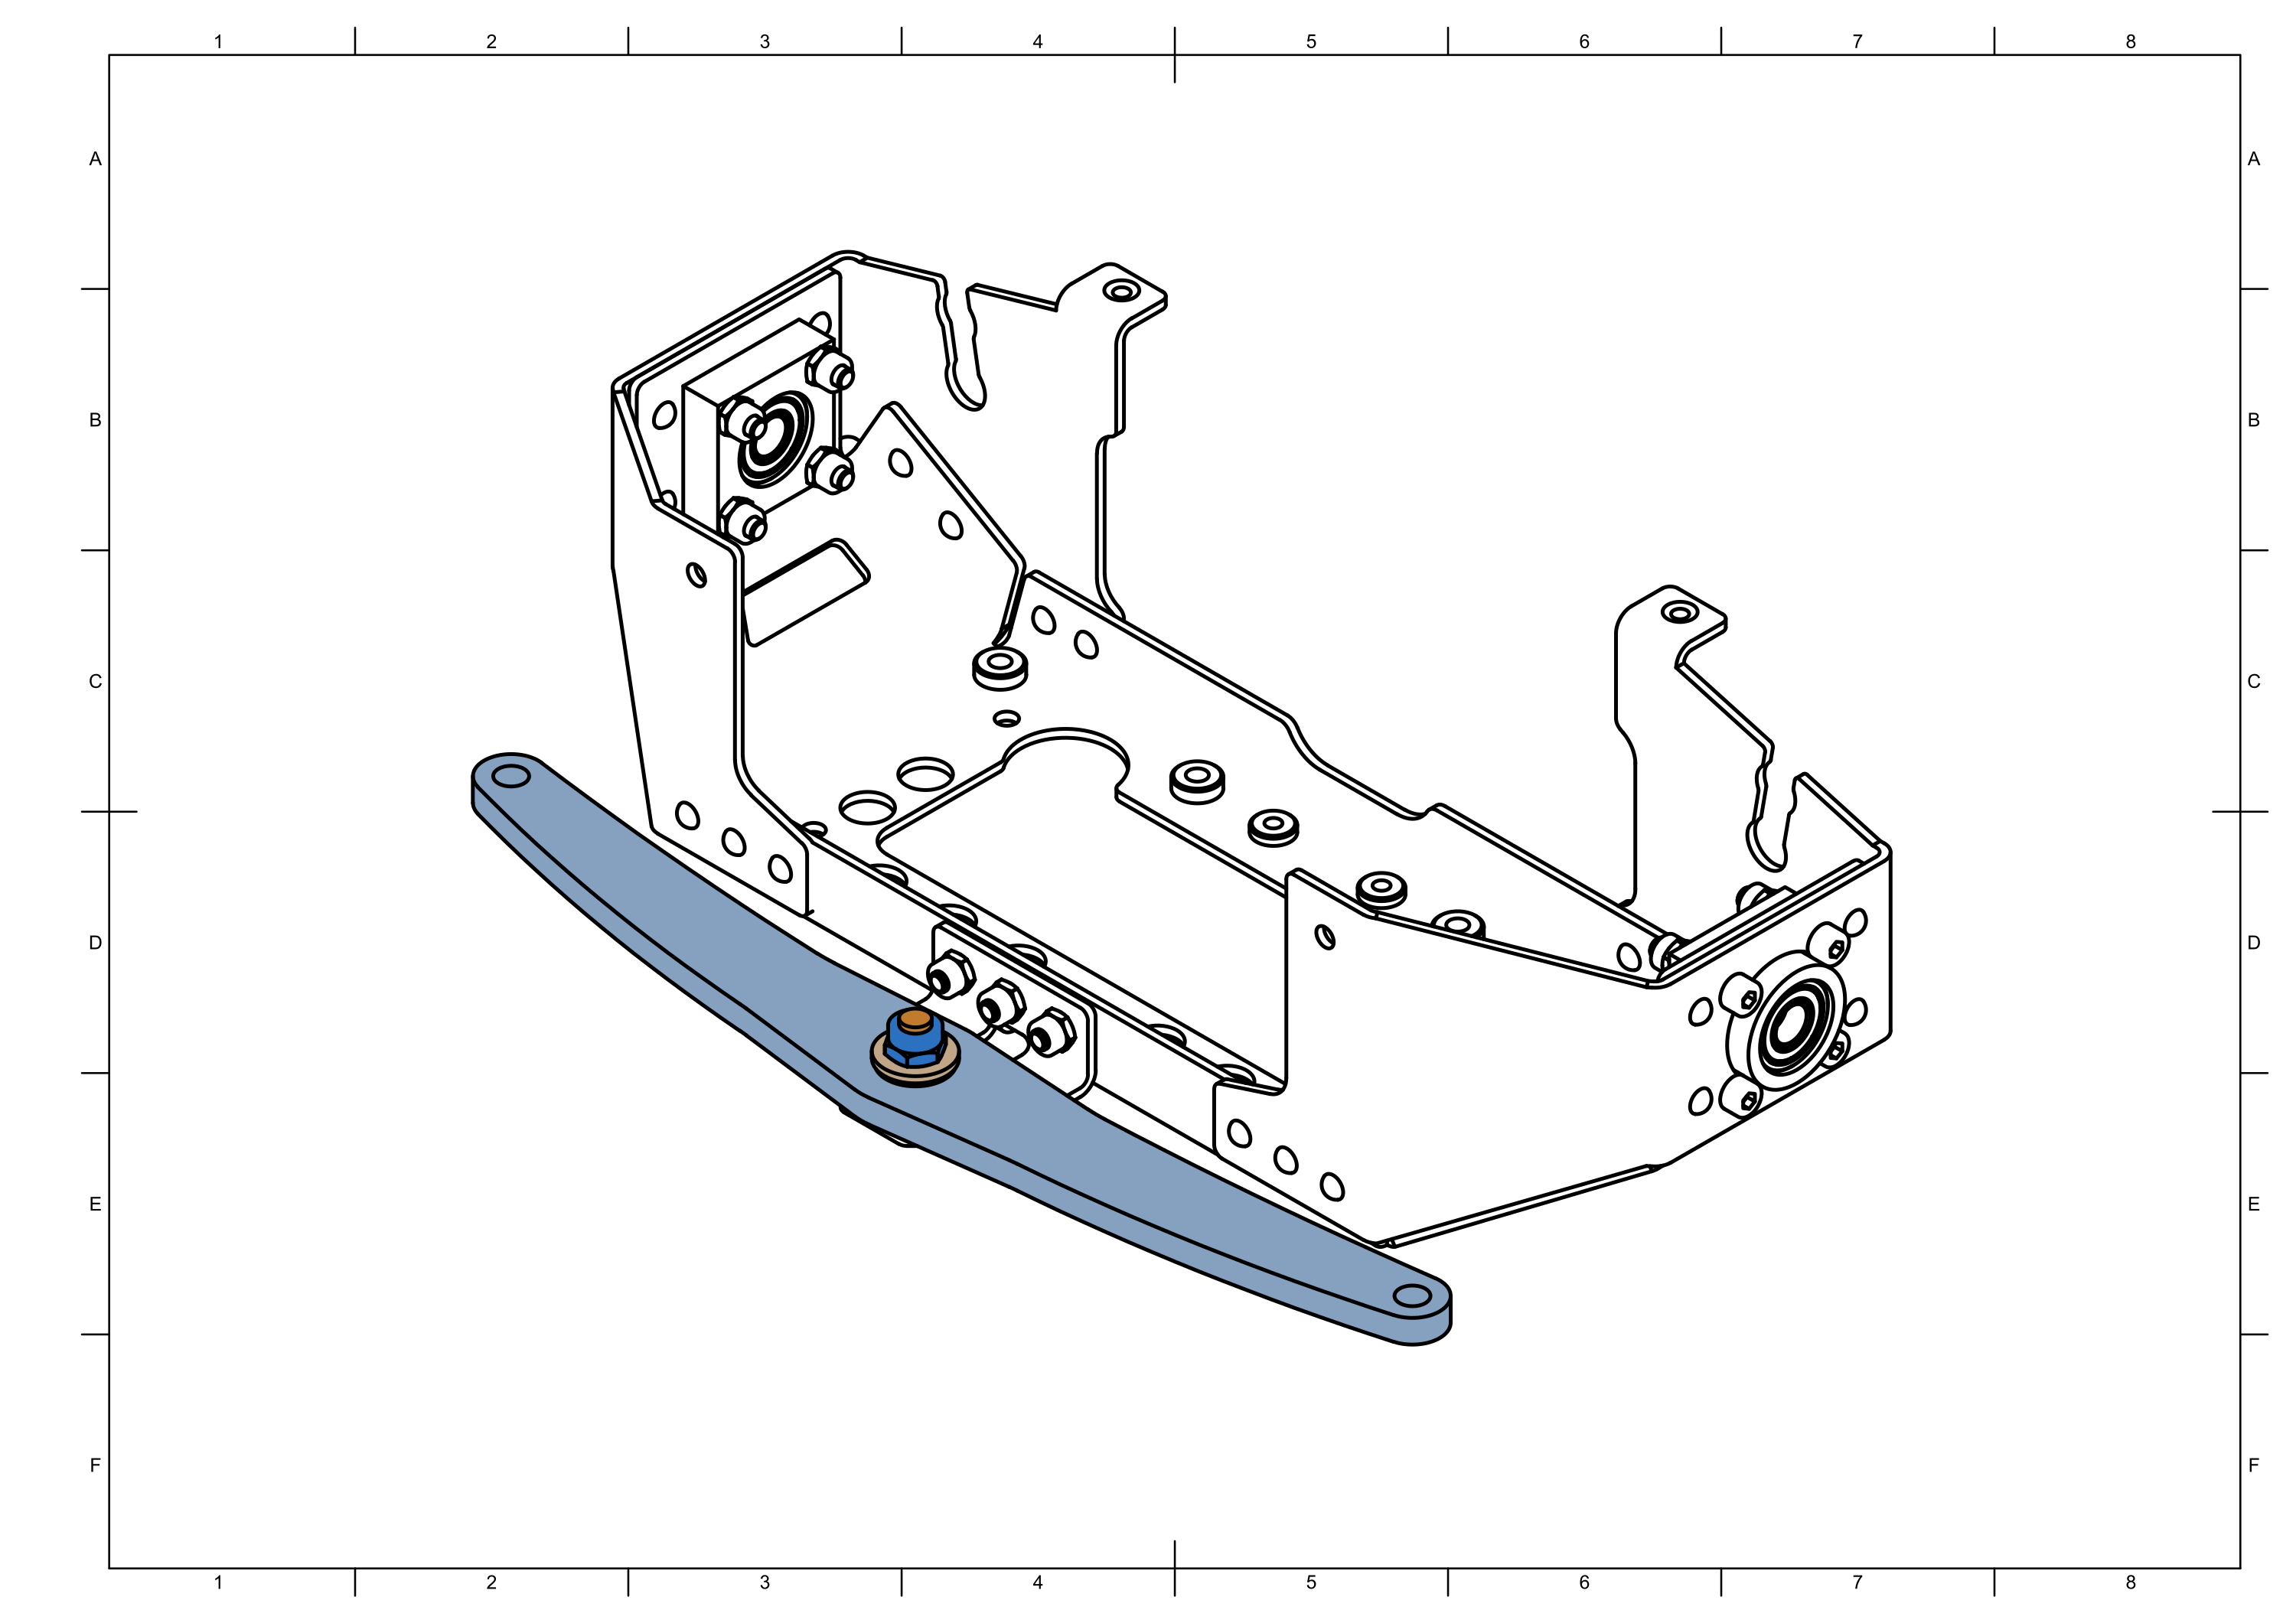
Repeat until you have 2 suspension mounts.
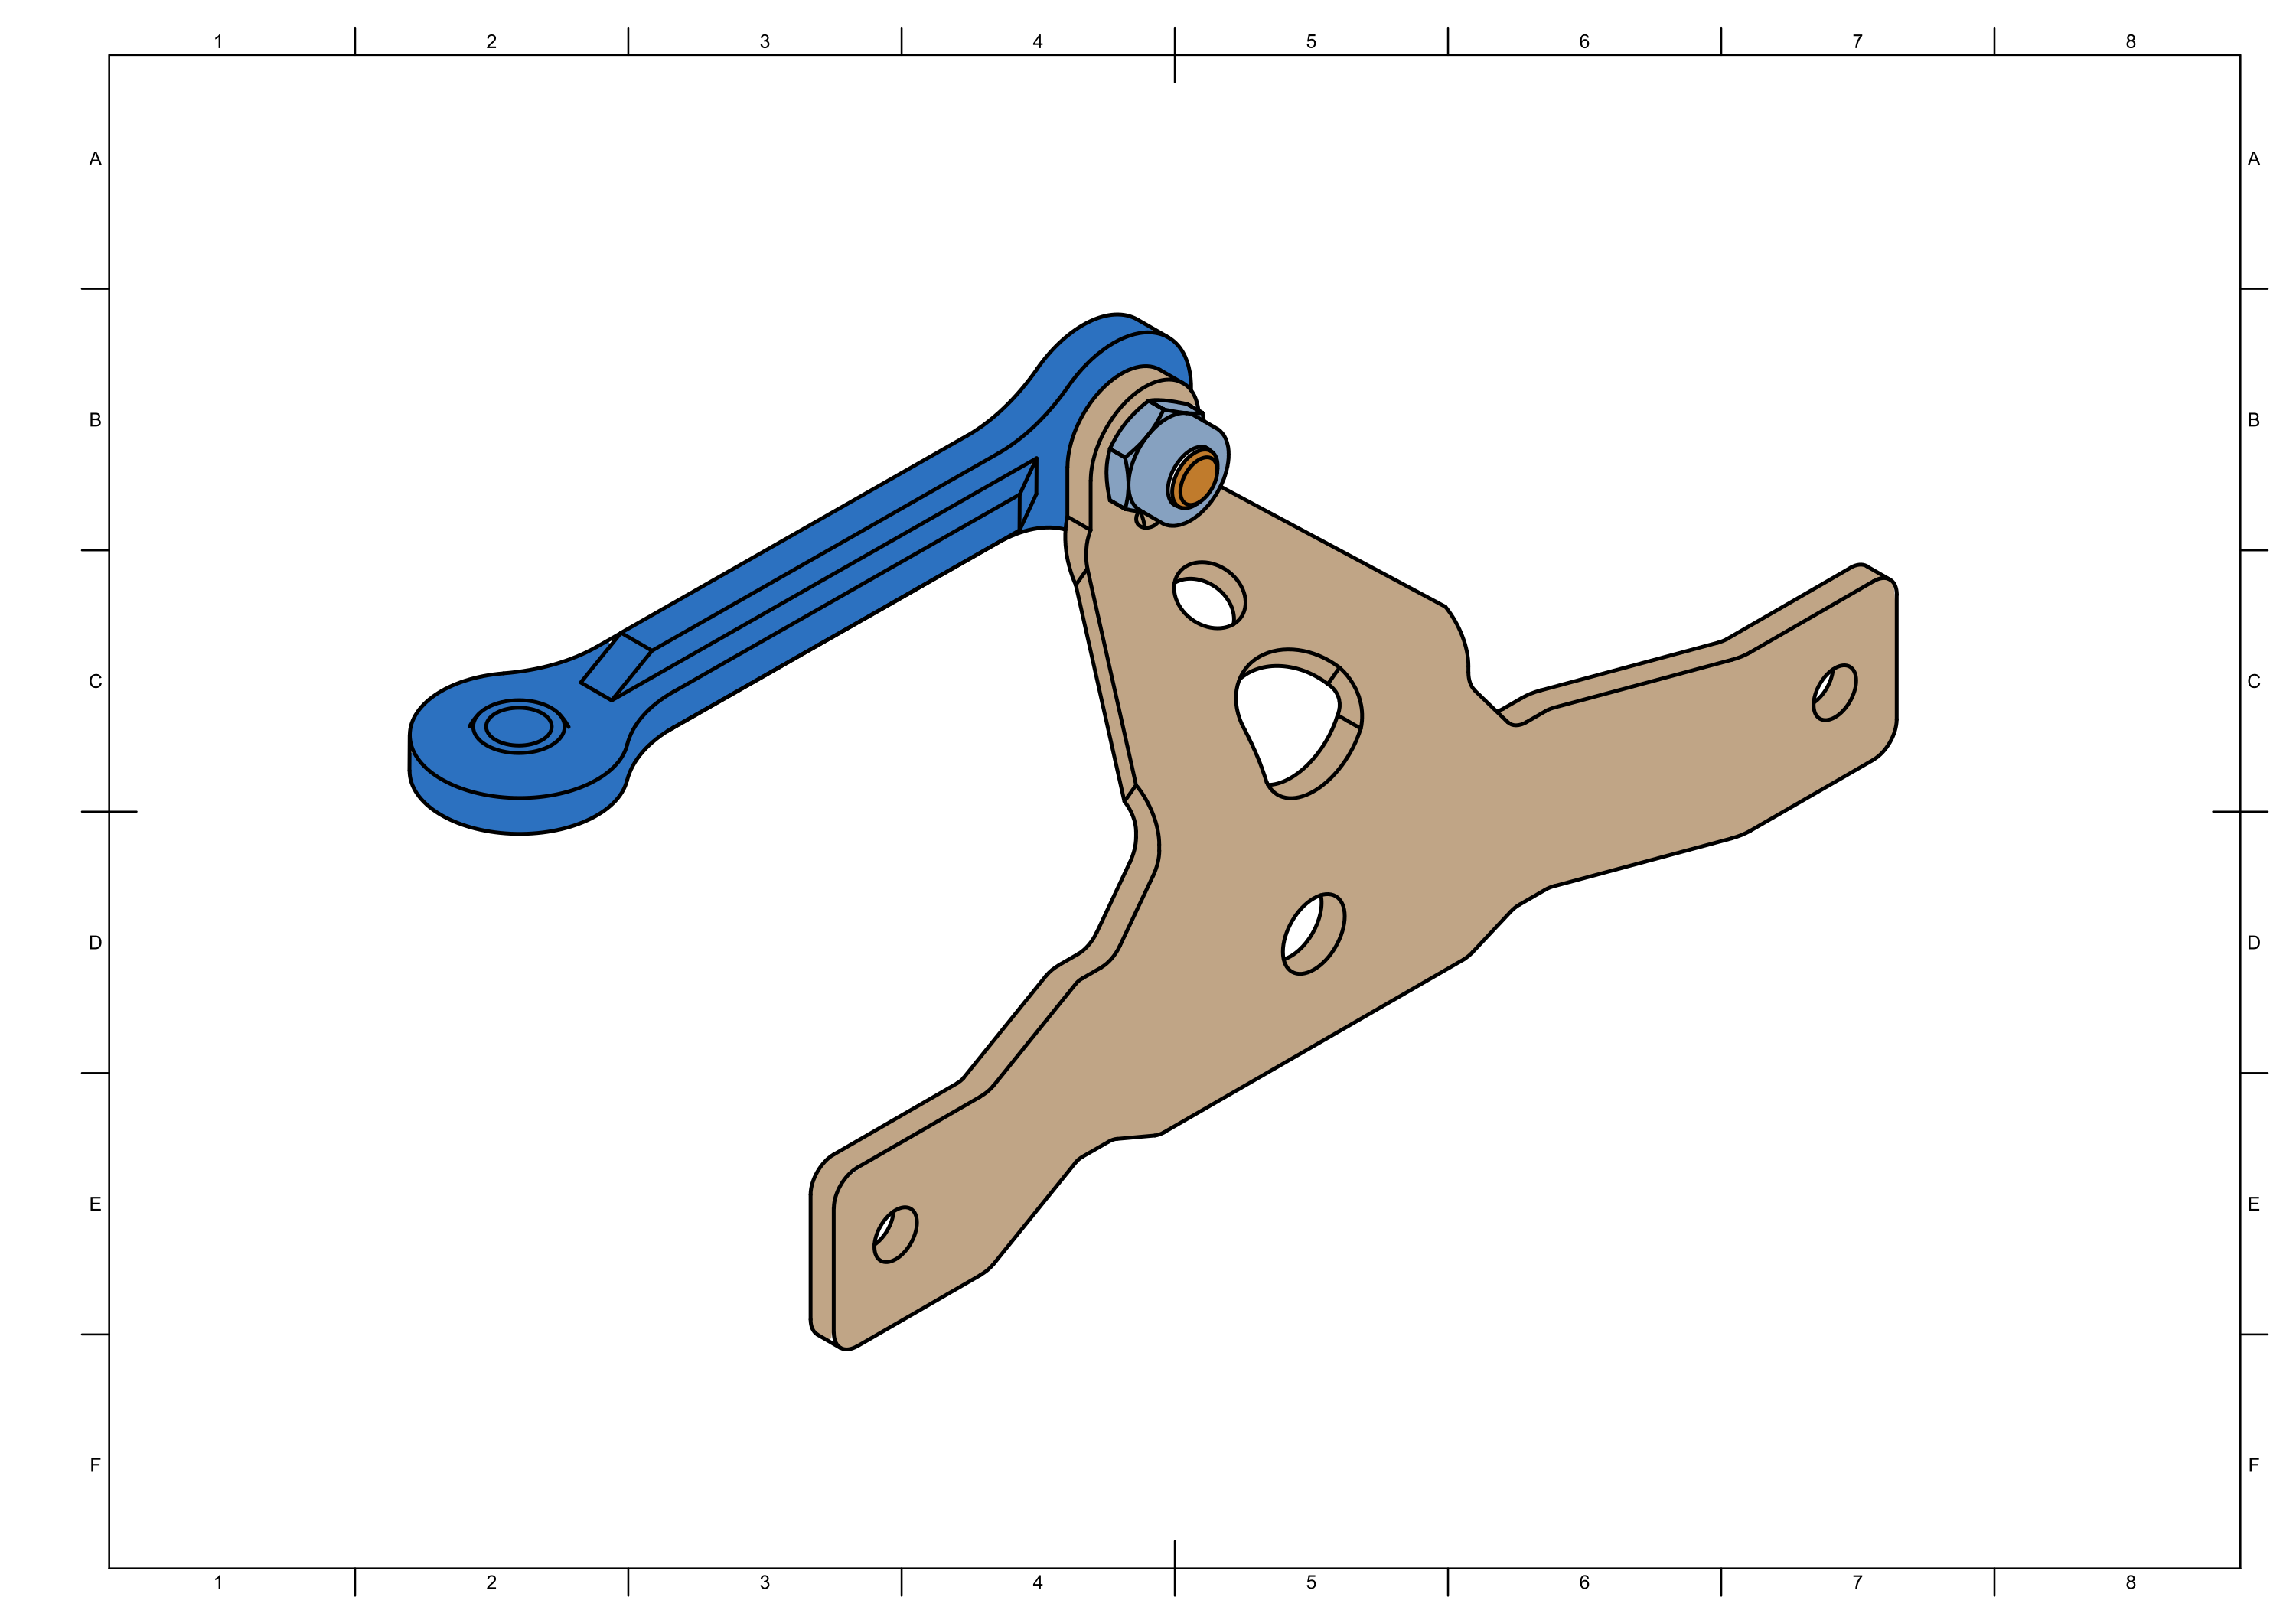
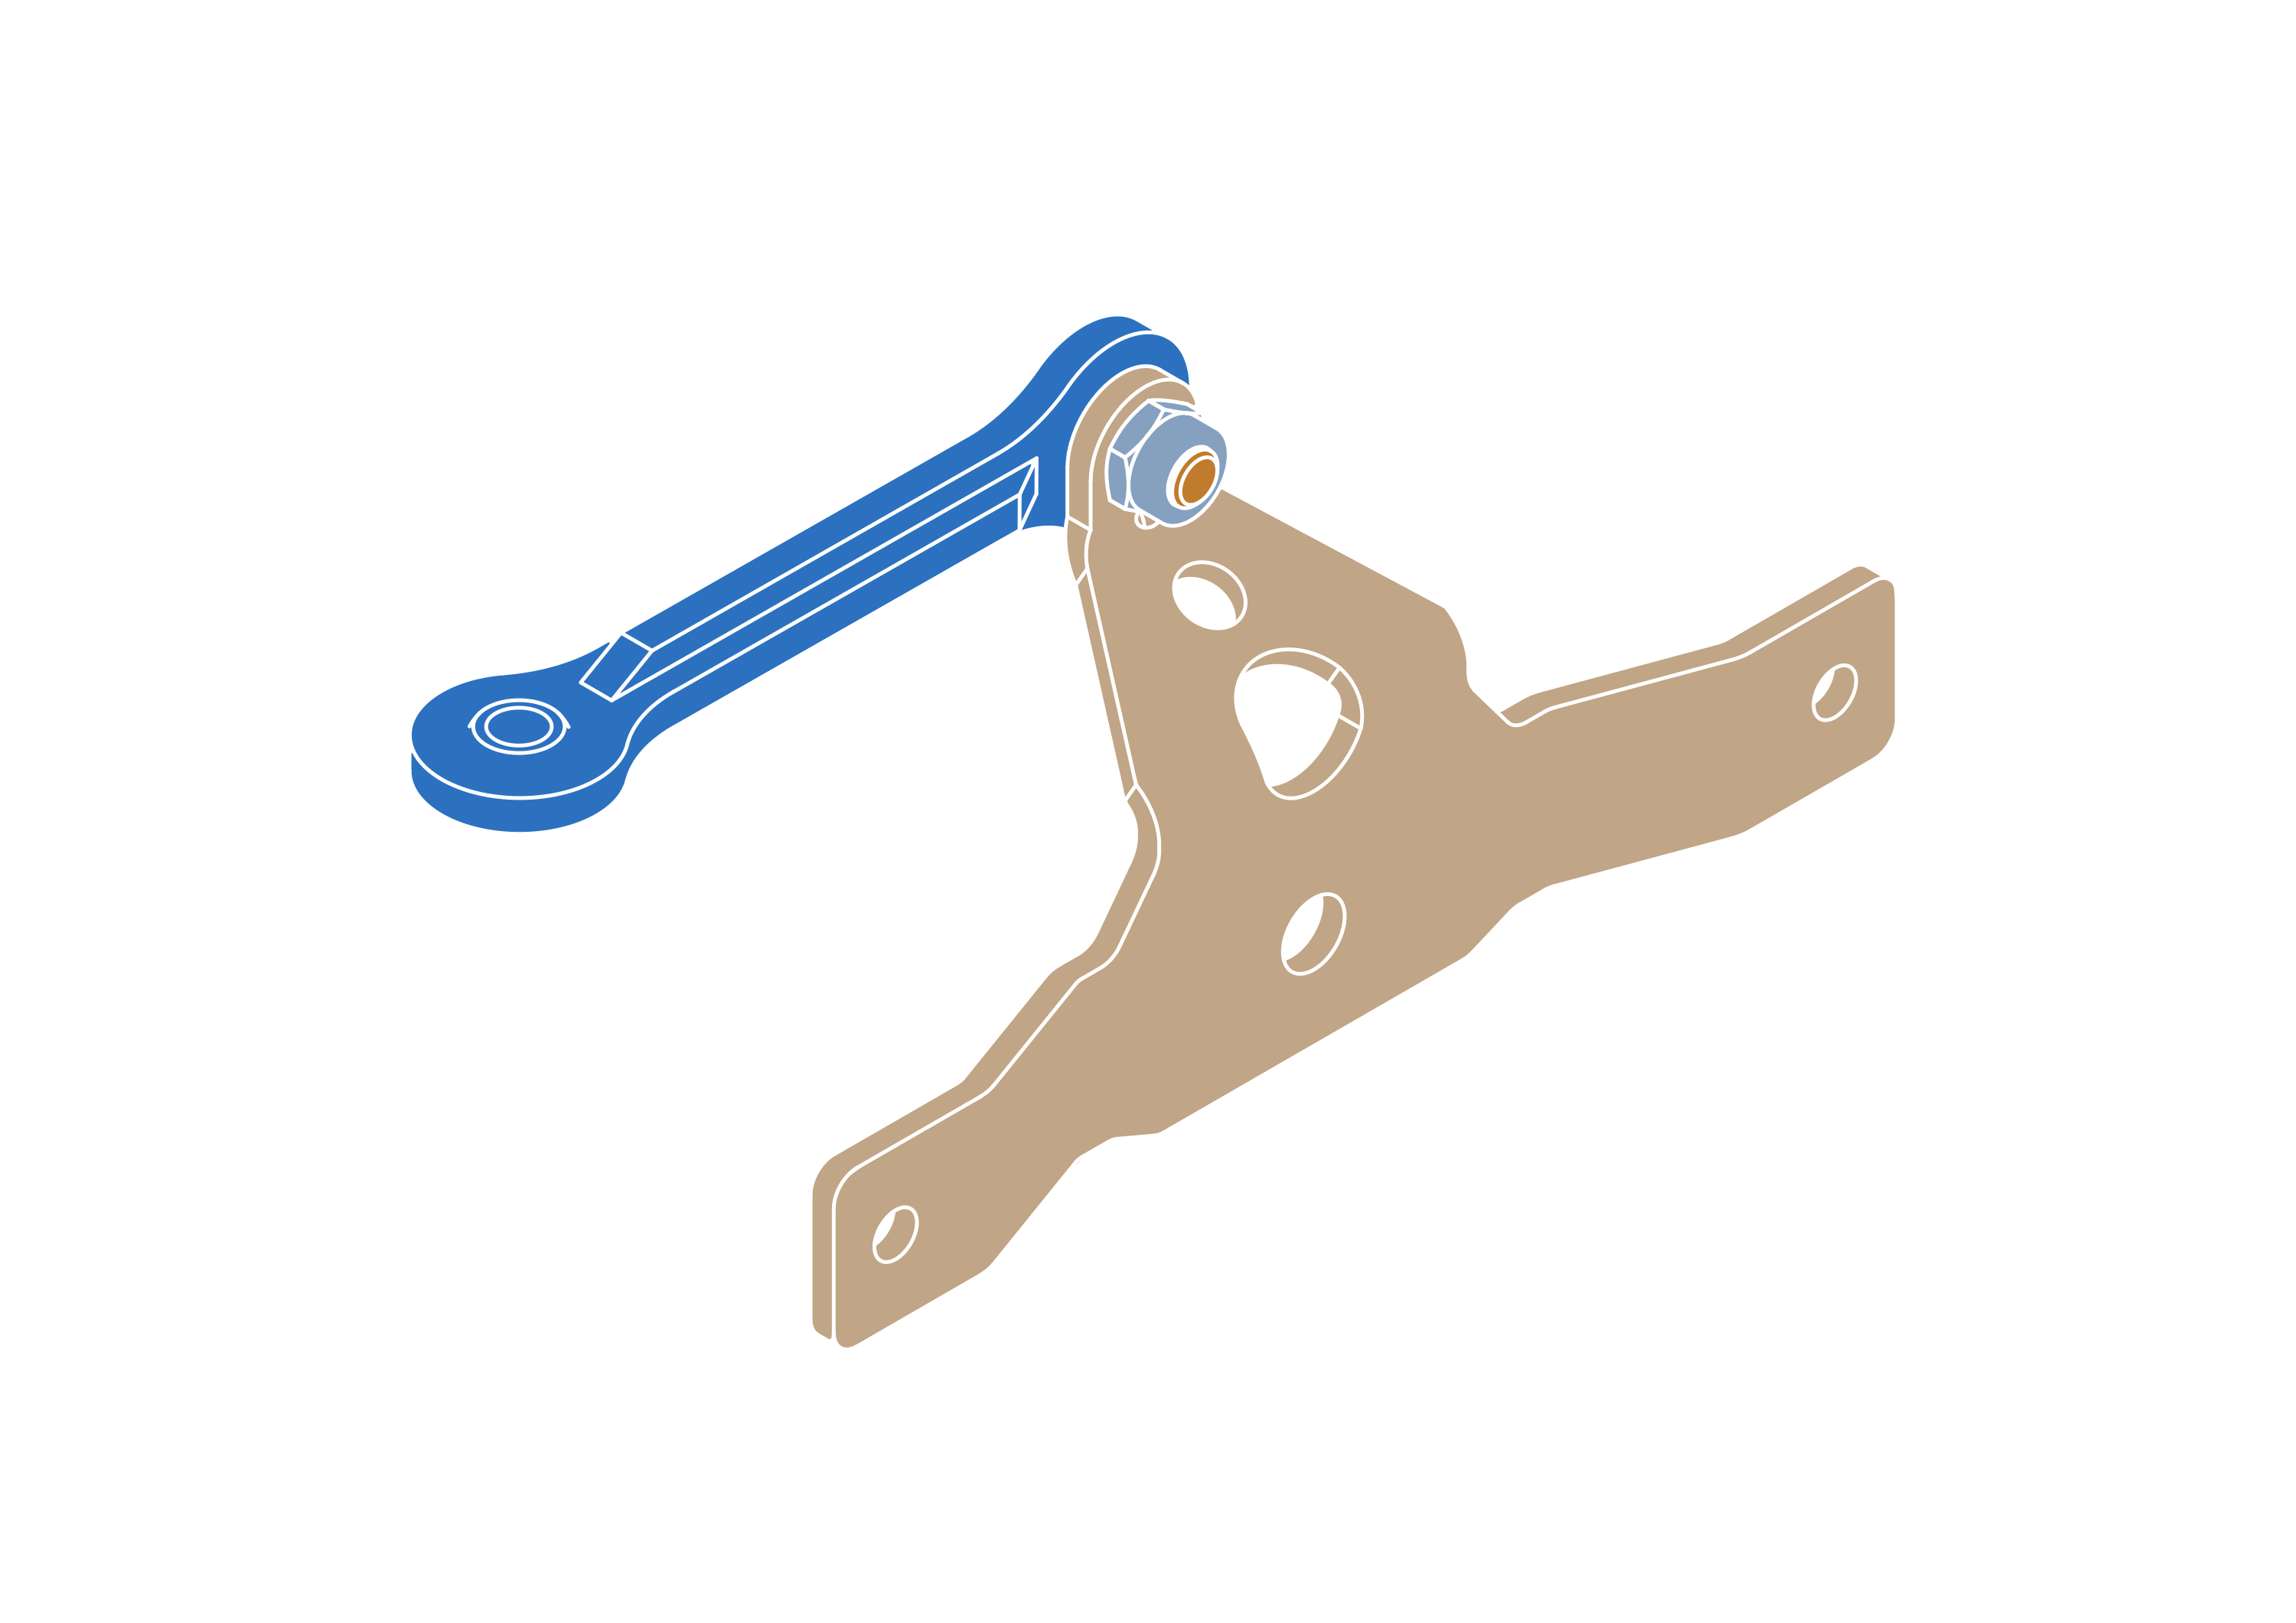
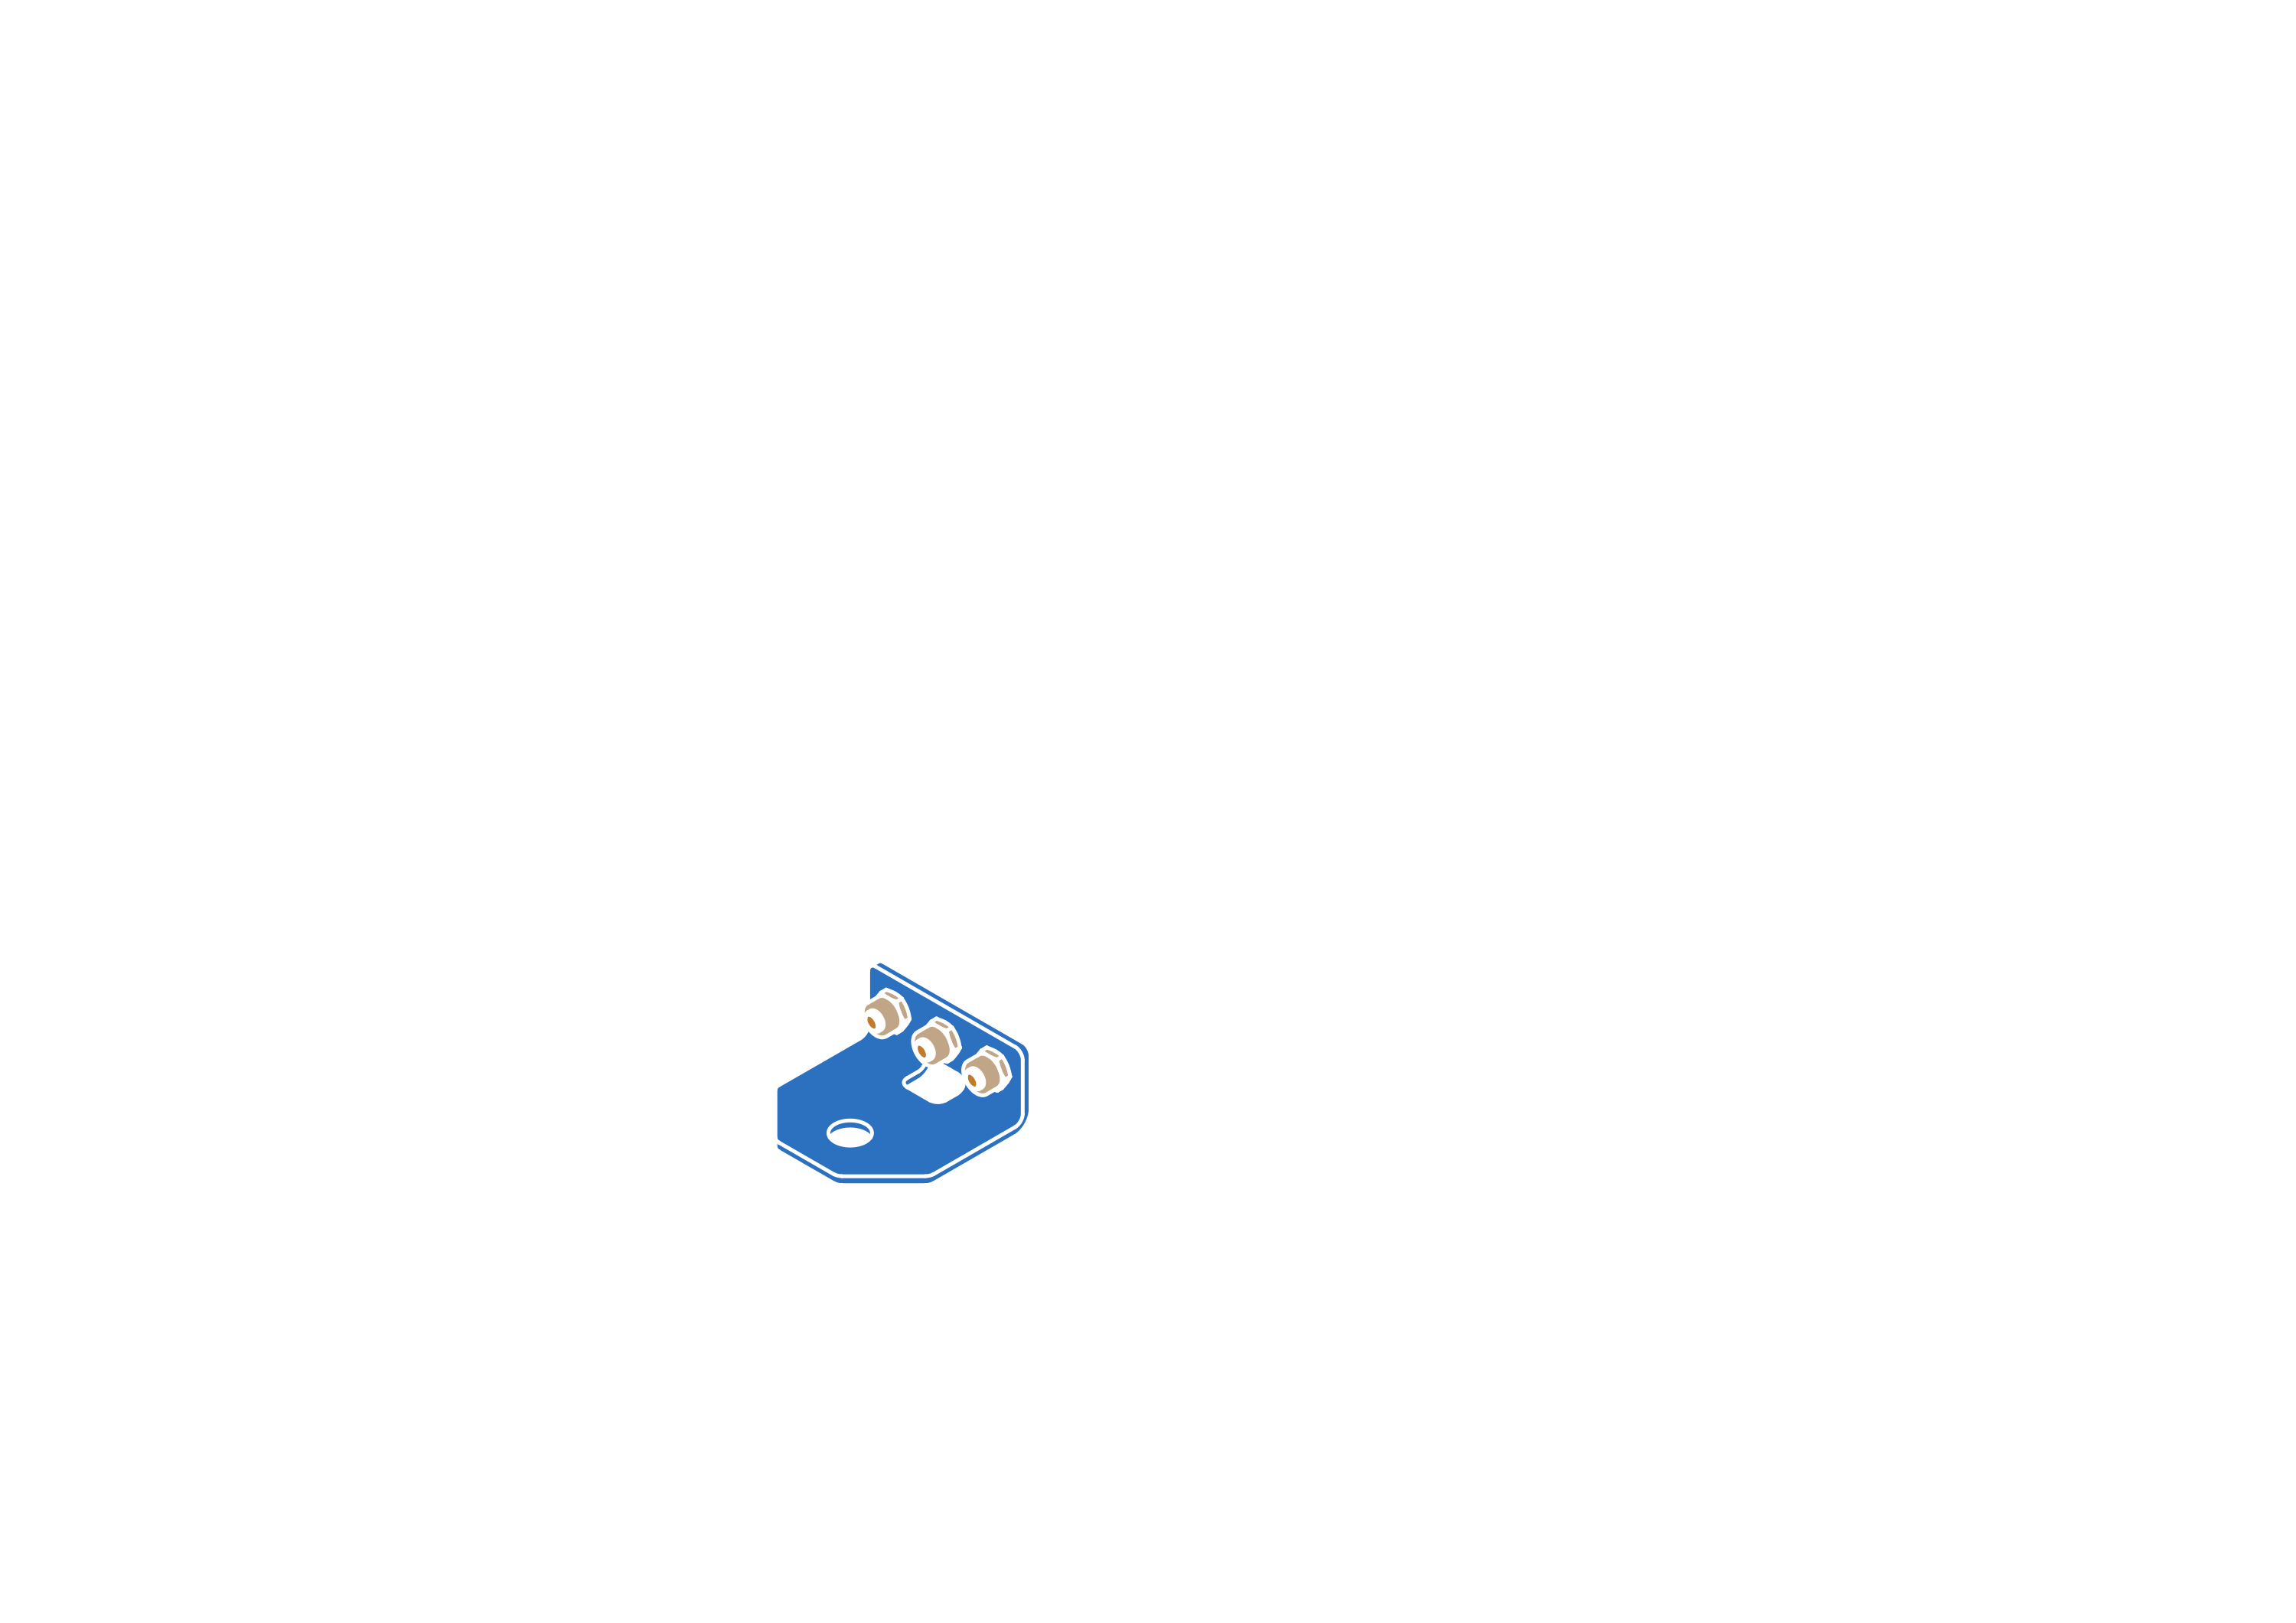
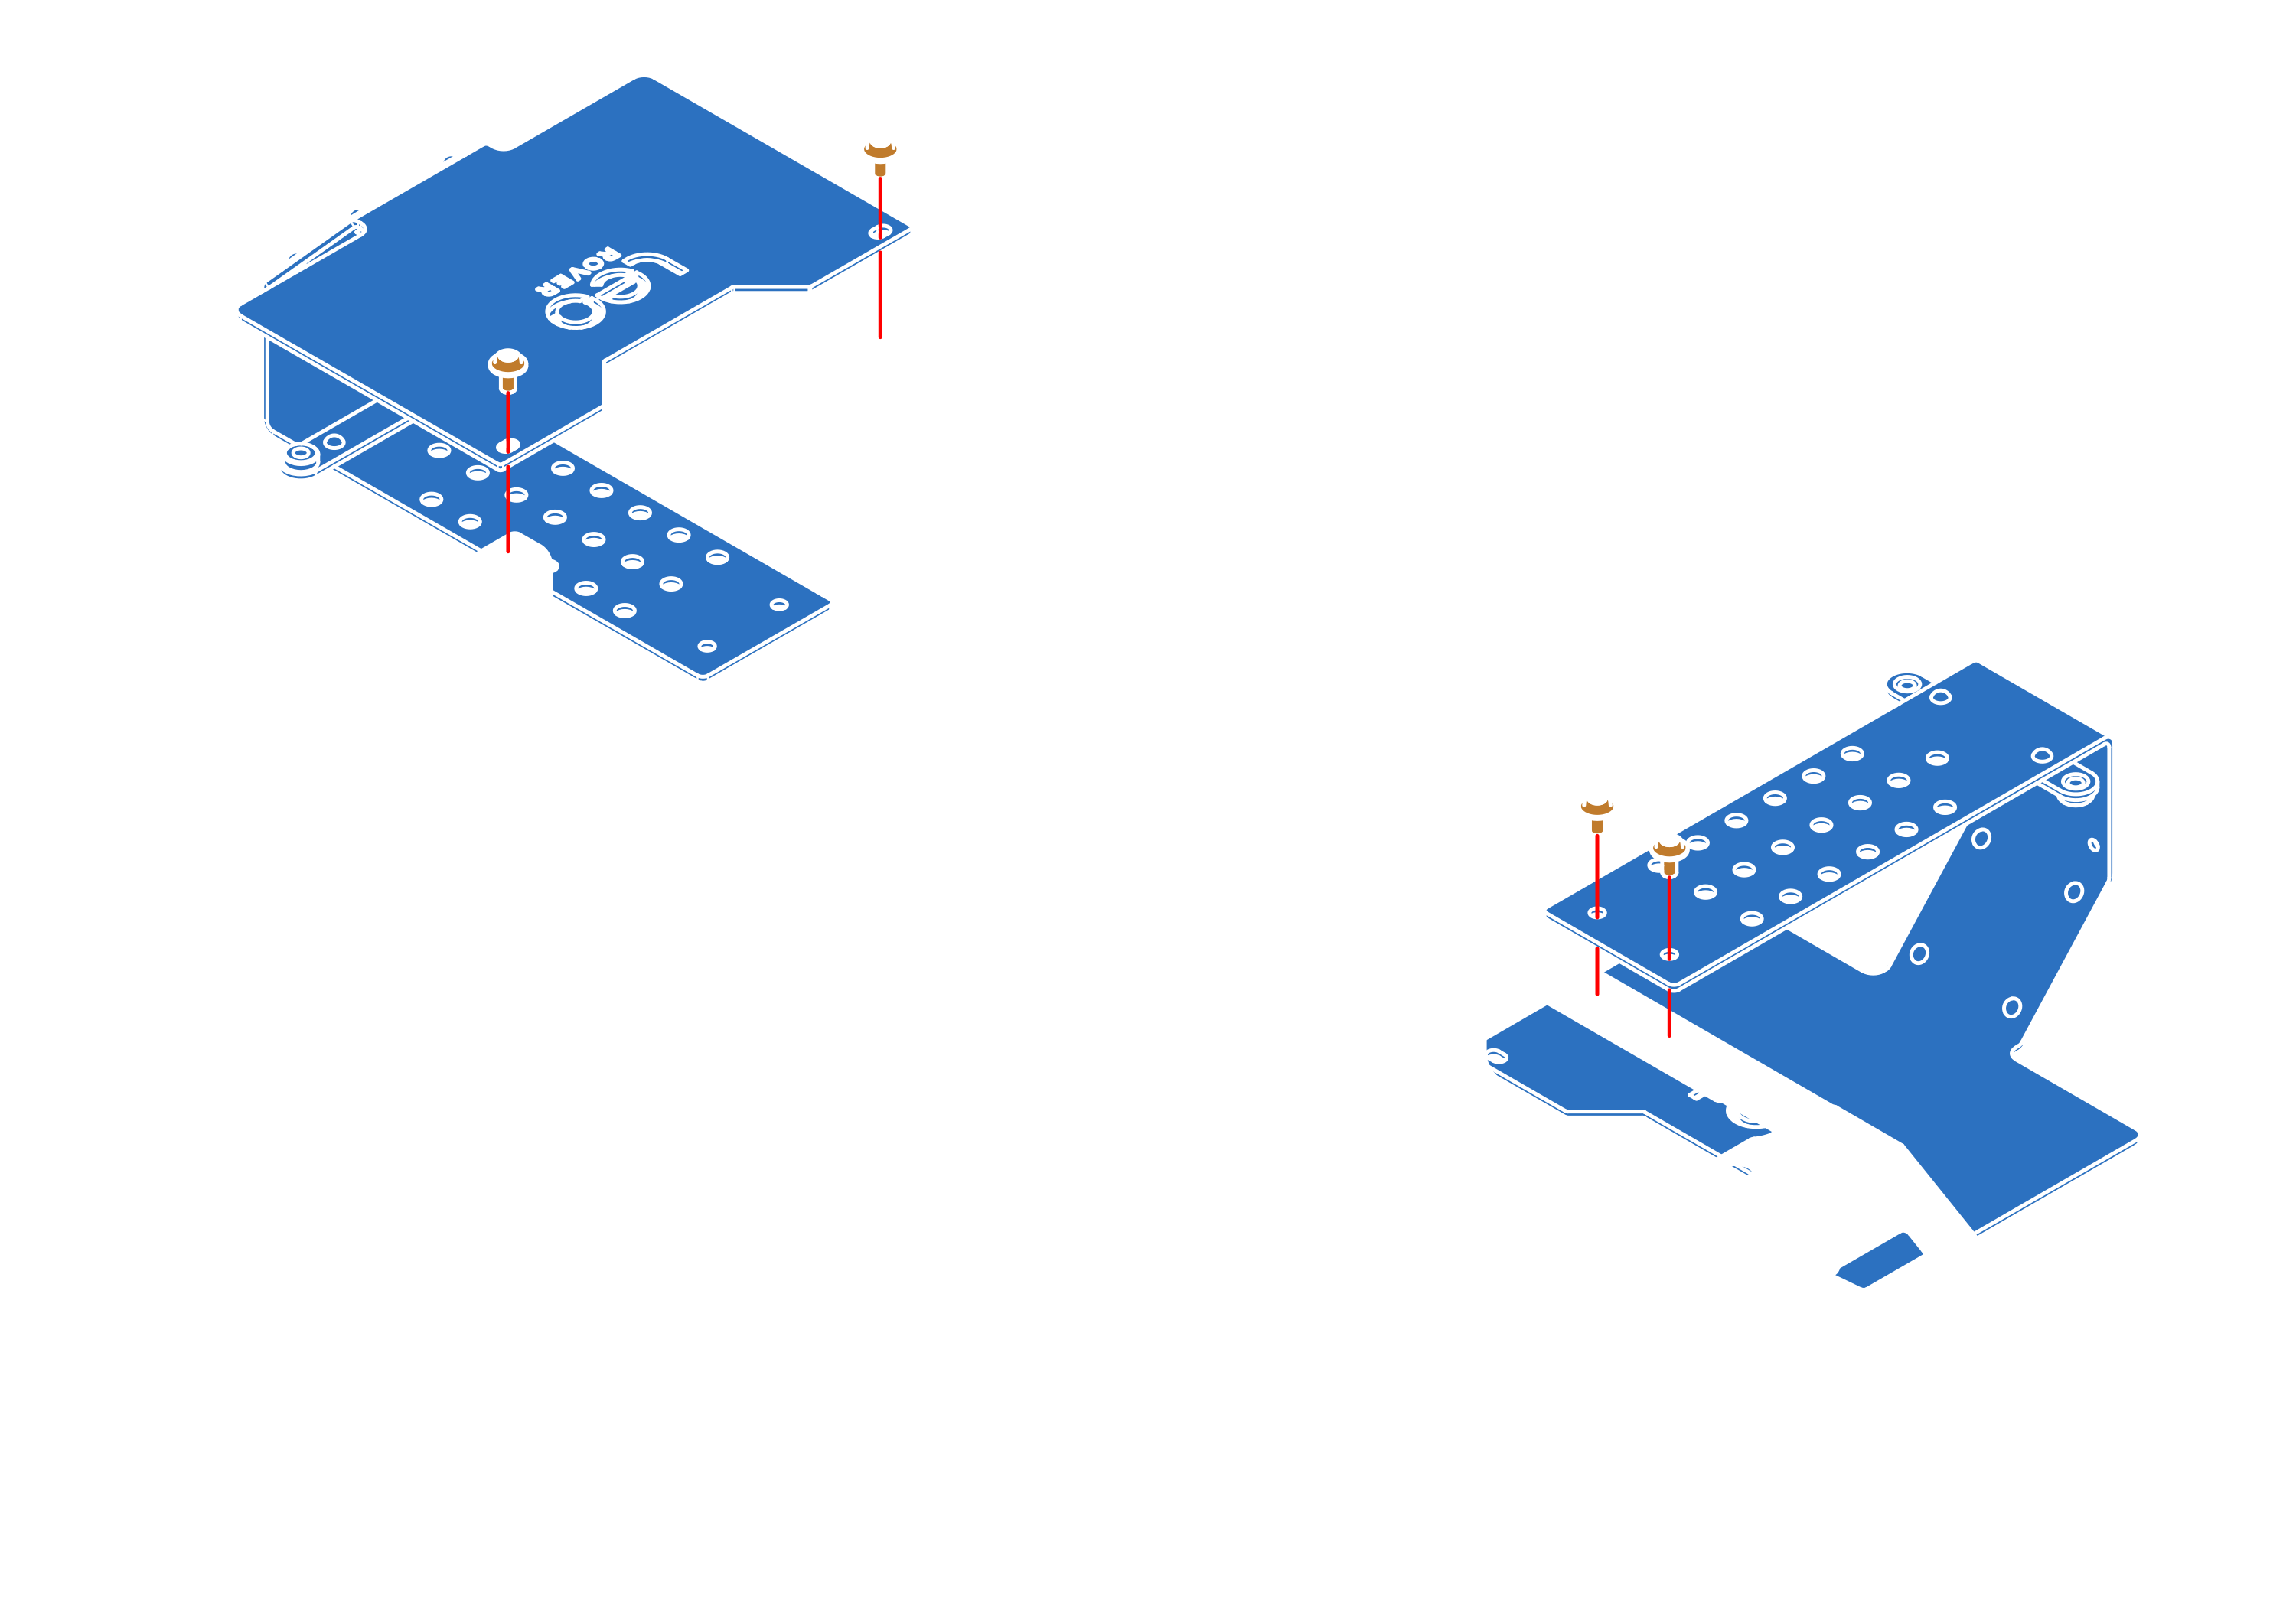
Step 2


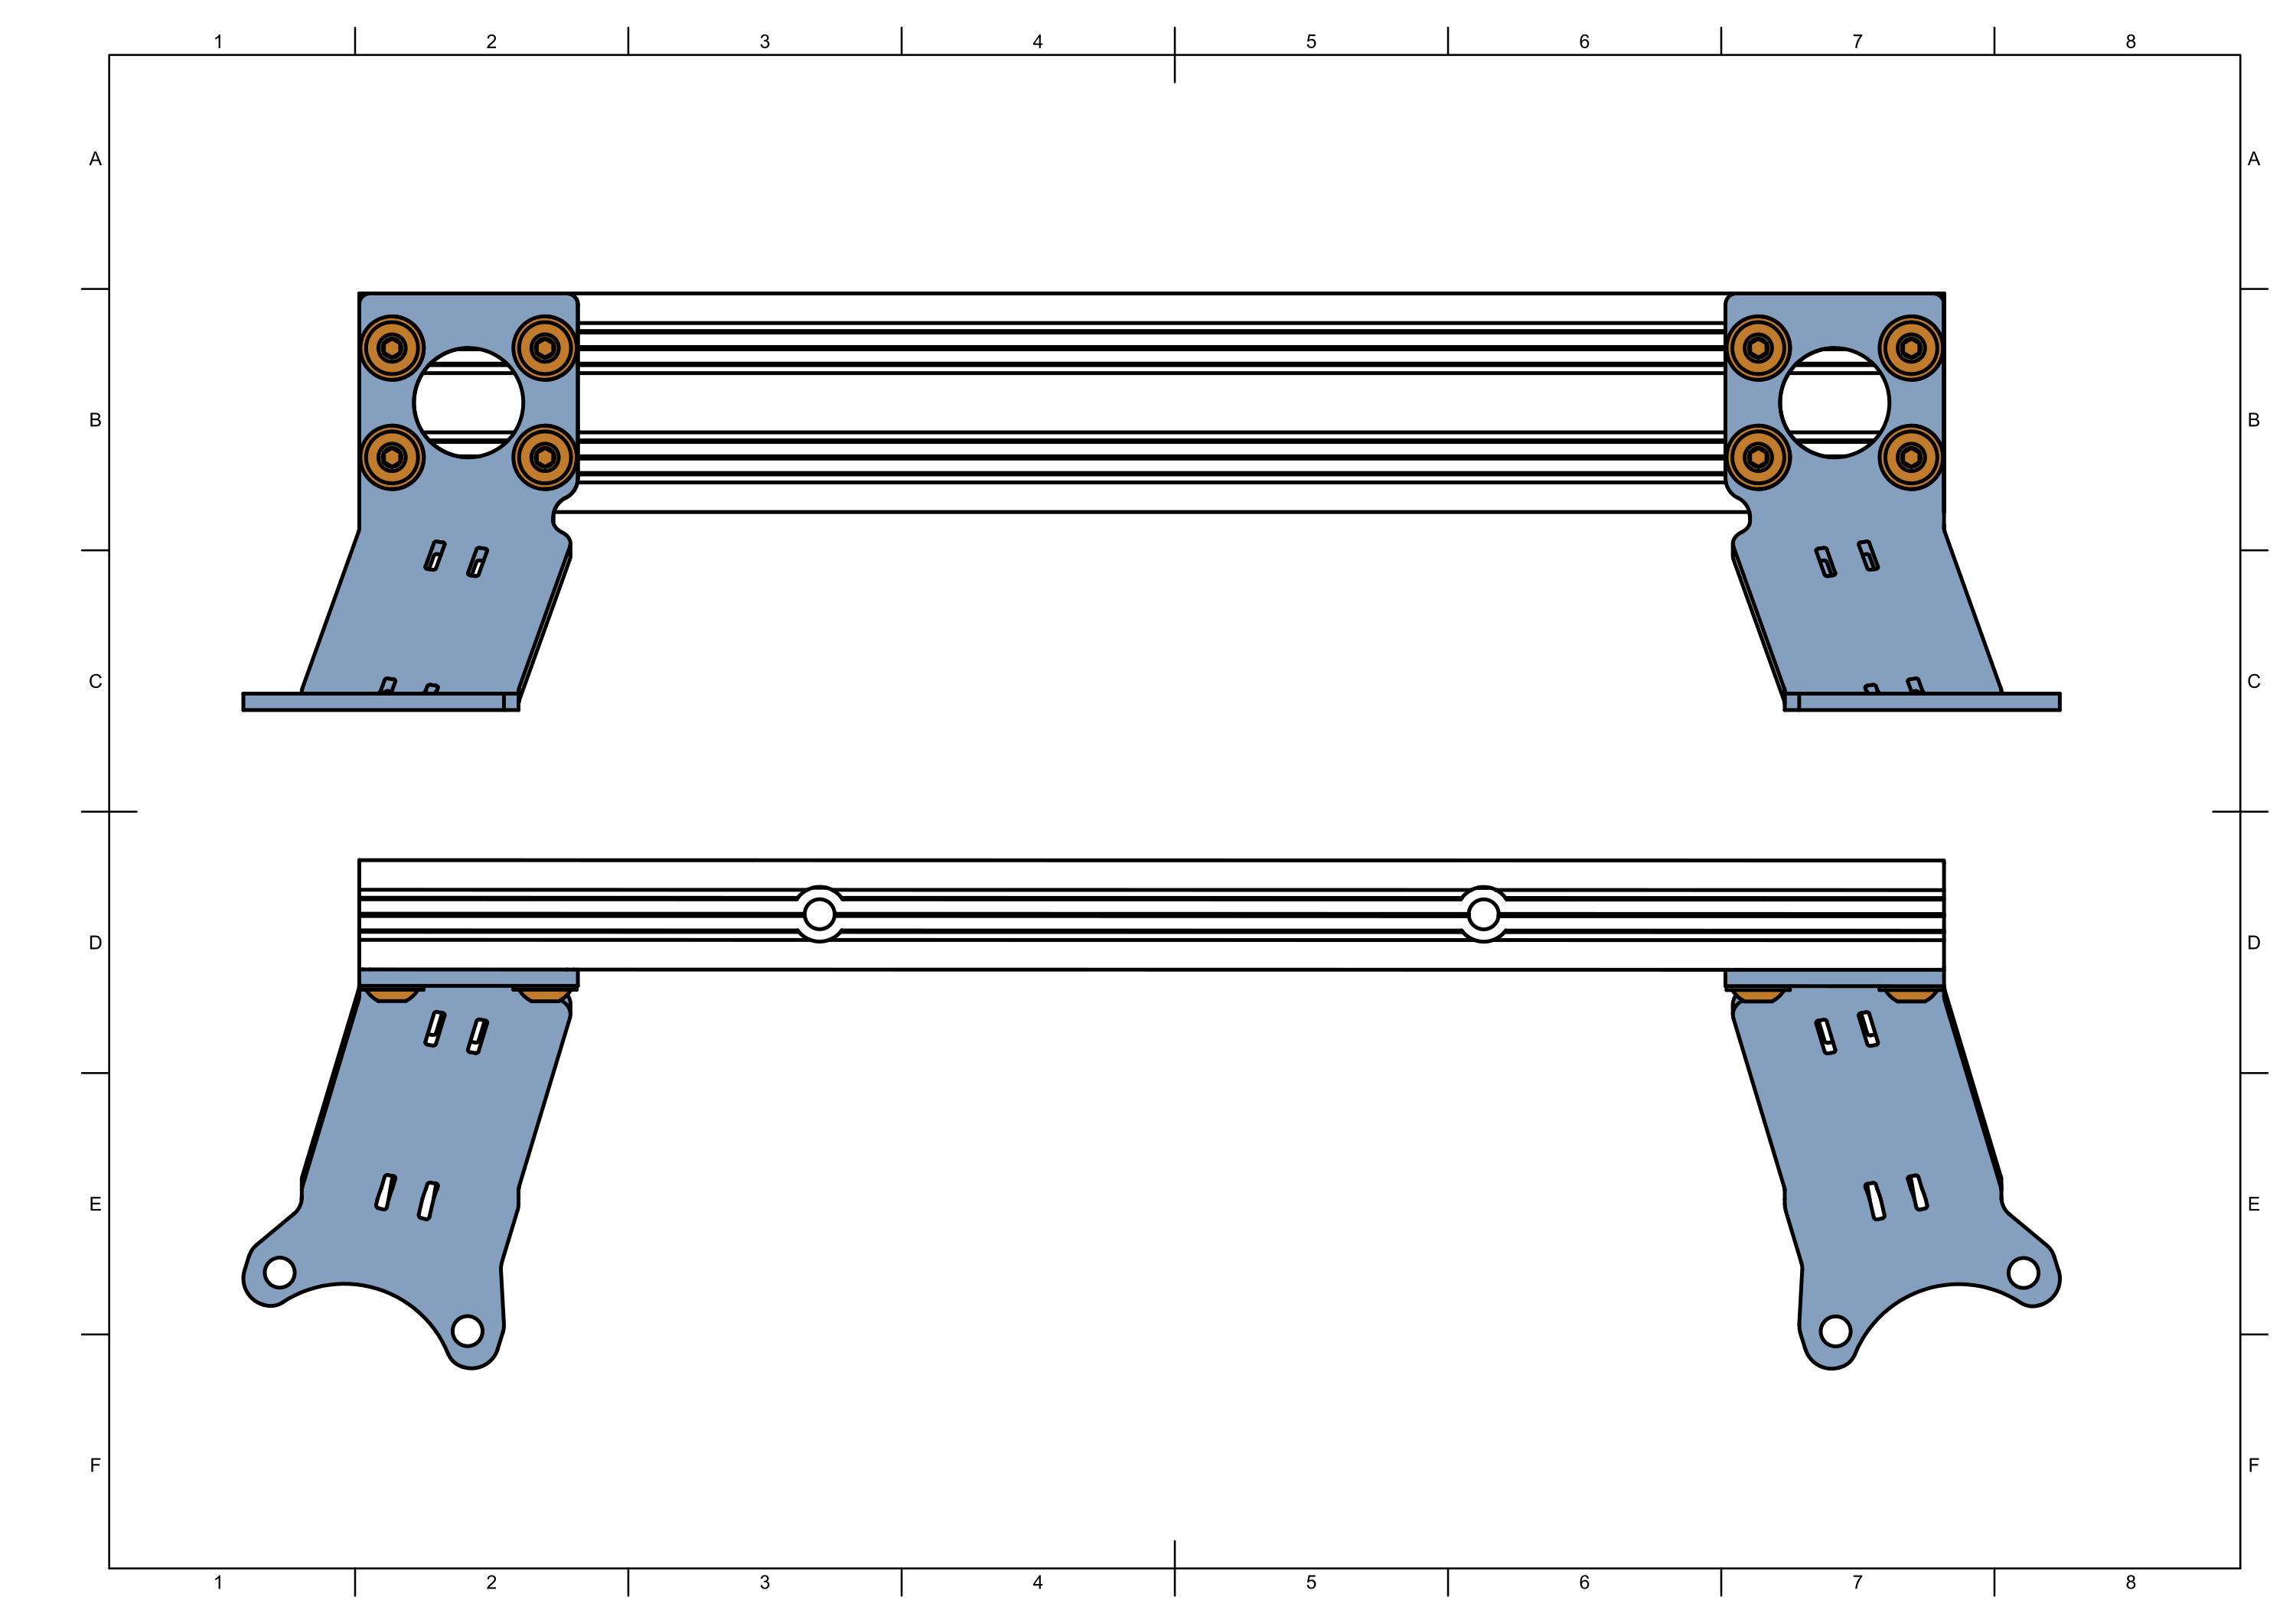
info
Repeat the steps until you have 2 suspension mounts.
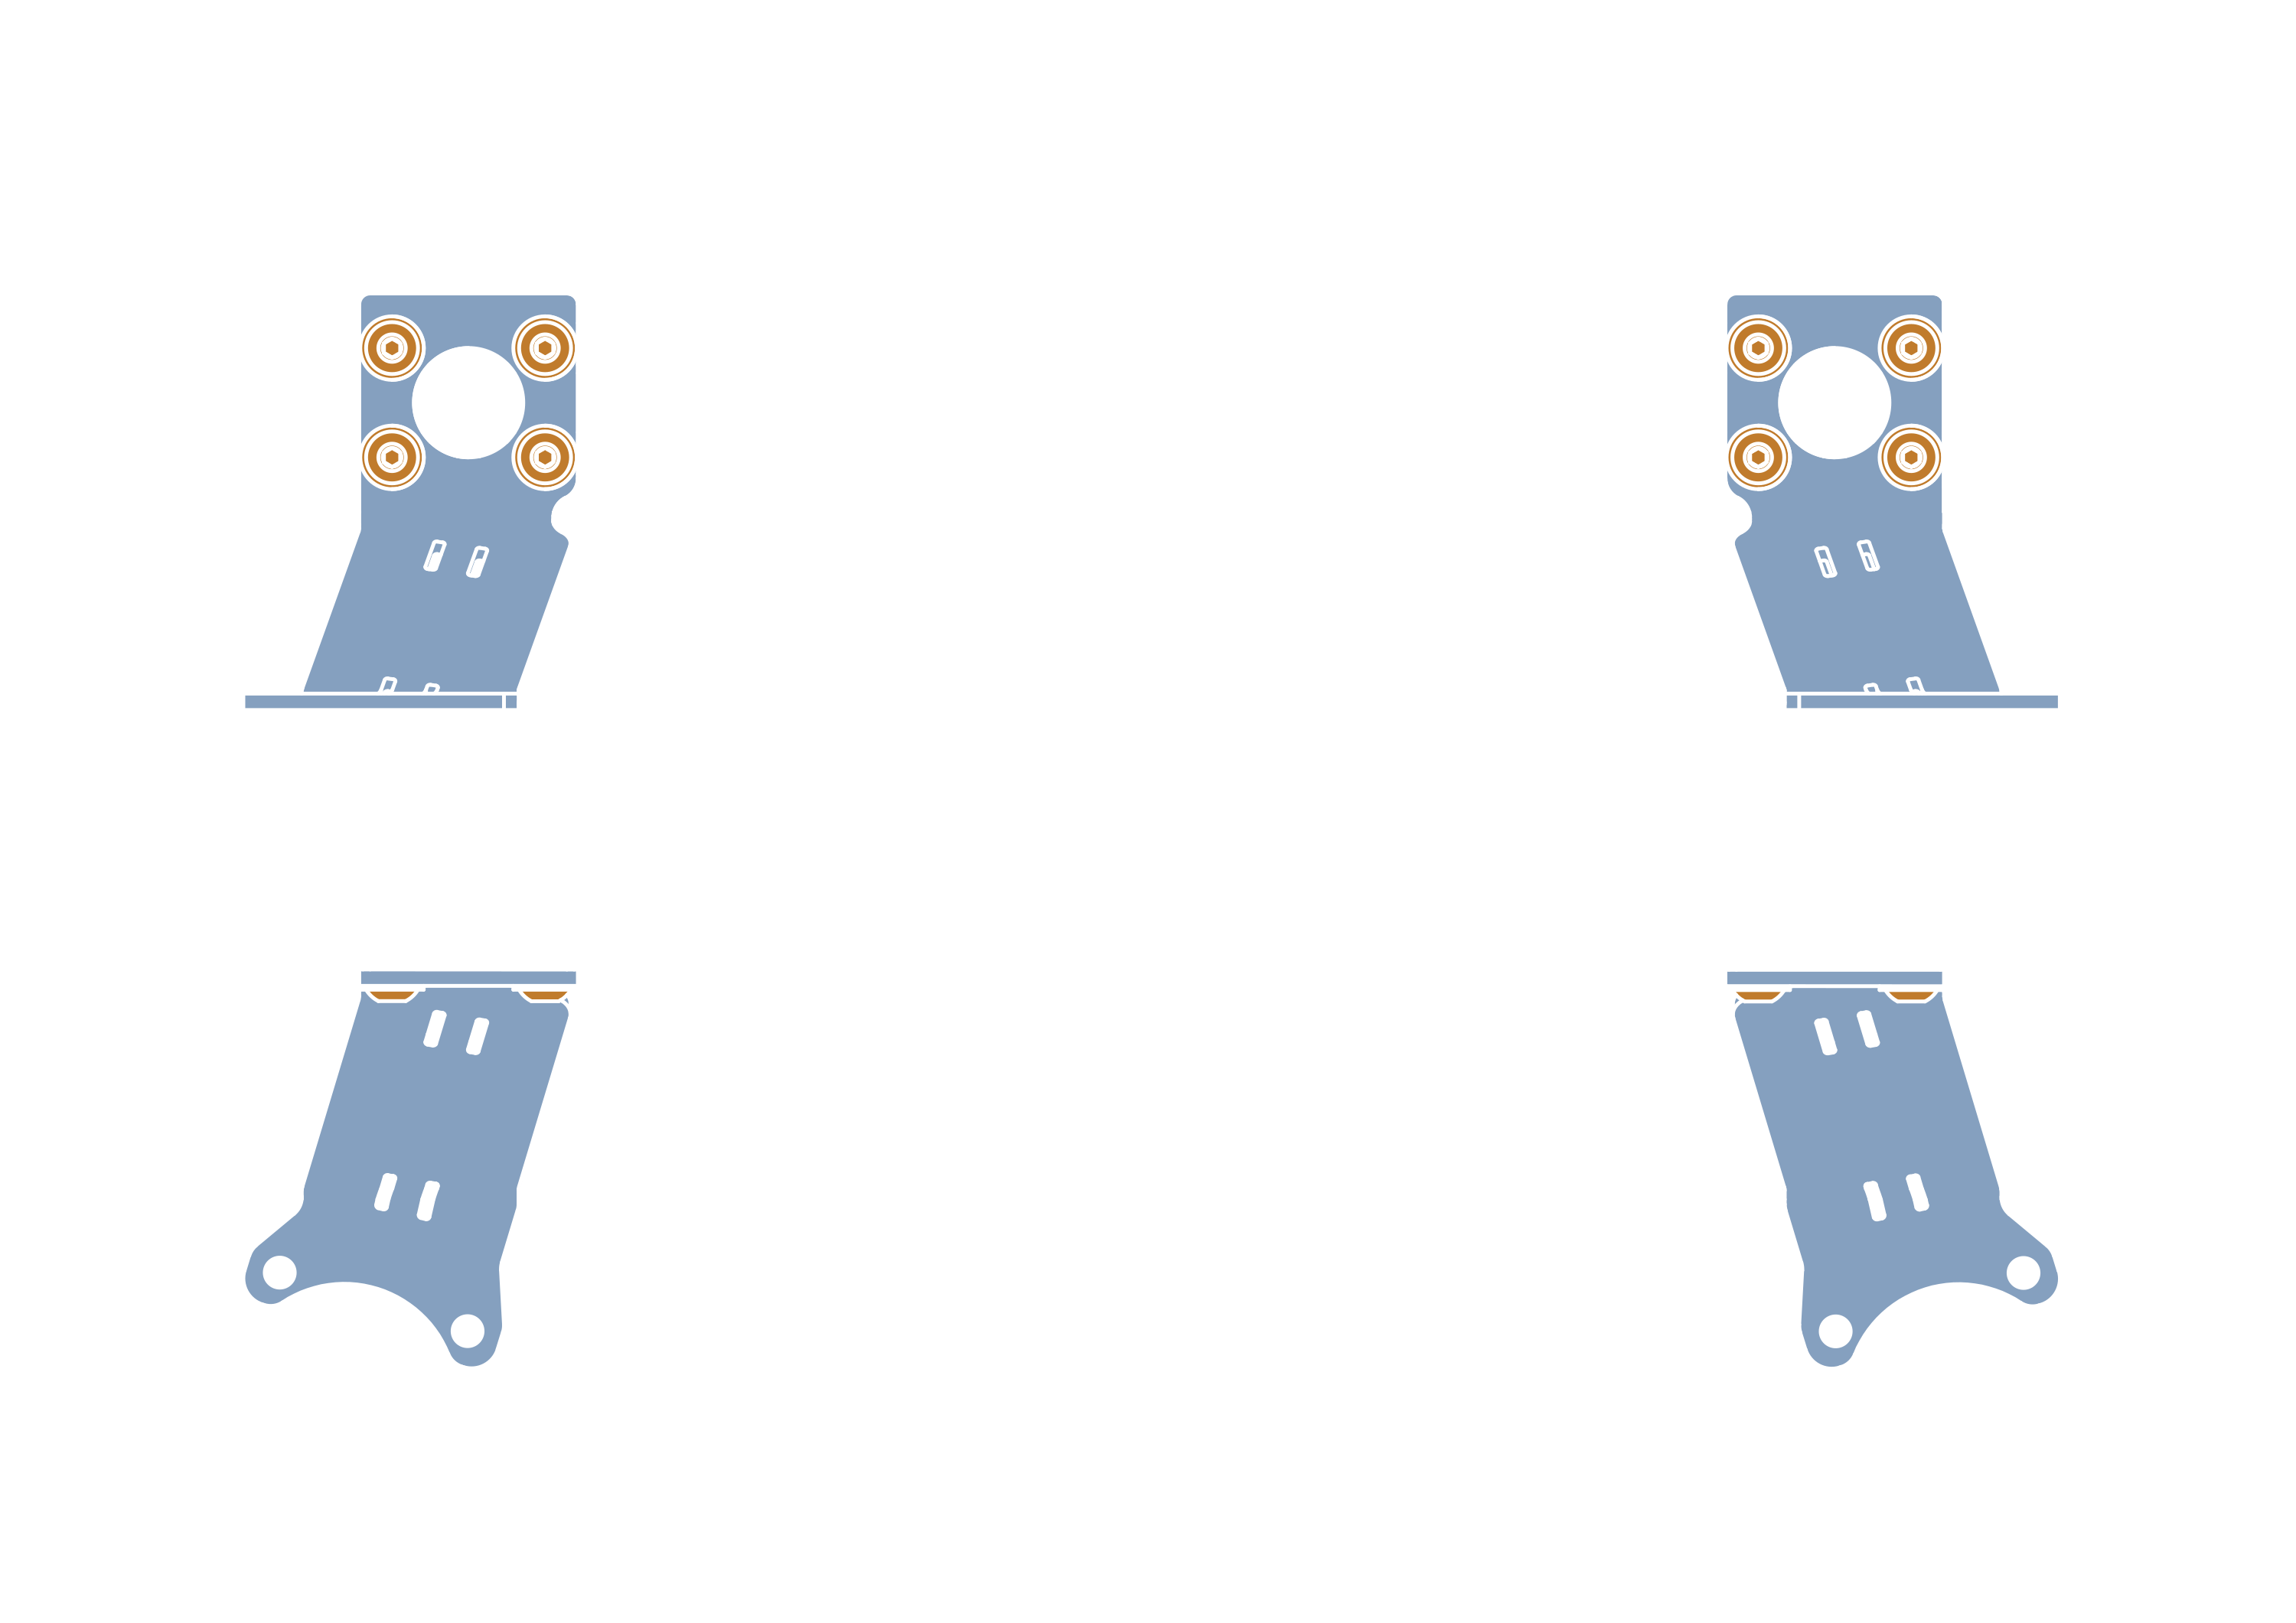
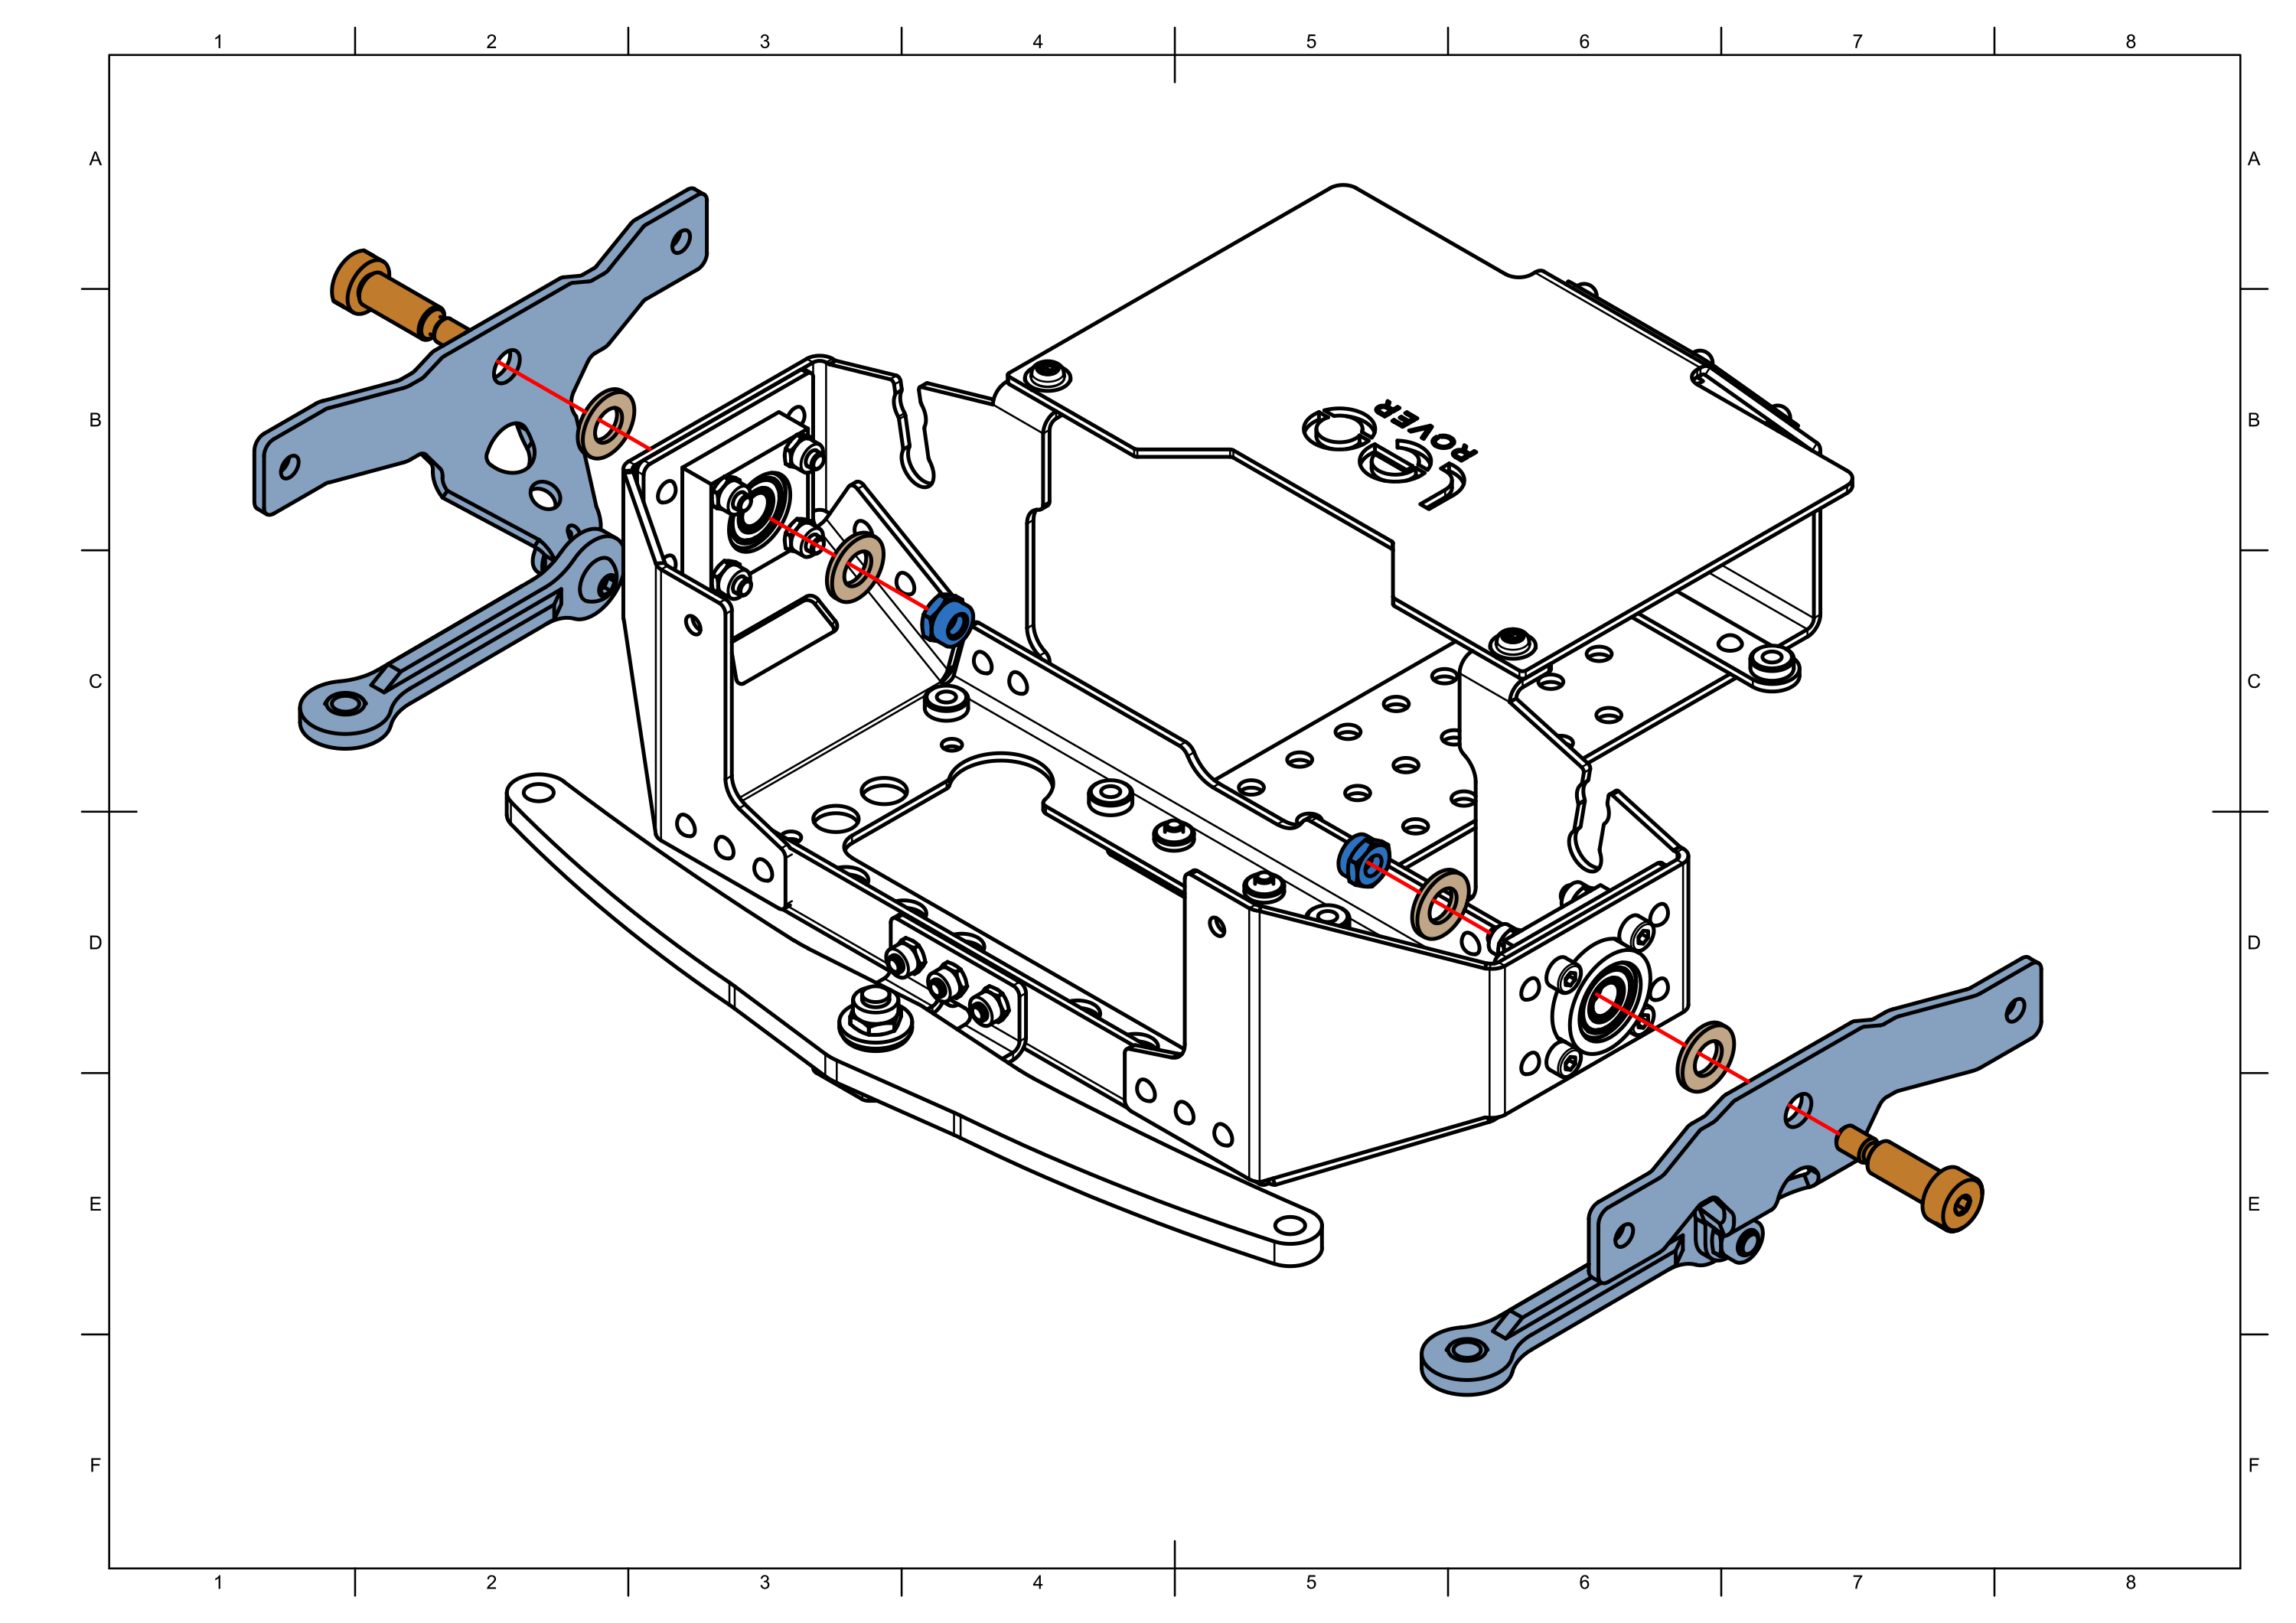
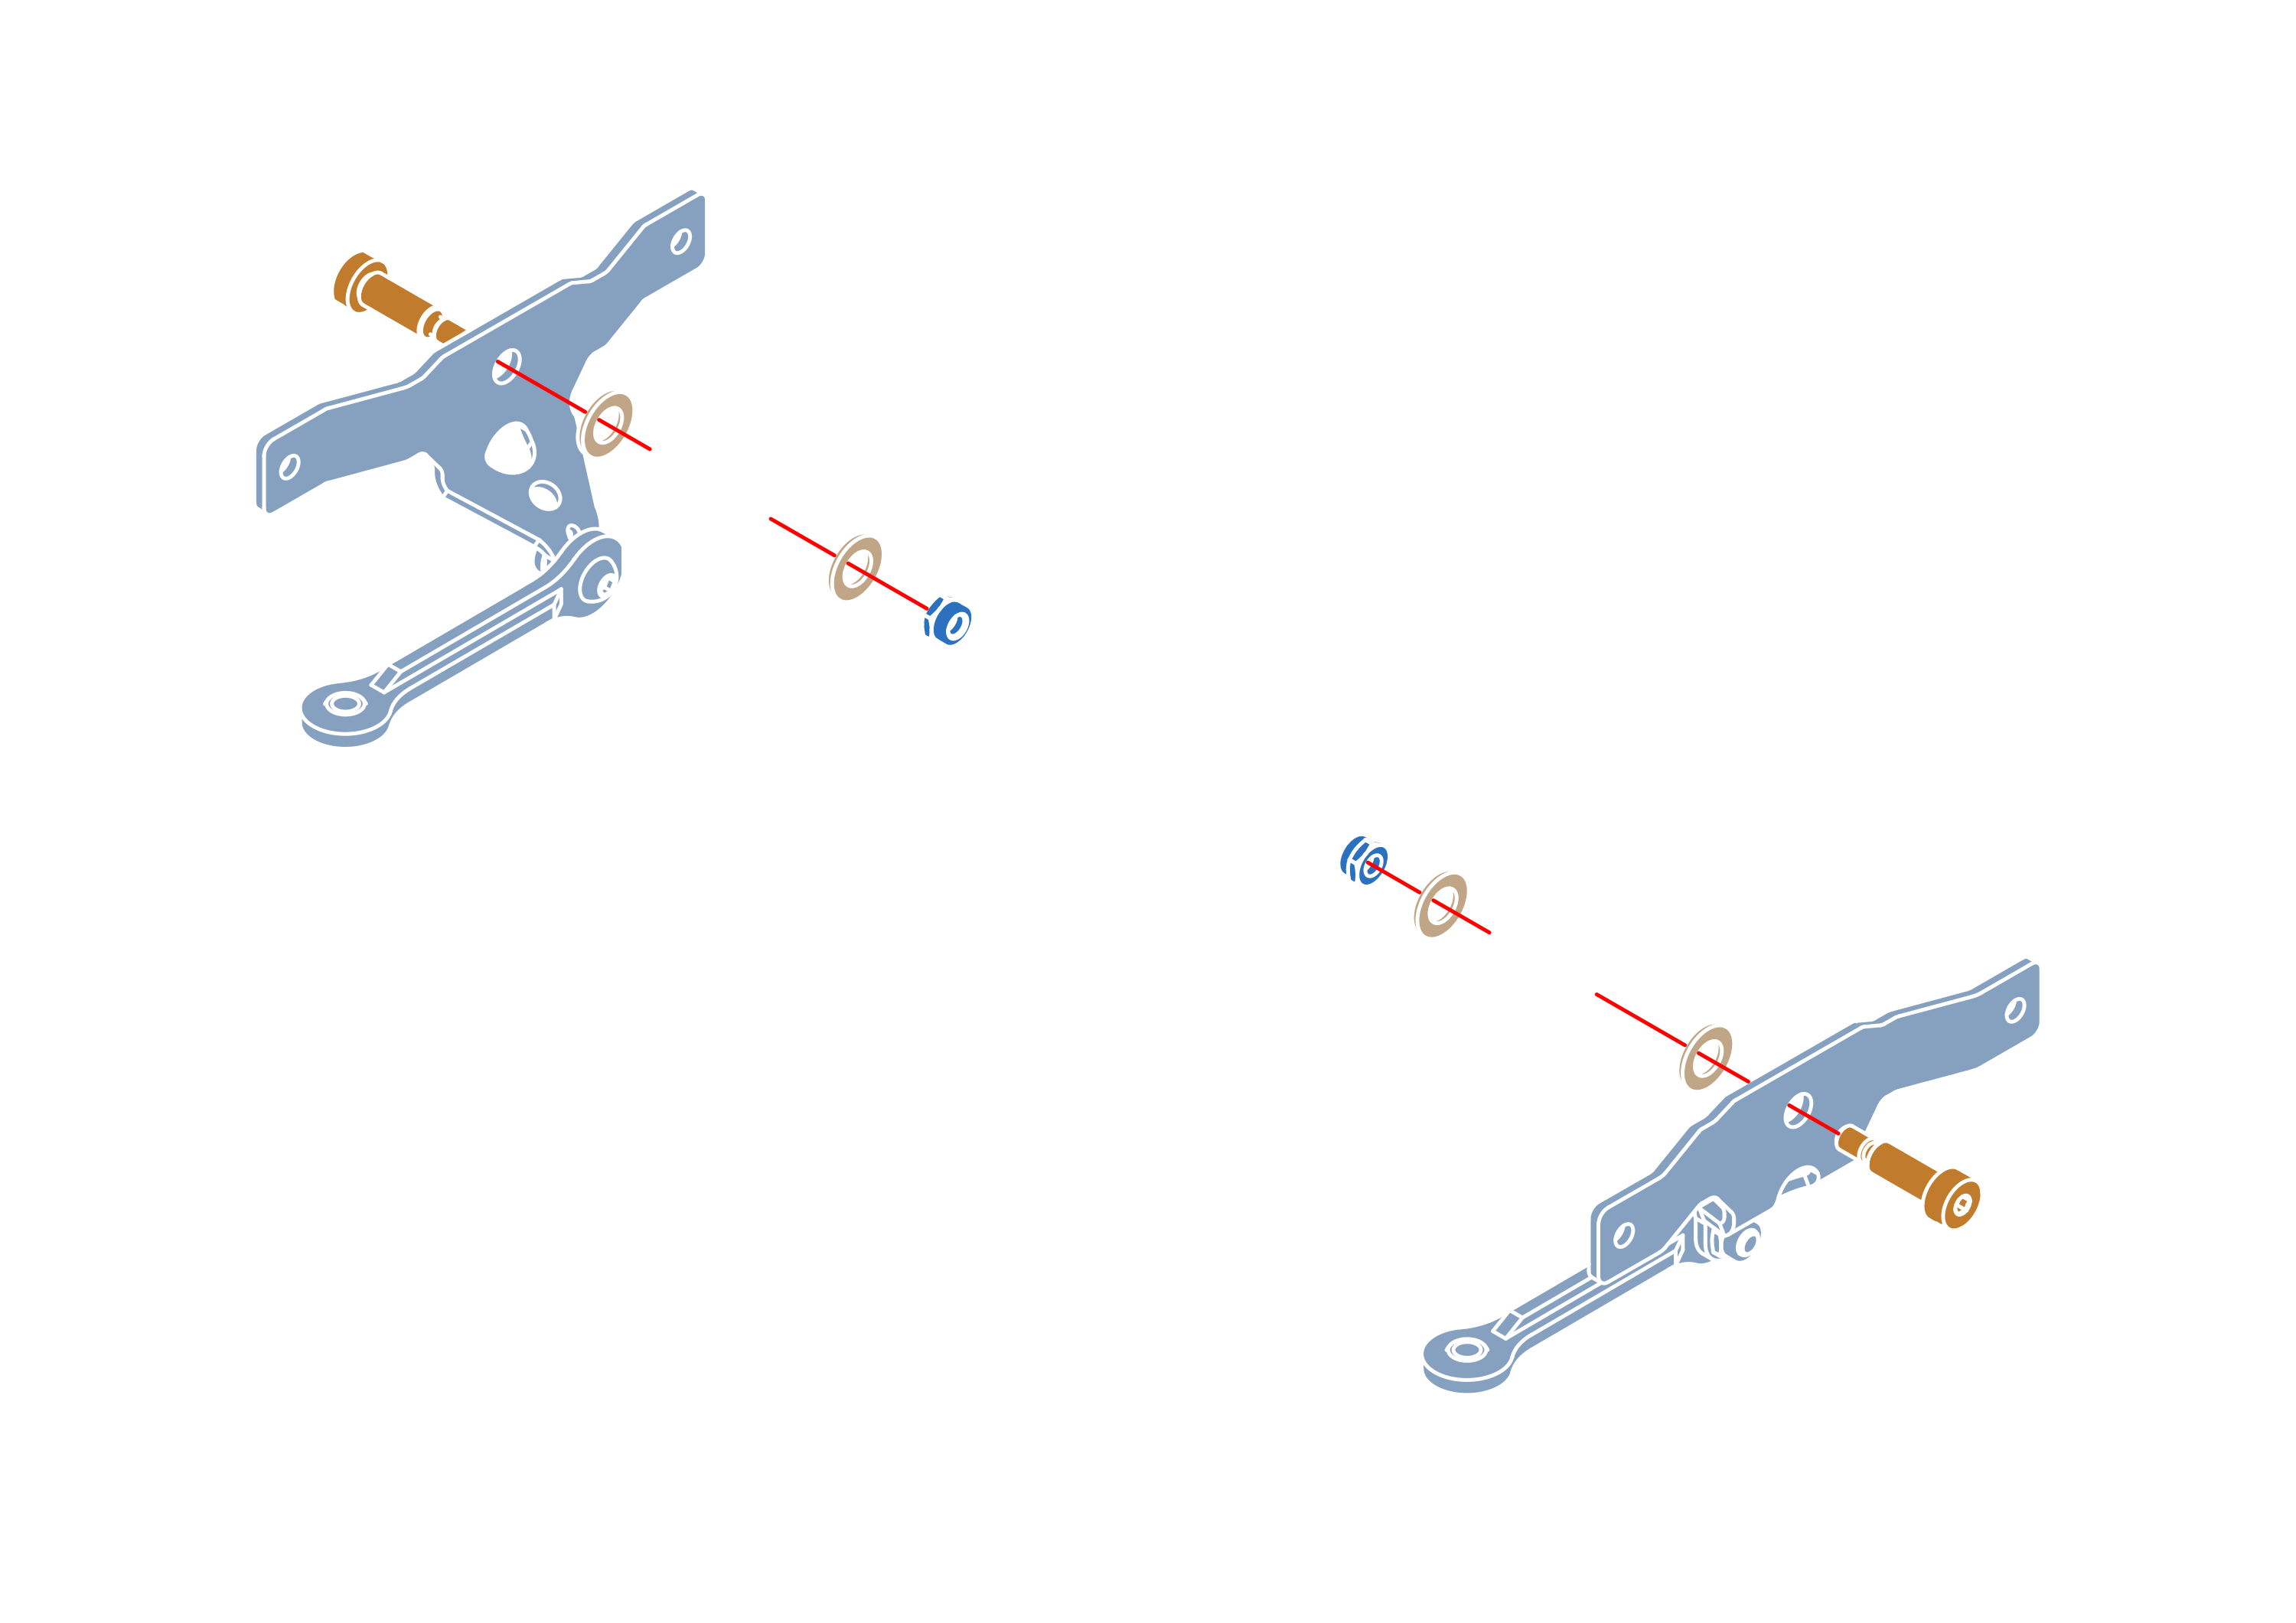
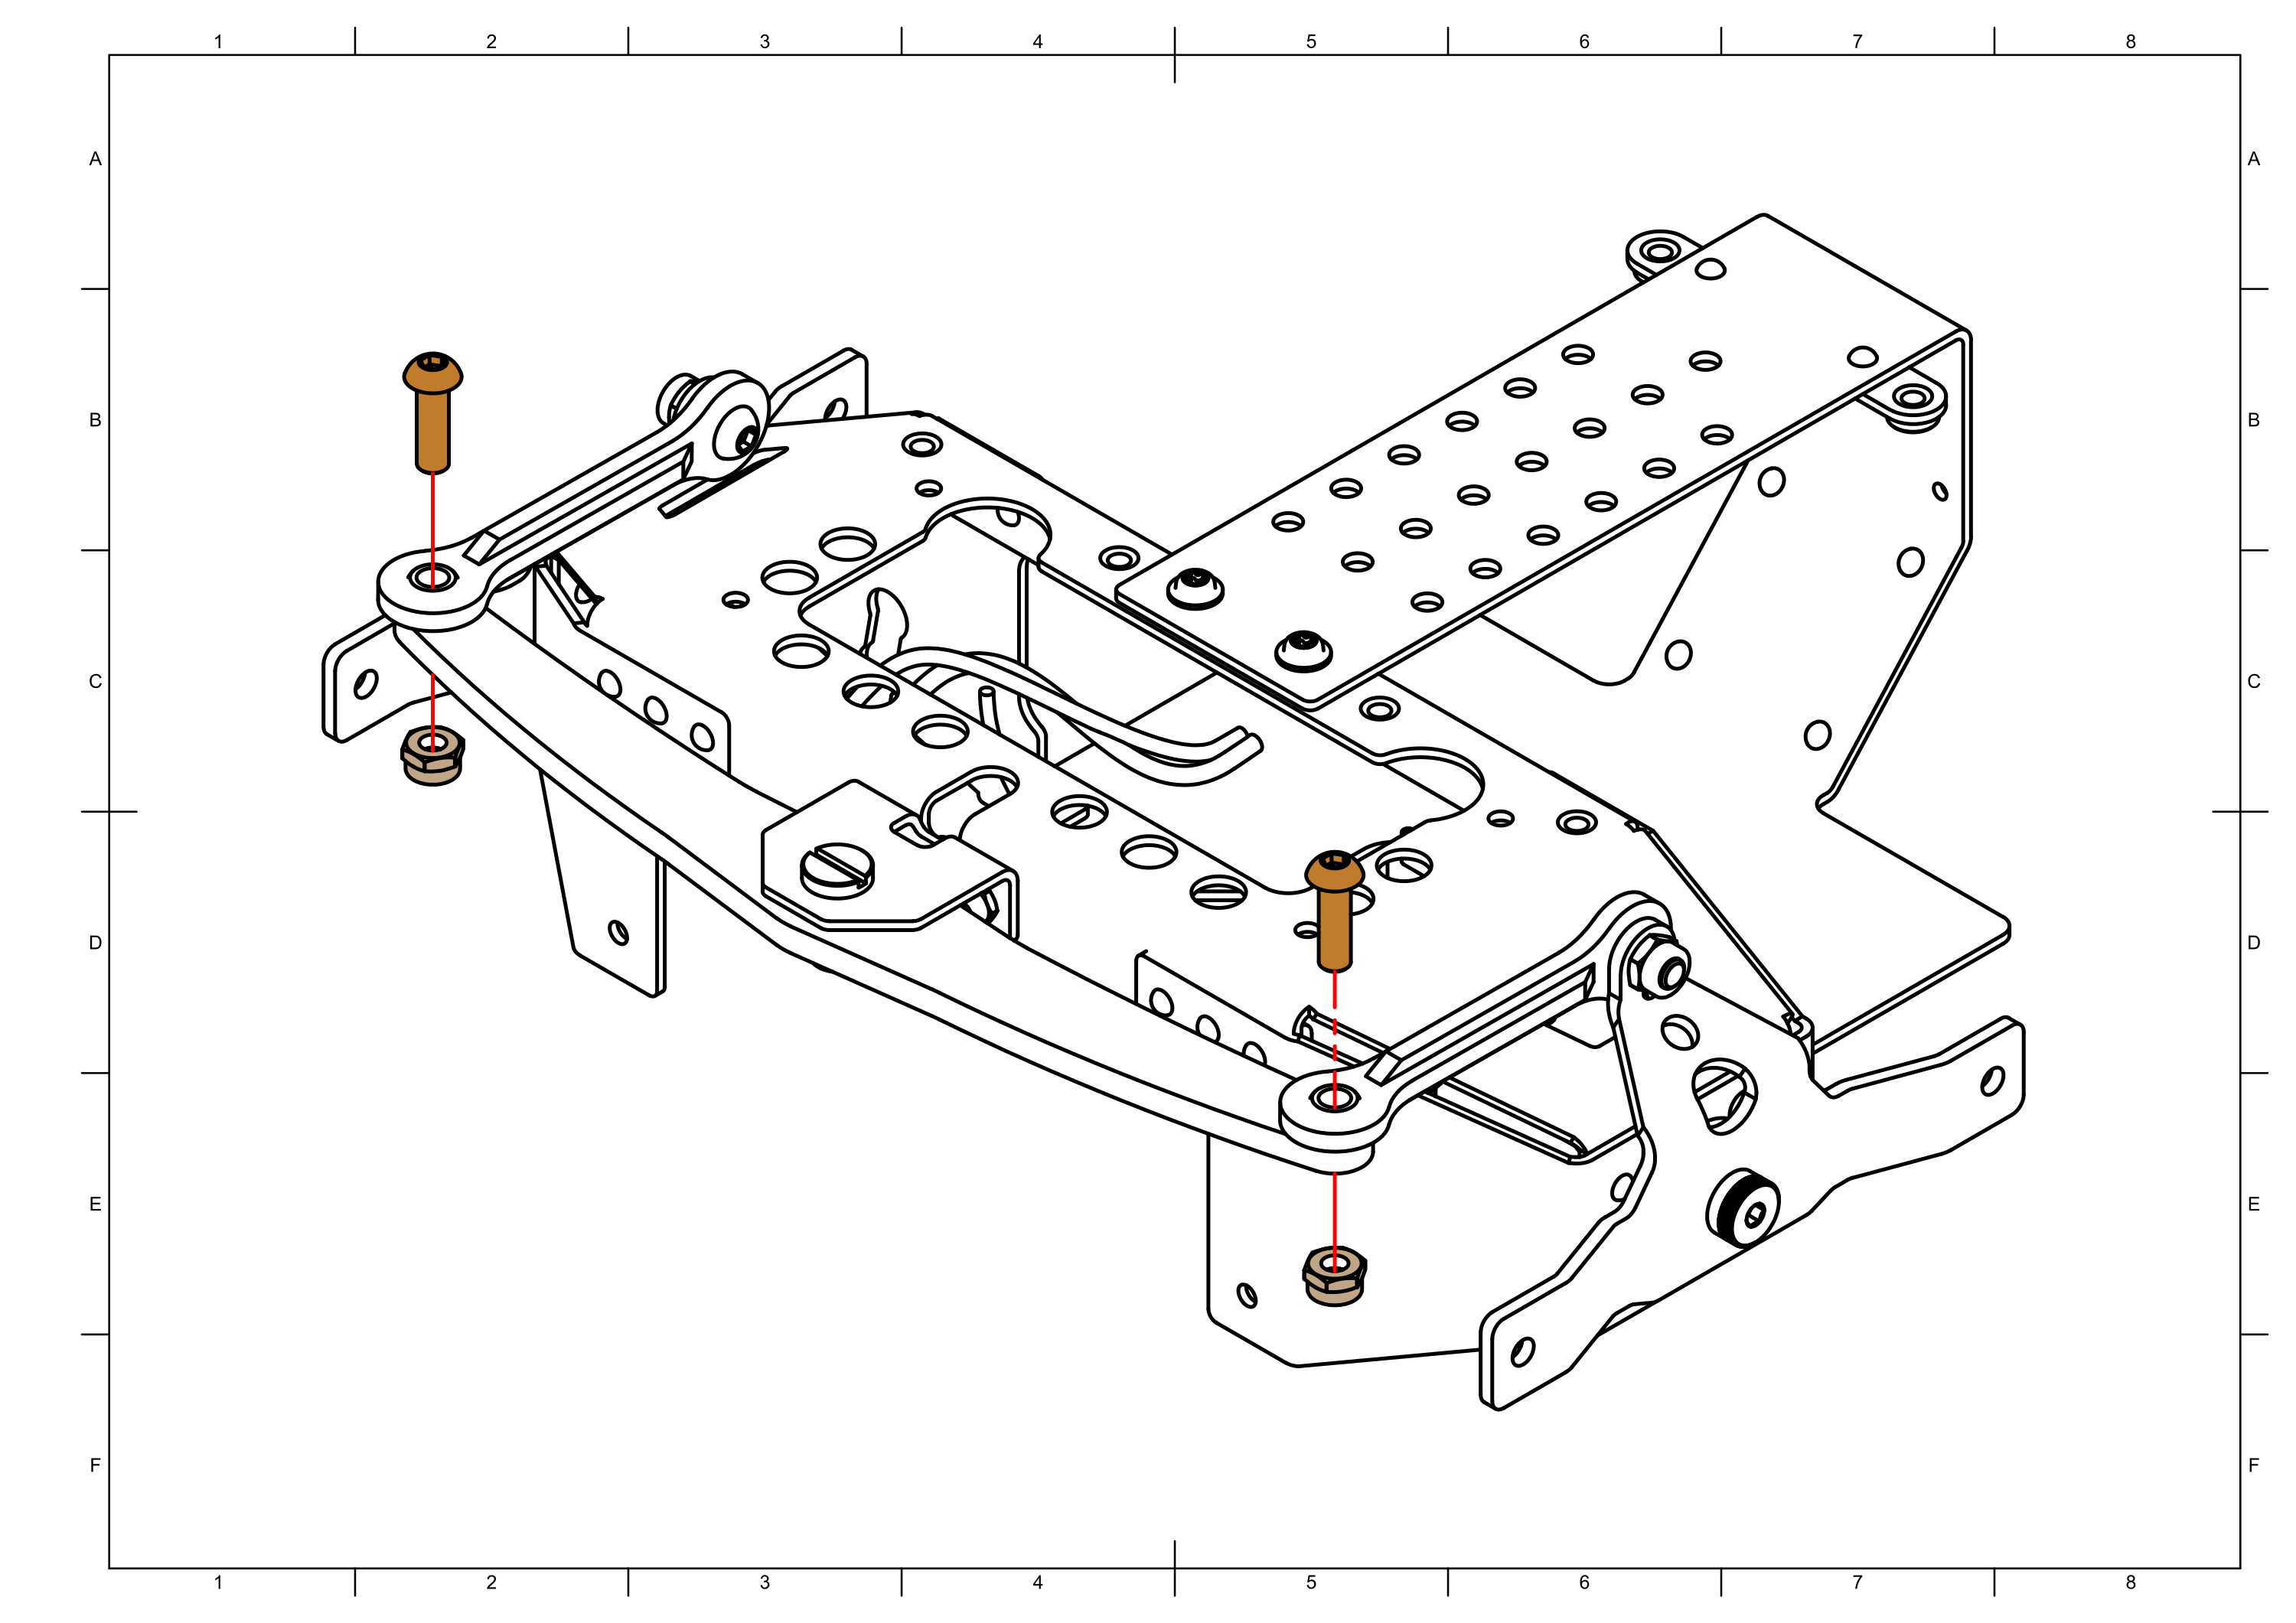
Step 3


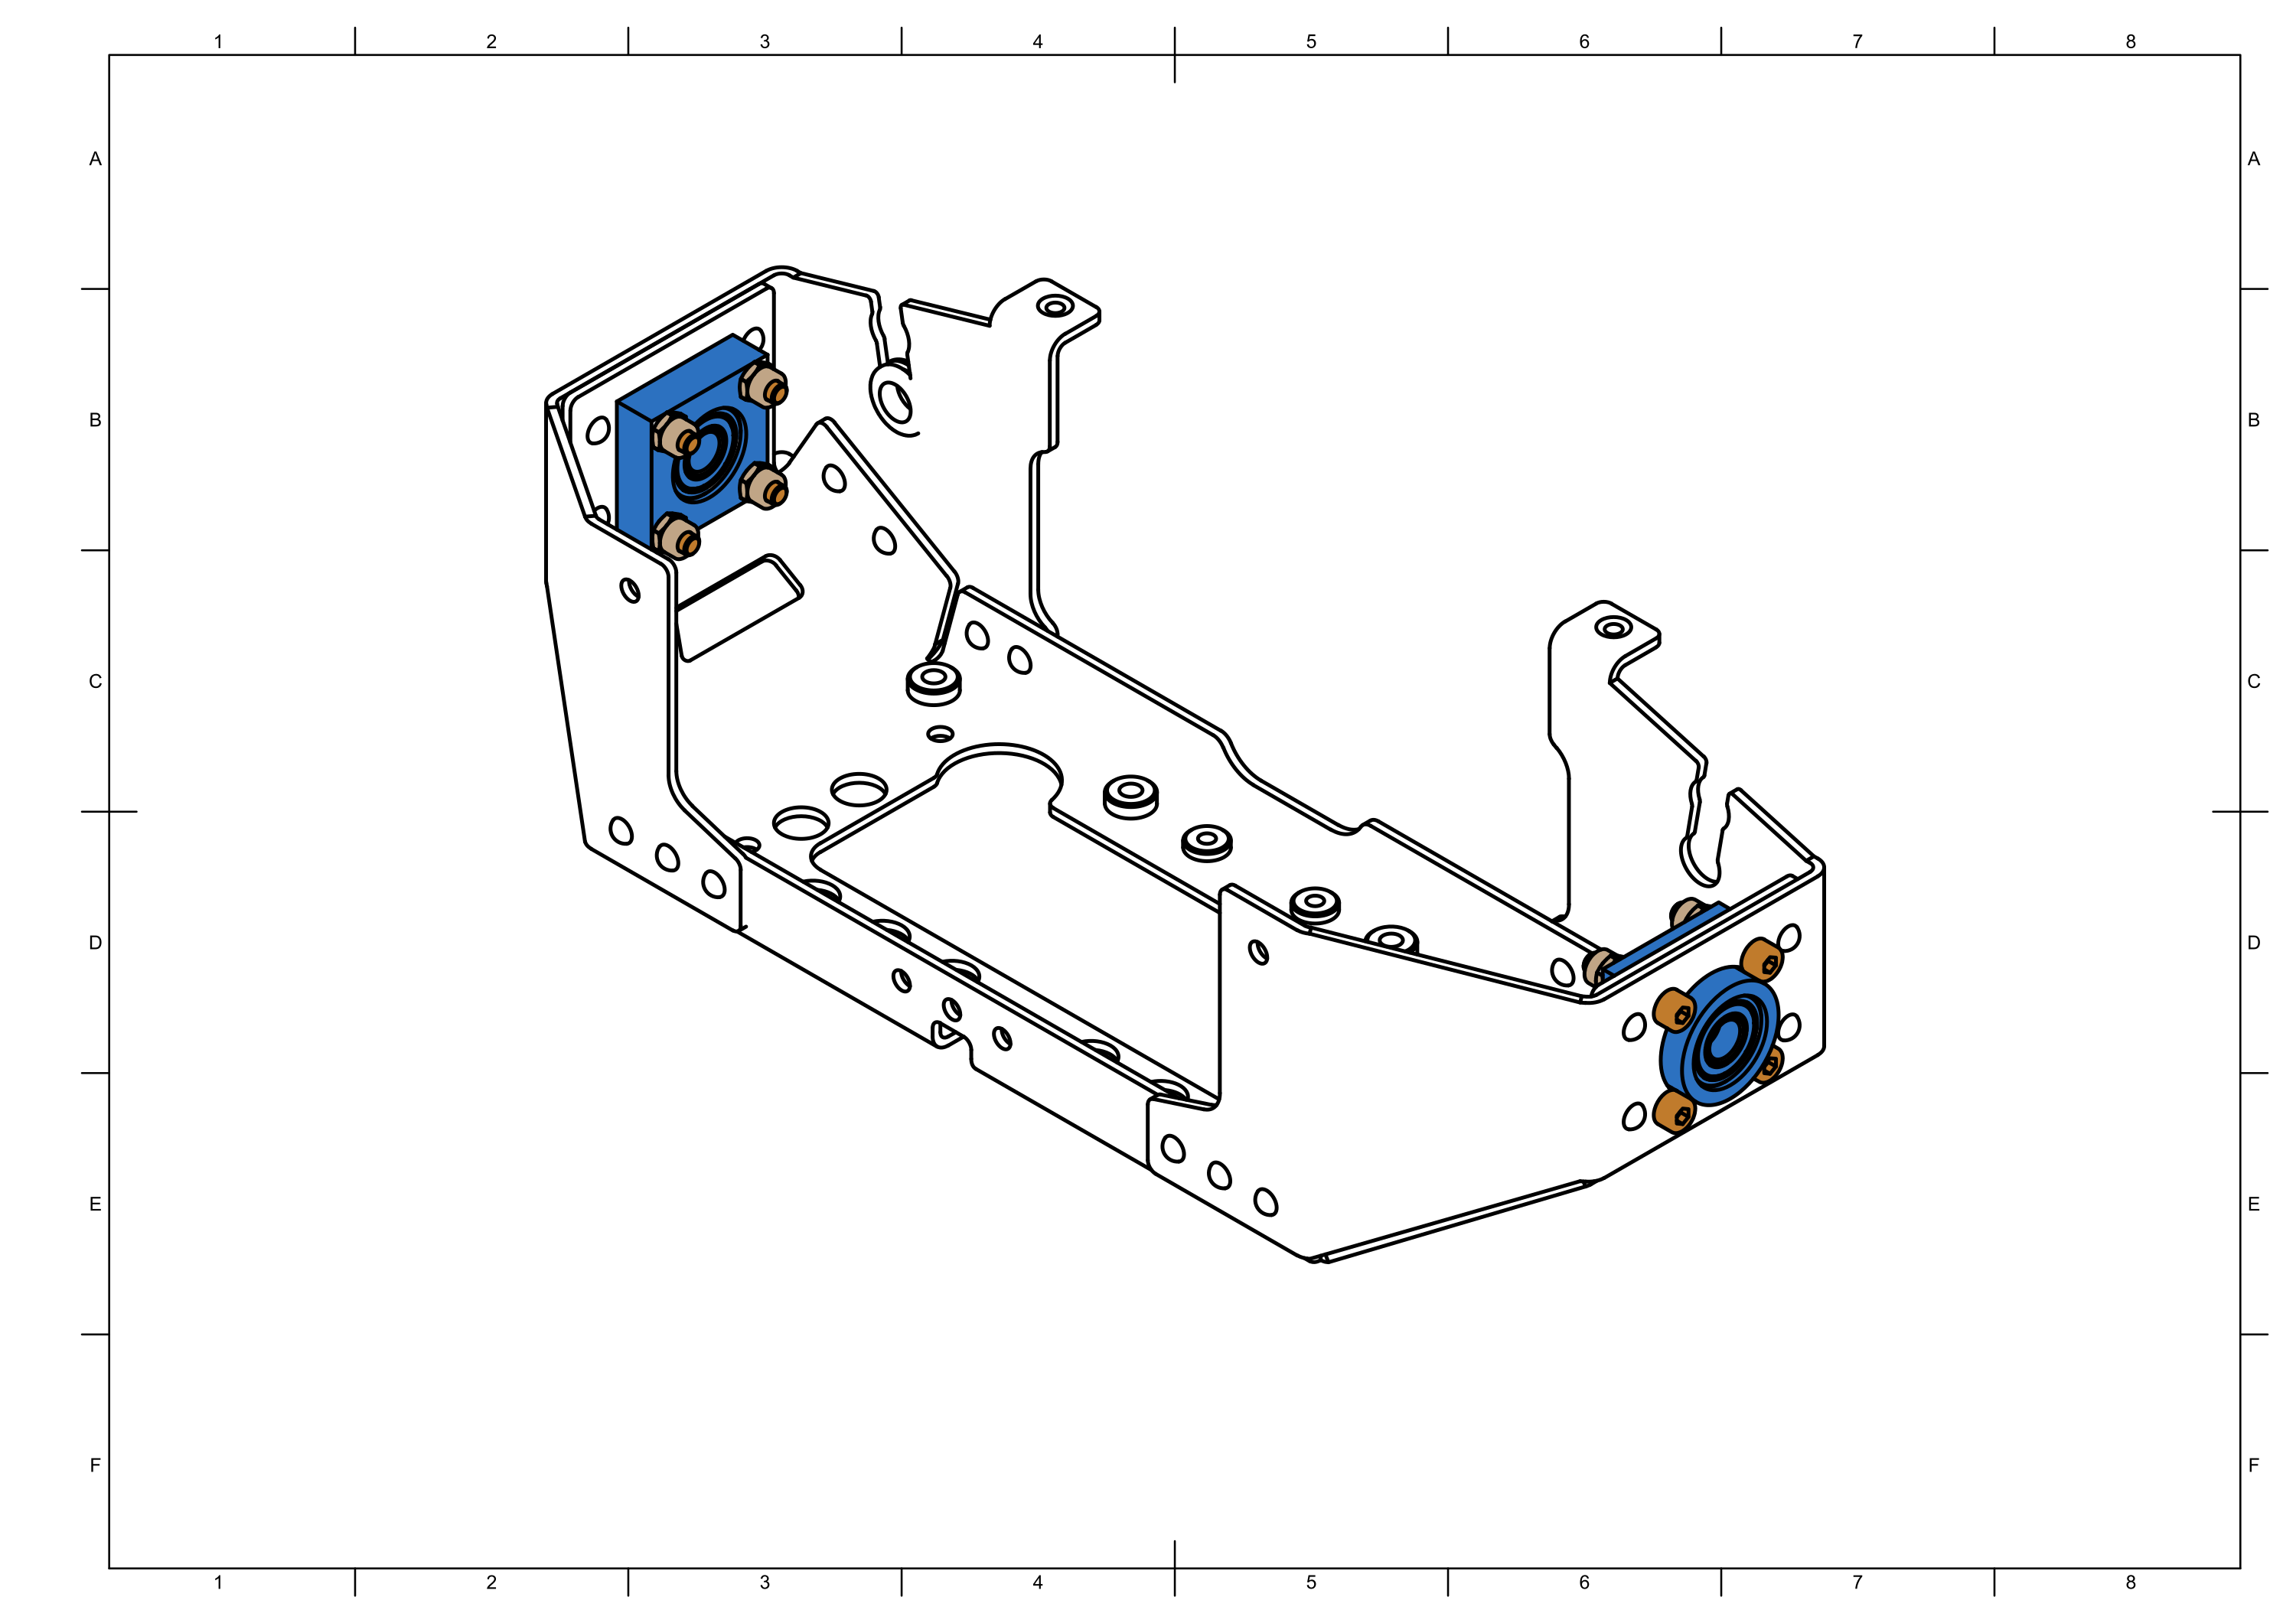
Step 4


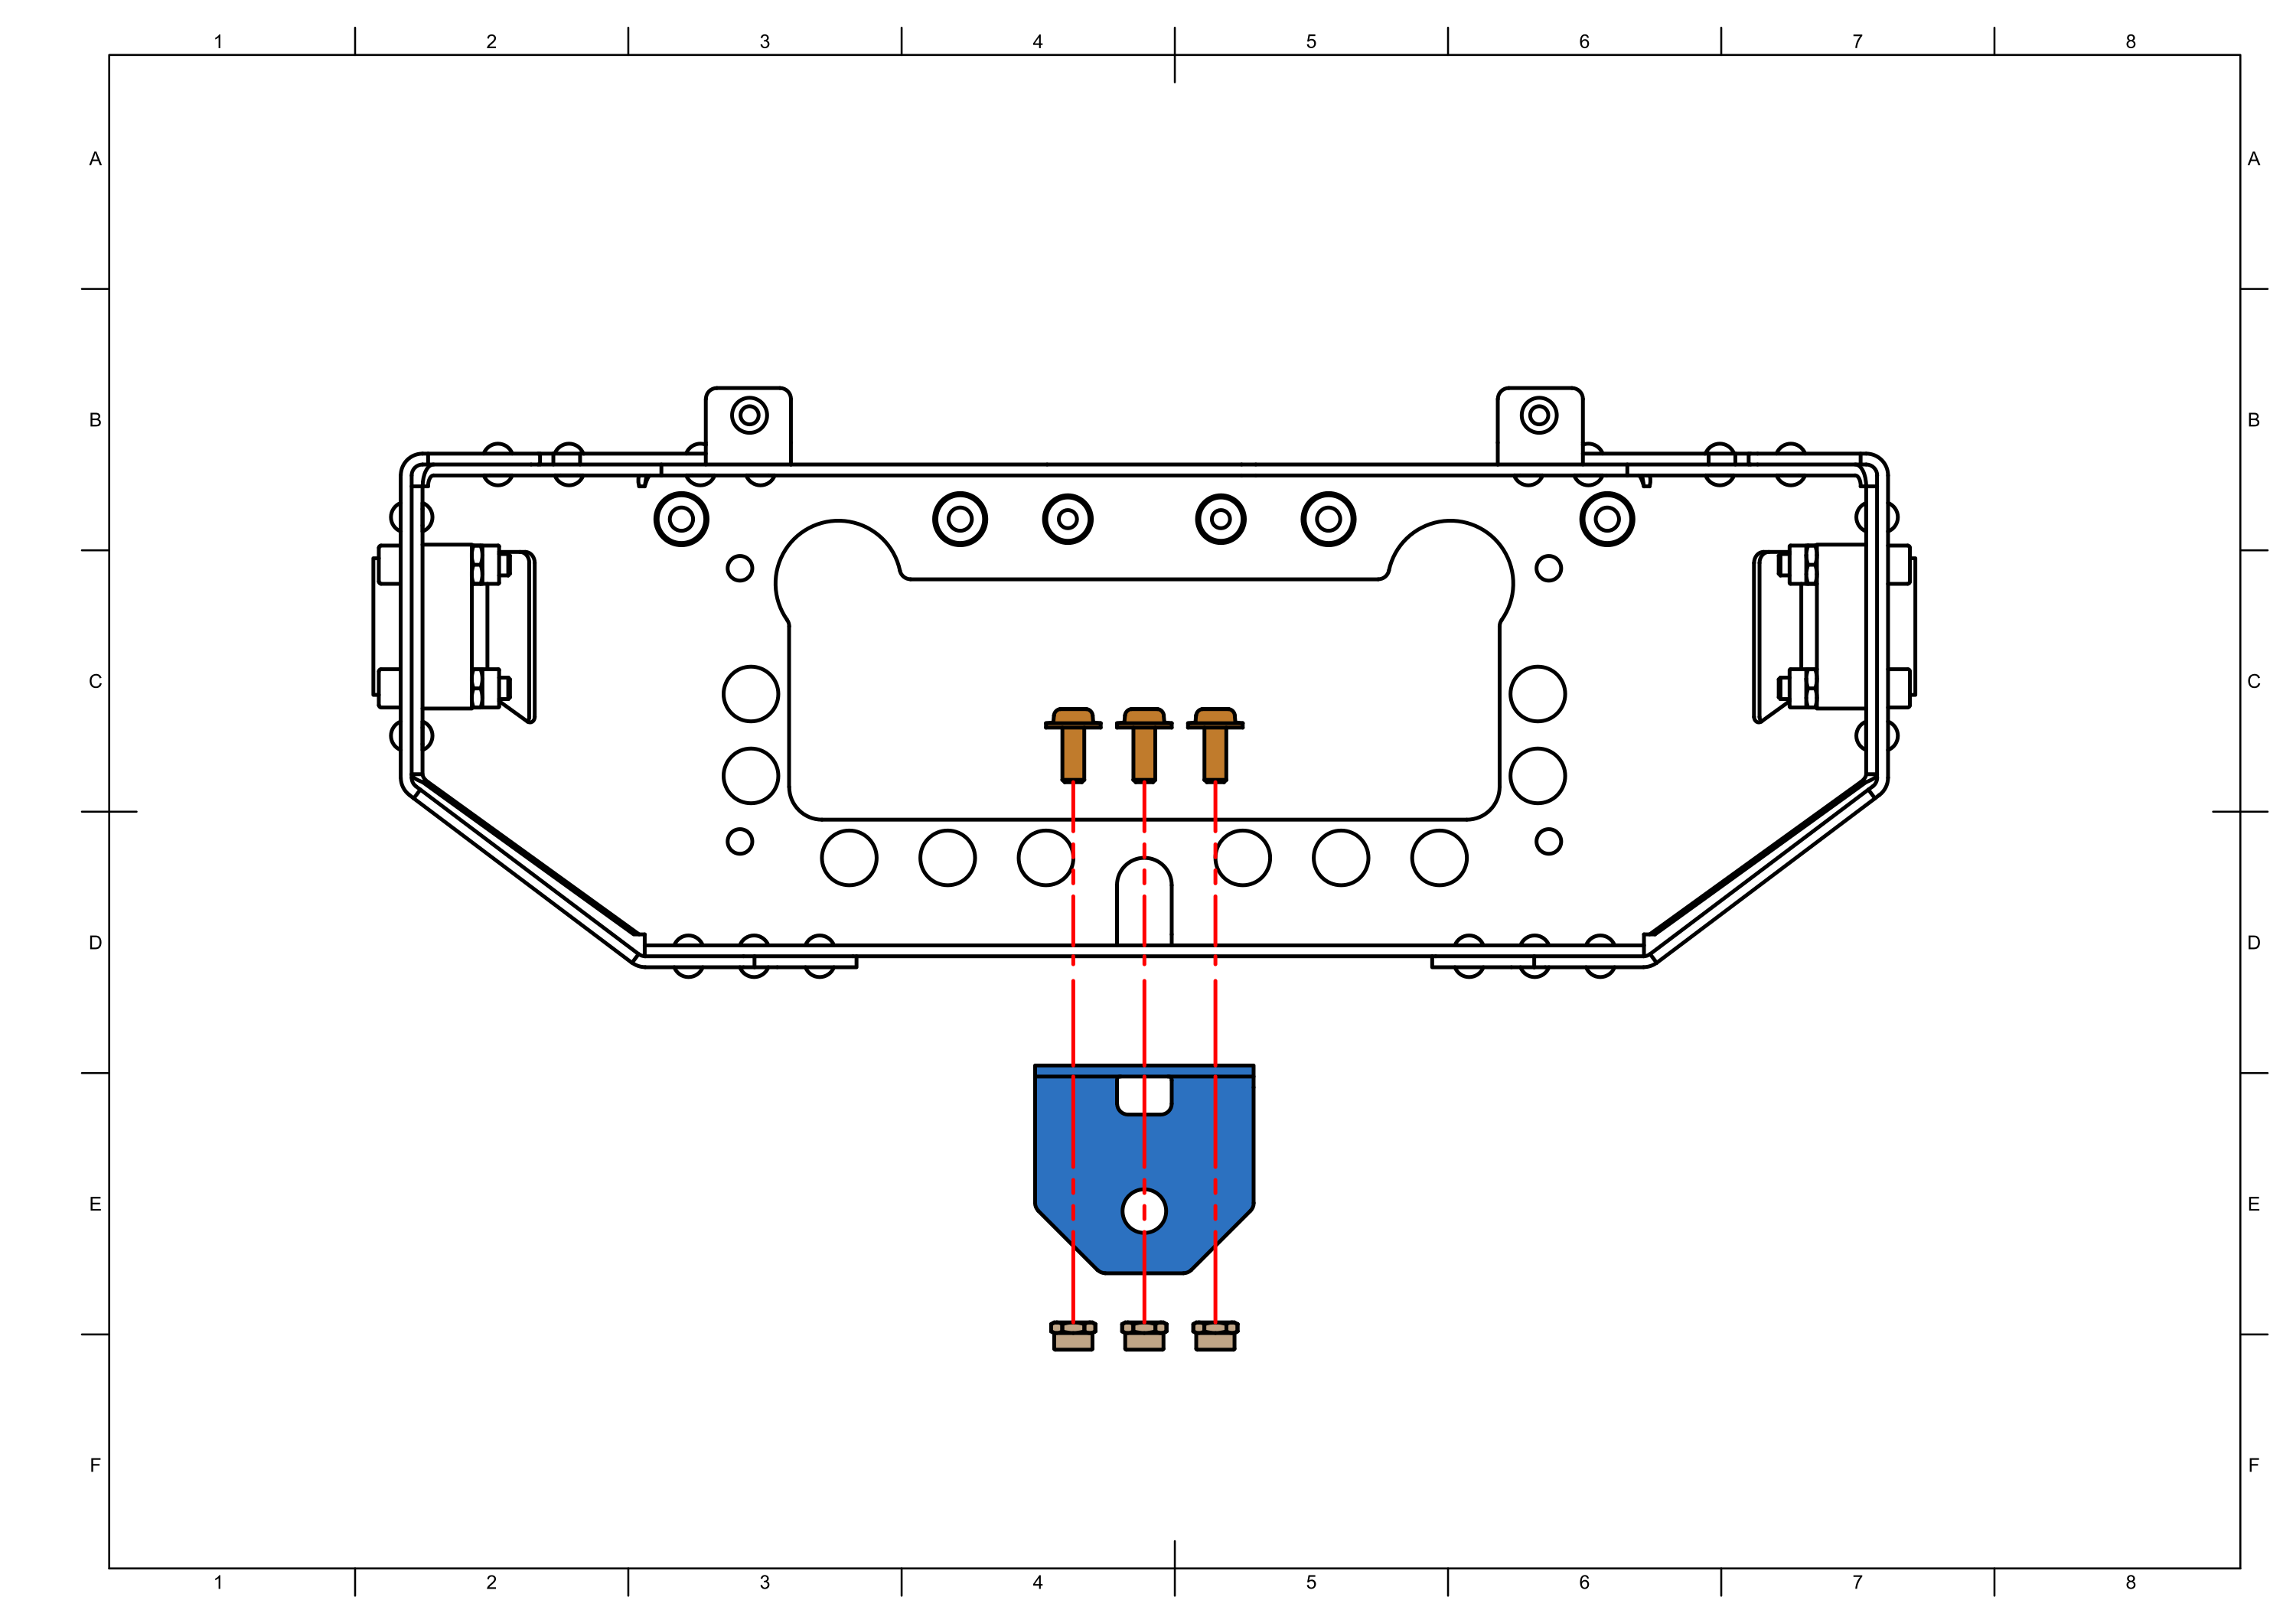

Step 5


note
Make sure that the screw is tight, but differential bar can move without excess play and resistance.
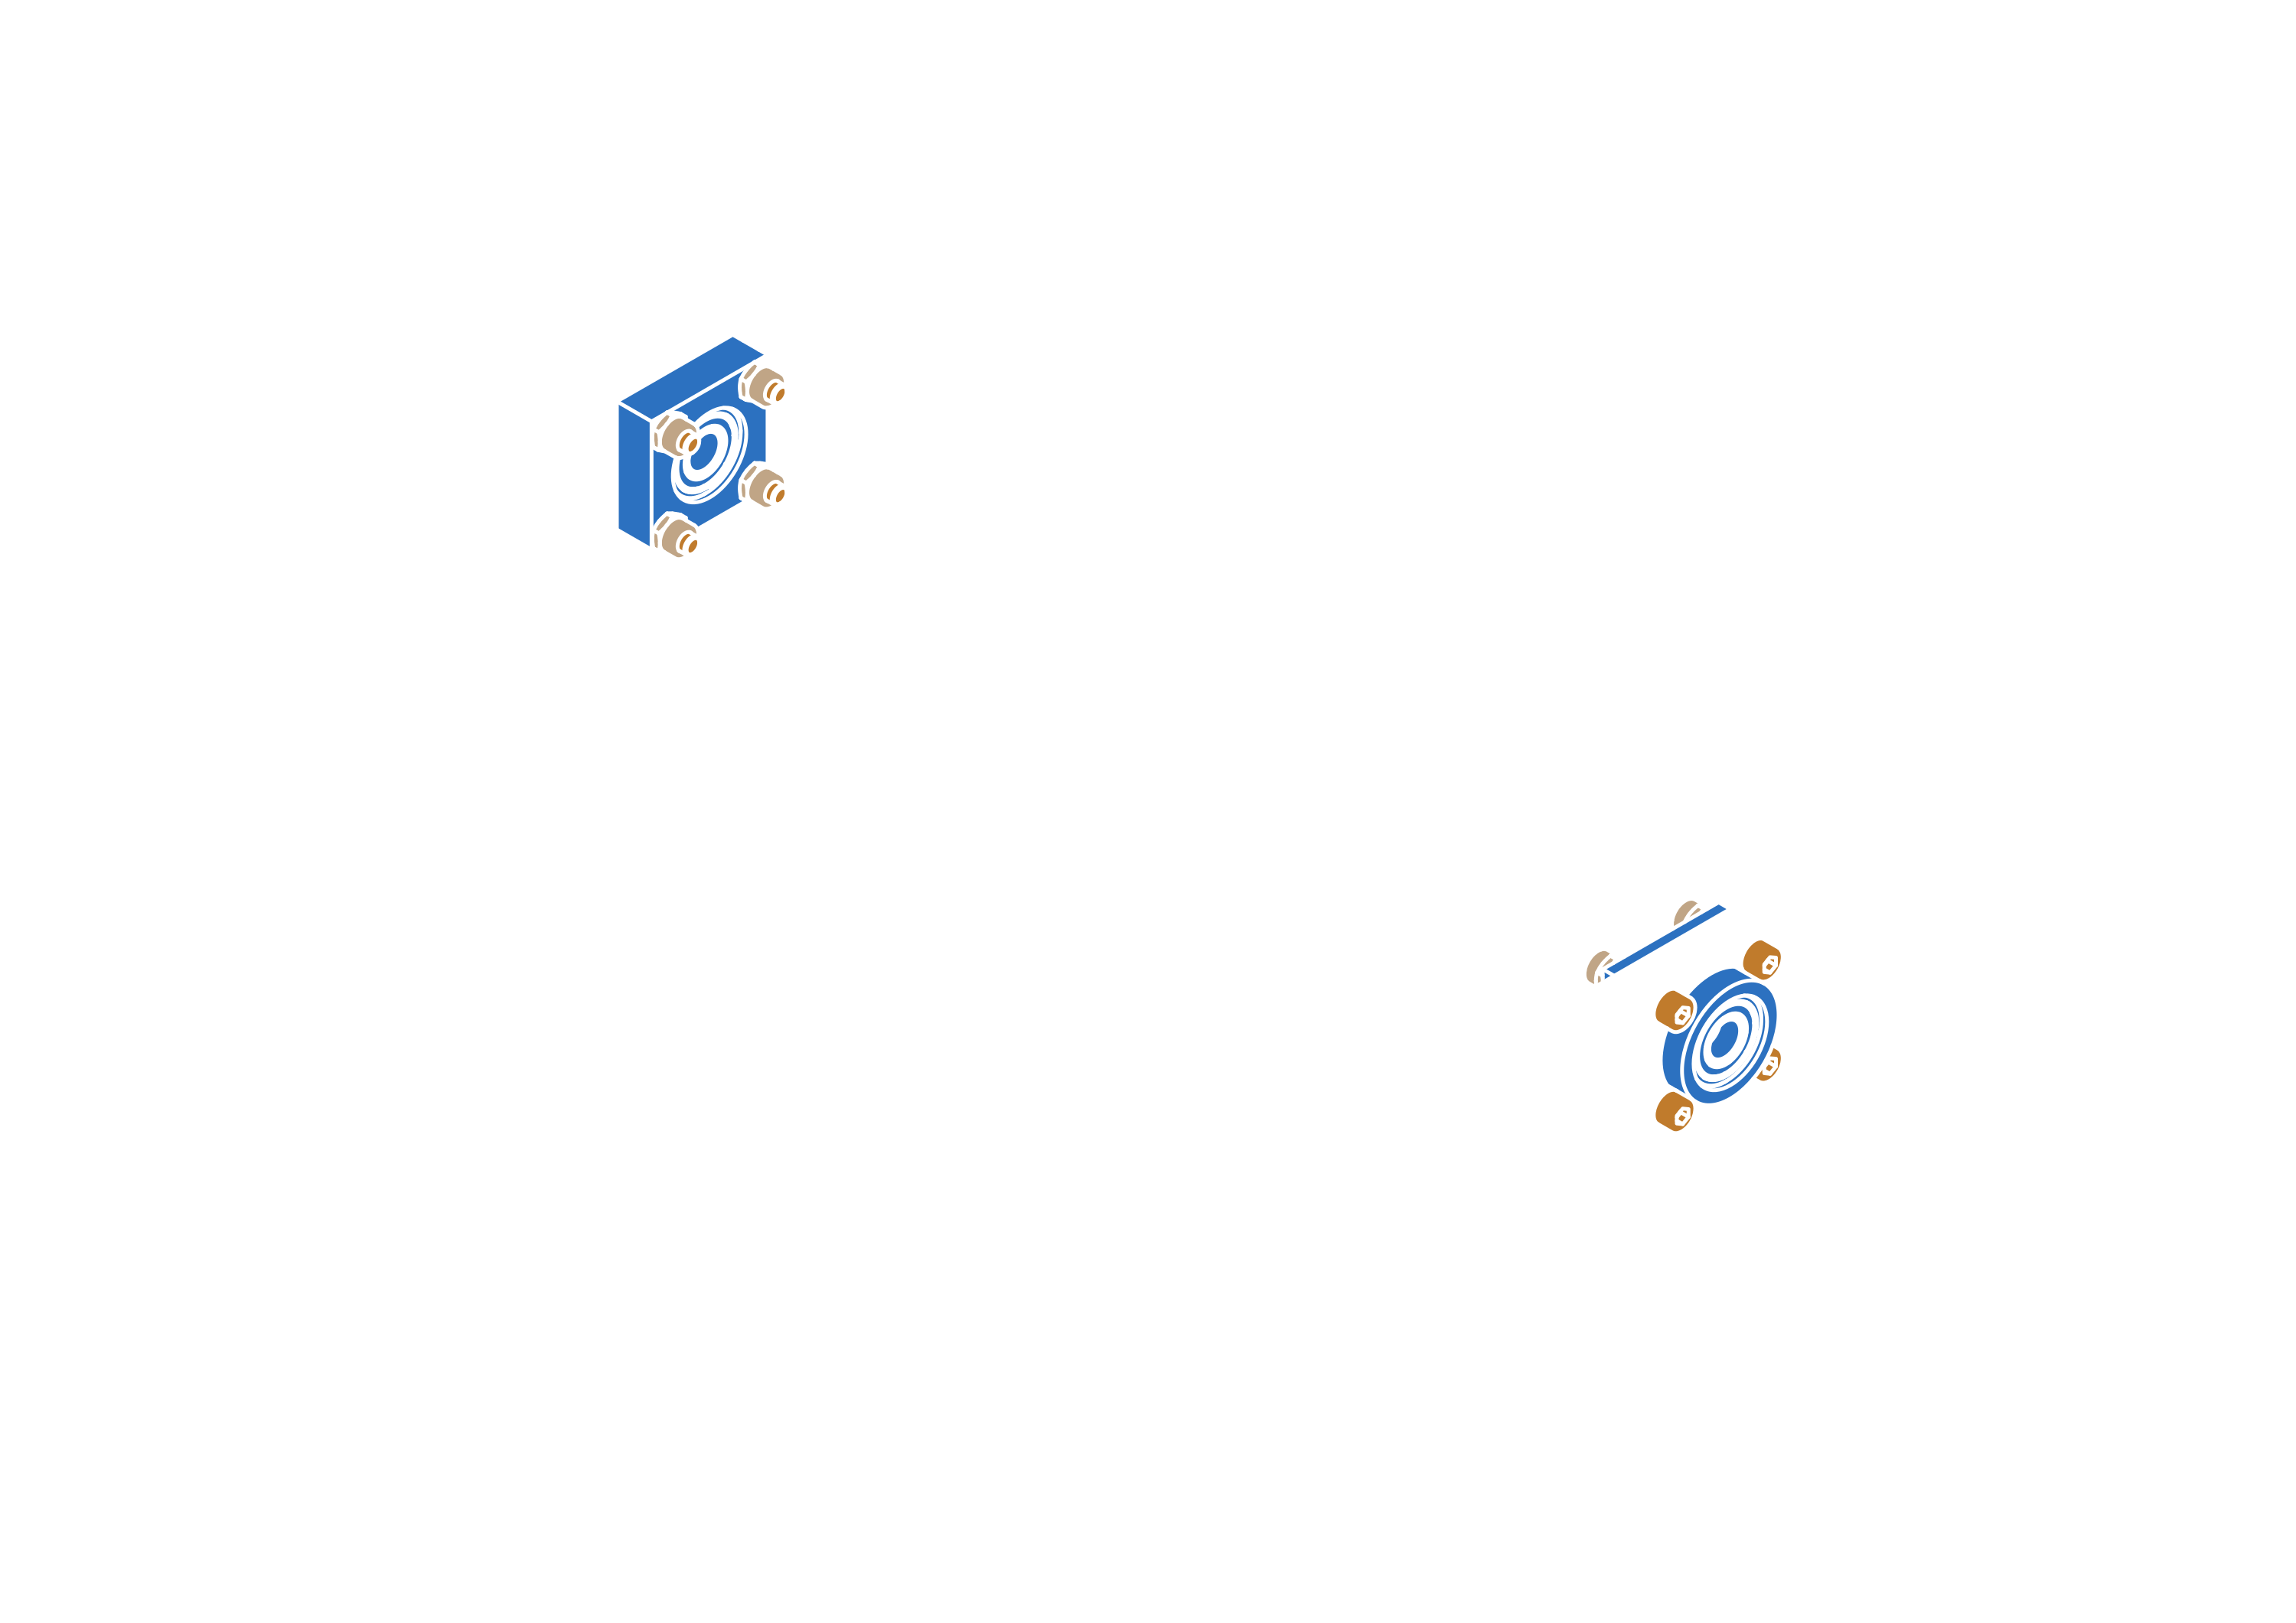
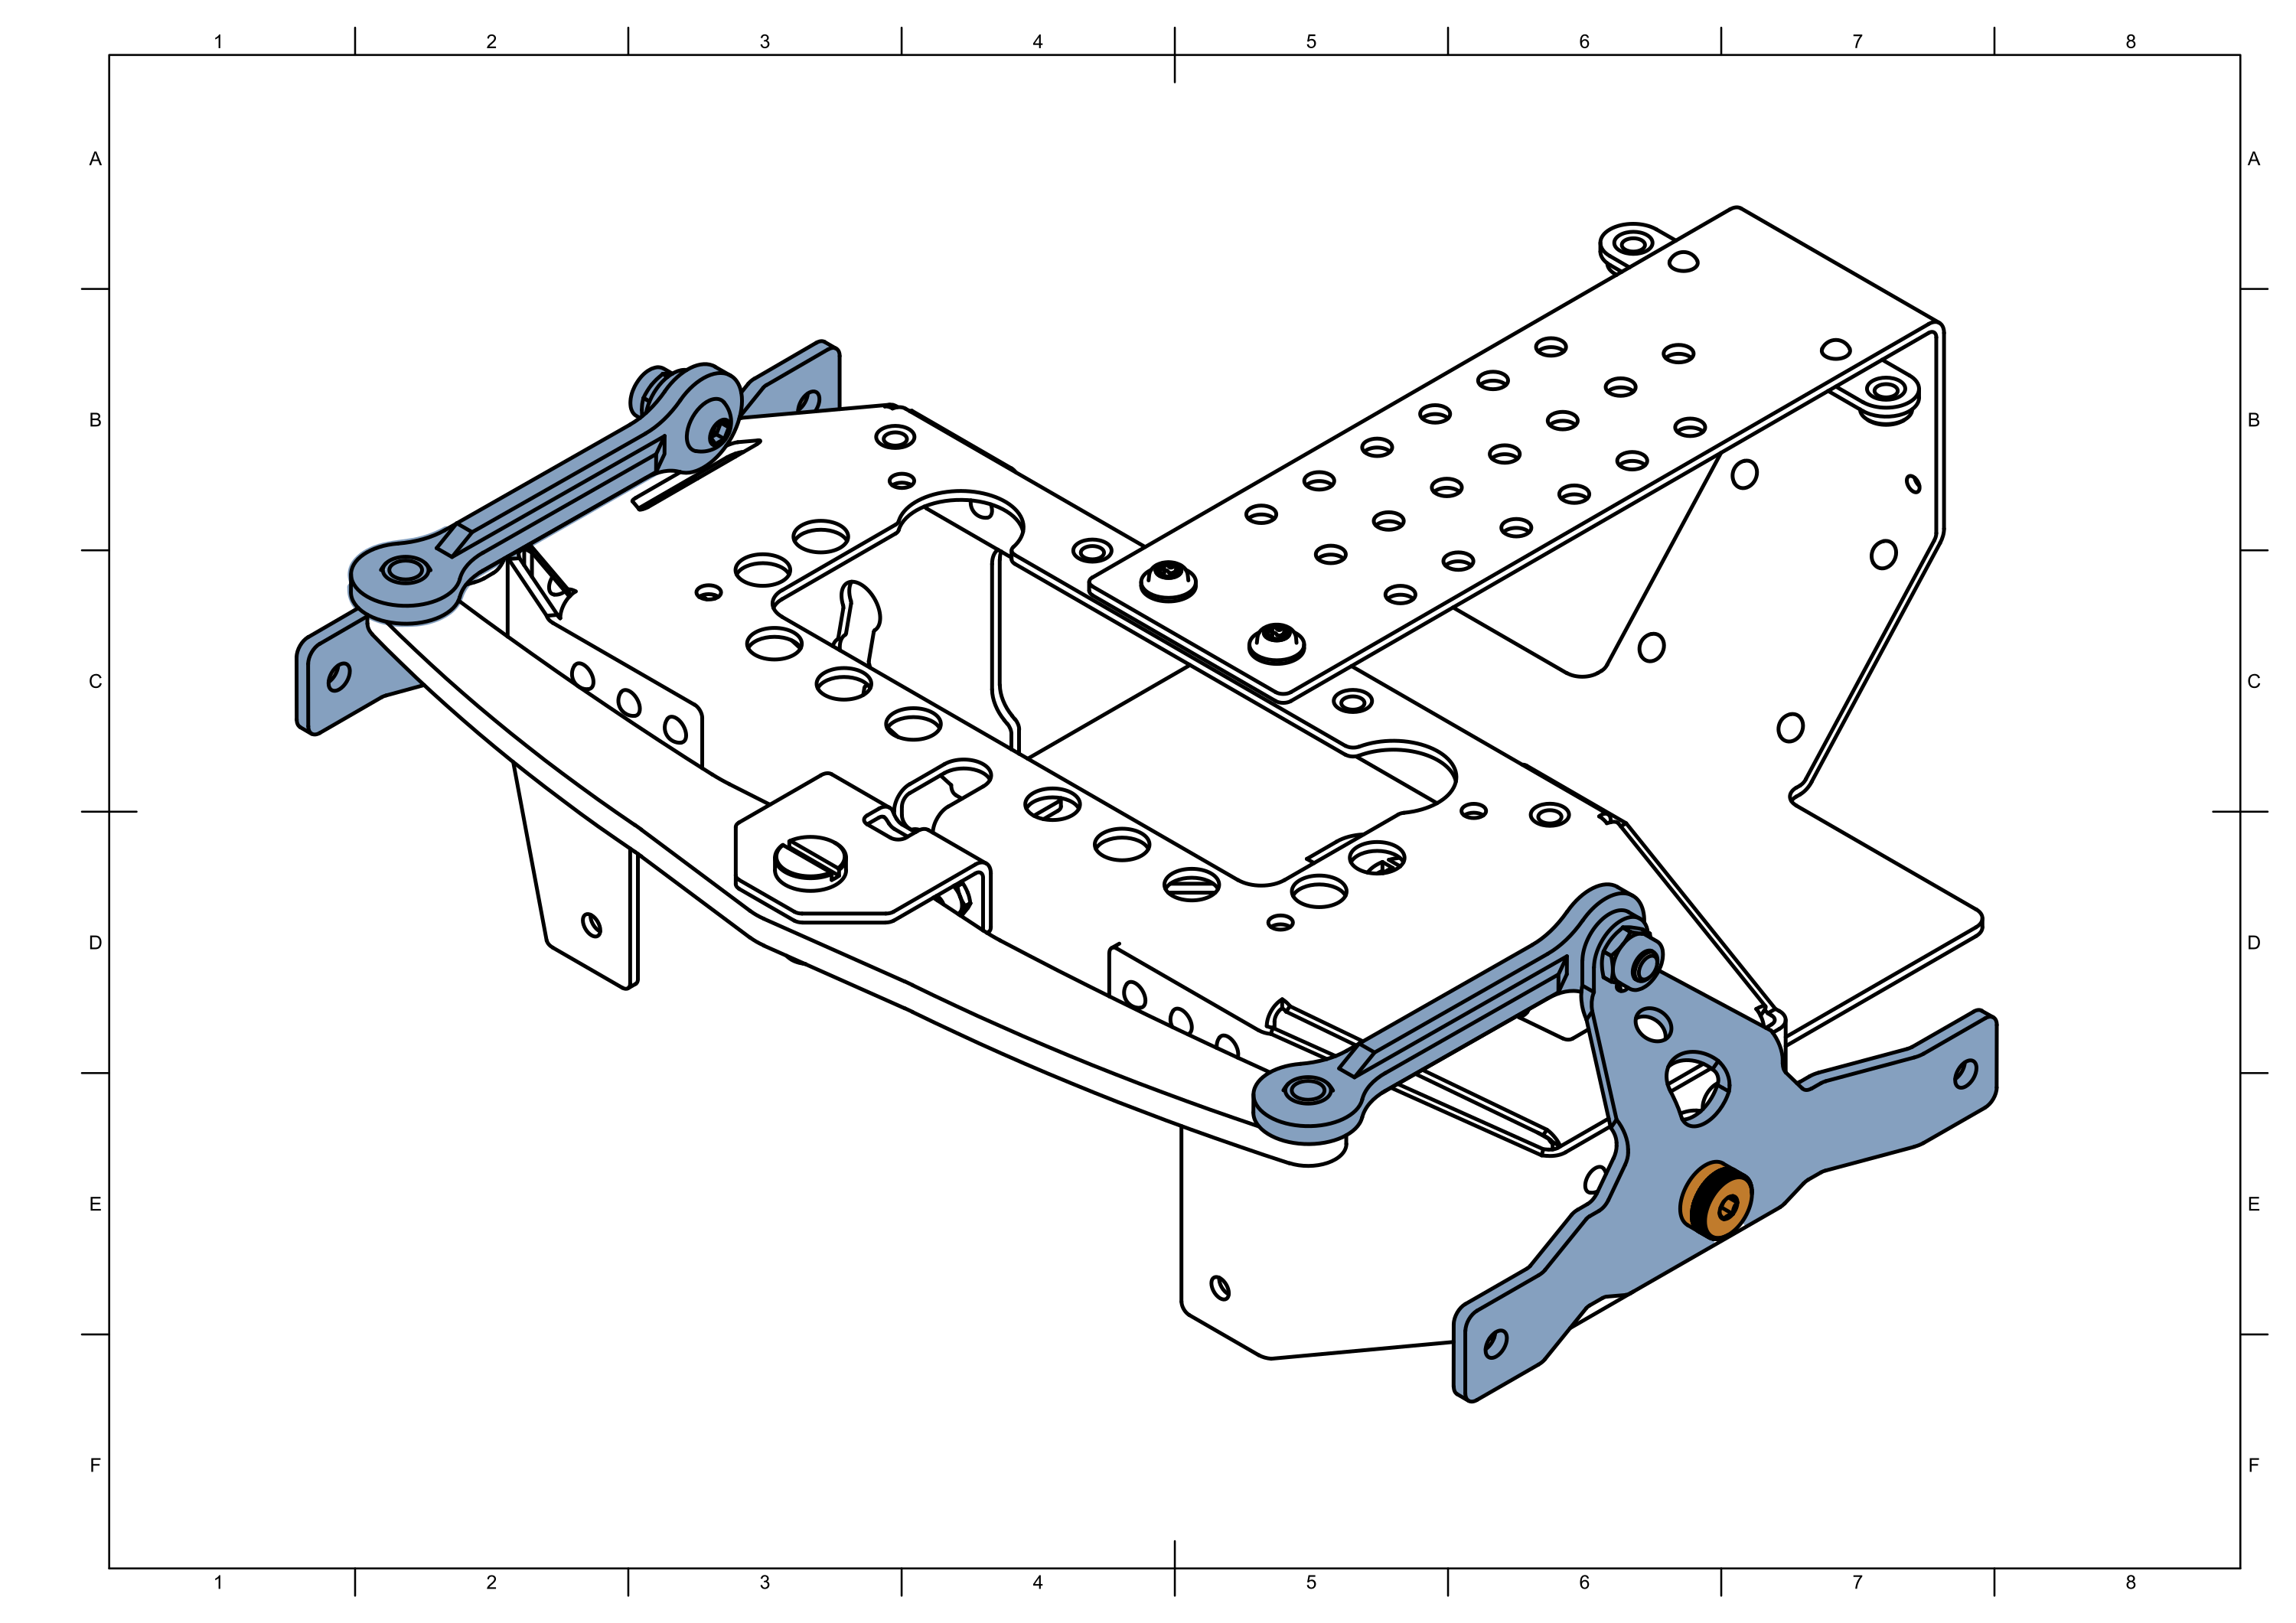
Step 6


Step 7


note
Do not overtighten the screws.
Make sure that washers and nuts are concentric with the
bearings.
Make sure that rocker mounts
can move without excess play and resistance.
Step 8


Step 9