Leo Rover 1.7 and below specification
This is a technical specification of the older version of the Leo Rover that is
no longer available for purchase.
If you are looking for specification of
the latest version of the Leo Rover, please visit:
Size and Performance
Weight: 6,5 kg
Dimensions: 425x448x305 mm
Maximum linear speed: ~0.4m/s
Maximum angular speed: ~60 deg/s
Estimated maximum obstacle size: 70mm
Protection rating: IP55 compliant
Run time: Estimated 4 hours of nominal driving
Connection range: Up to 100m (with live video stream)
Dimensions


Payload
Payload capacity: ~5 kg
Upper mounting platform dimensions: 299 x 183 mm
Hole grid: 18 x 15 mm
Holes: 40 x Φ7mm + 22 x Φ5,5mm
Connection interfaces
- miniUSB waterproof socket
- WiFi access point
Components
Wheels
Motors: 4 x in-hub DC motor with 73.2:1 planetary gearbox and 12 PPR encoder
Tire material: rubber with foam insert (non-pneumatic)
Inner rim diameter: 71 mm
Outer tire diameter: ~130 mm
Tire width: ~70 mm
Battery
Voltage: 11.1 V DC
Capacity: 5800 mAh
Type: 3S Li-Ion with internal BMS
Safety features:
- short-circuit
- overcurrent
- discharge protection
Max. current: 8A (total for whole Rover)
Estimated 4 hrs battery life (nominal driving)
Camera
Camera resolution: 5 MPx
Lens: Fisheye with 160 degree diagonal field of view (IR non-filtered;
night-vision allowed)
Network
WiFi 2.4 or 5 GHz access point with external antenna
WiFi 2.4 or 5 GHz on internal RPi antennas for connectivity
Electronics
Raspberry Pi 3B+ as an on-board computer
Core2-ROS as real-time microcontroller: STM32F4 (@168MHz, 192KB RAM, 1MB Flash)
Internal open interfaces
Raspberry Pi:
- USB x2
- GPIO x20
- RJ45 Ethernet
- RPi display port
- Bluetooth 5.0 with BLE
Core2:
- 6 x servomotor interface with built-in DC/DC converter (selectable multiple voltage level)
- 4 x UART
- 3 x I2C
- 1 x SPI
- 1 x CAN
- 13 x ADC
- 8 x interrupt input
Hardware structure


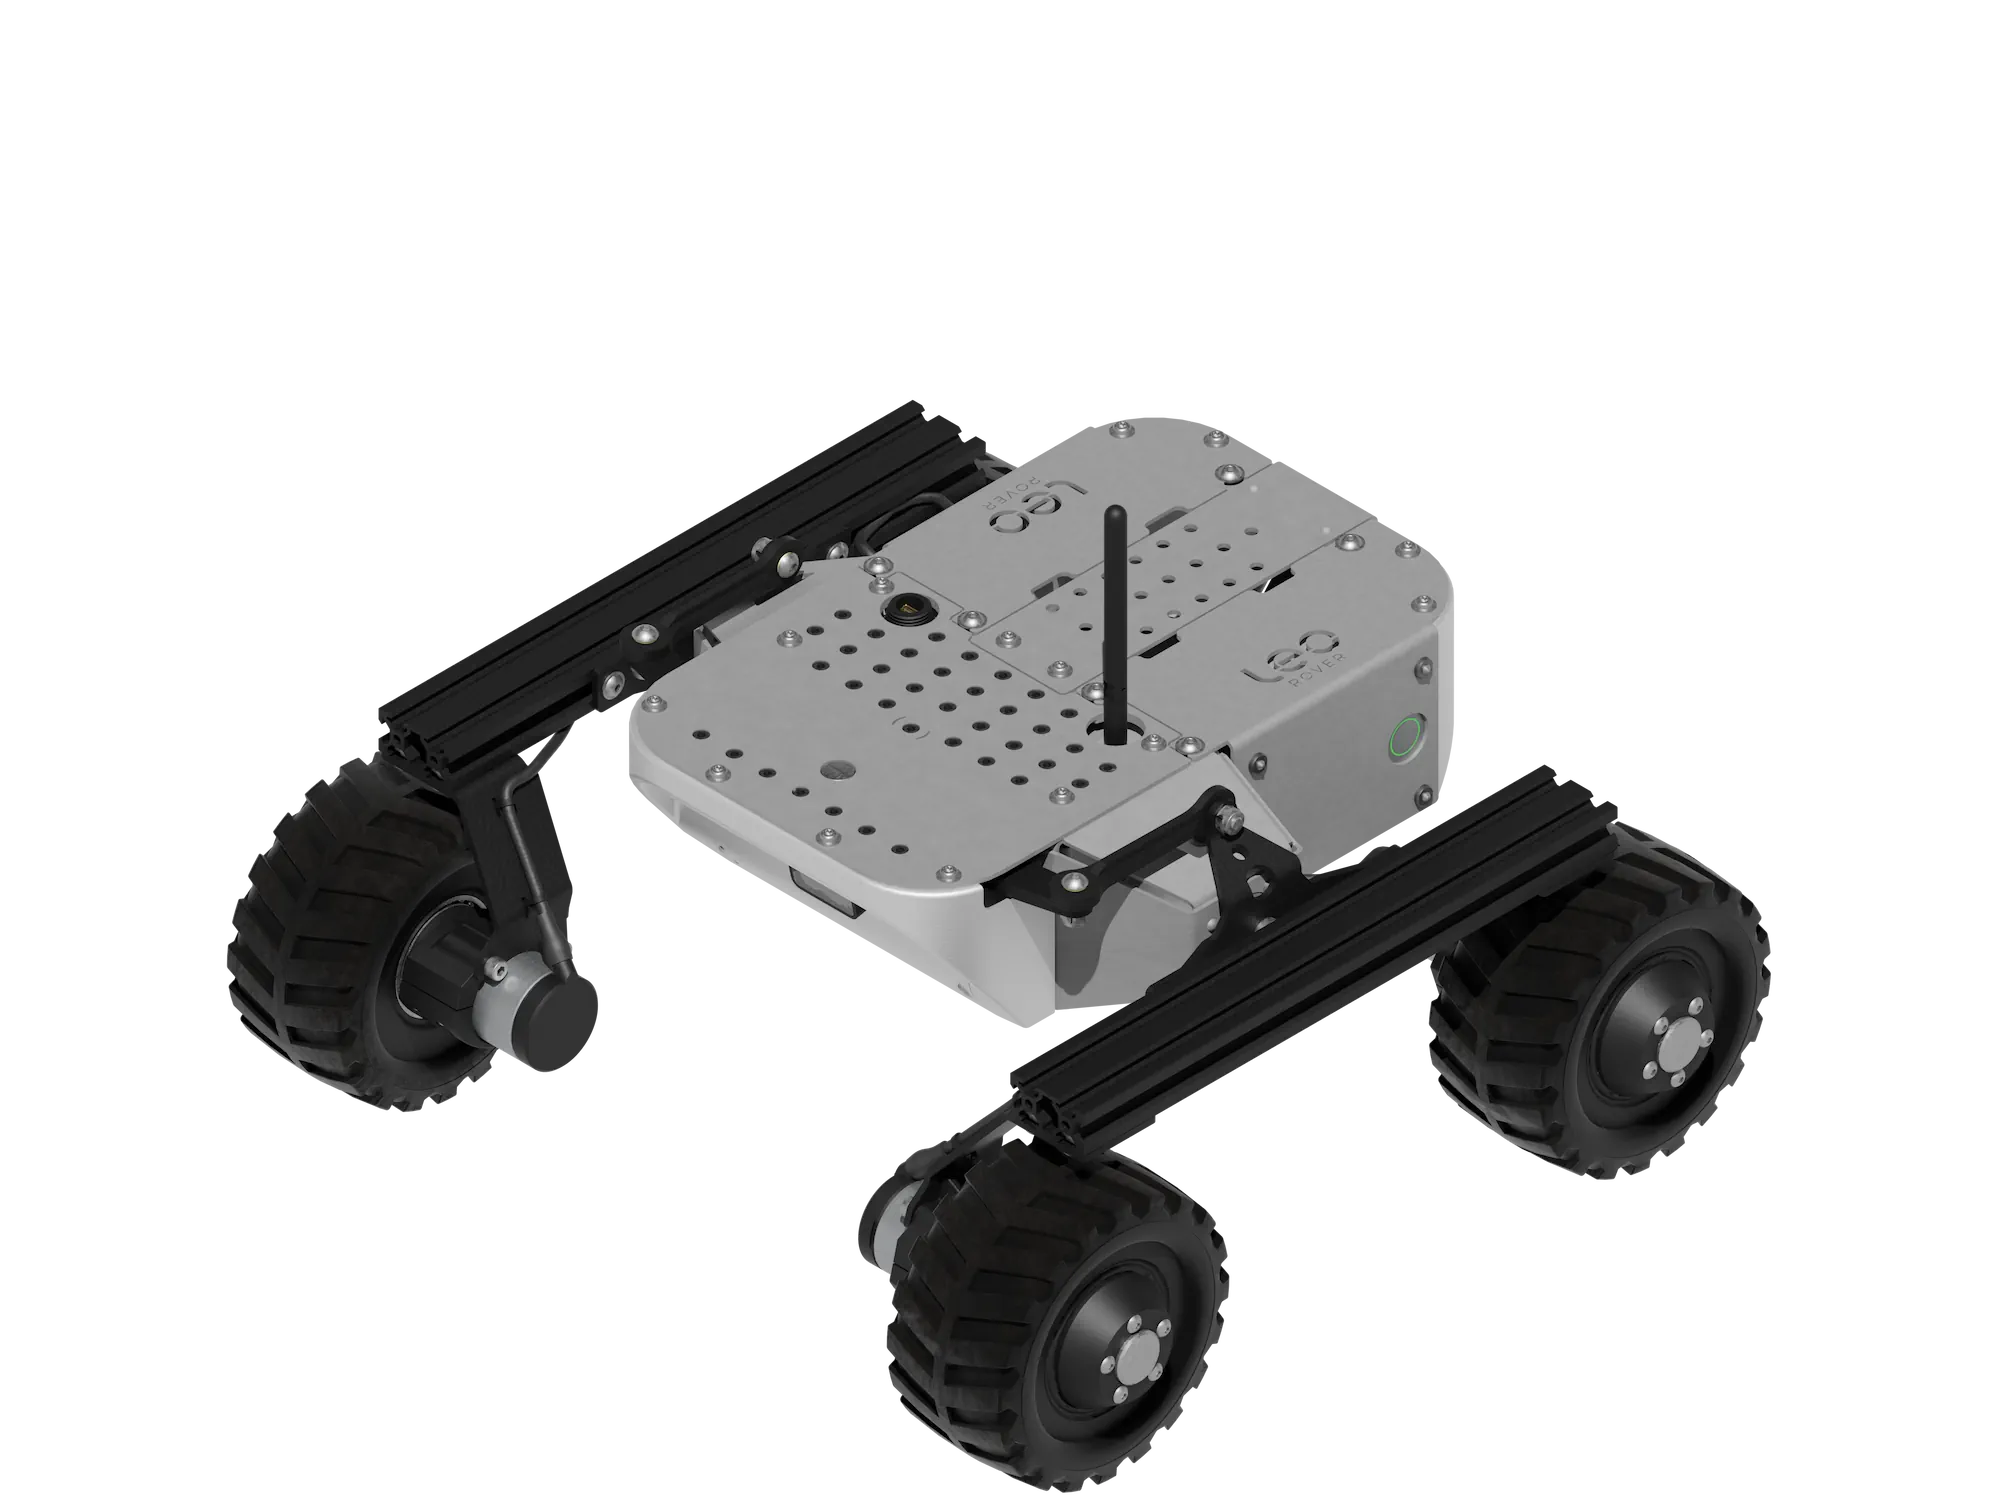
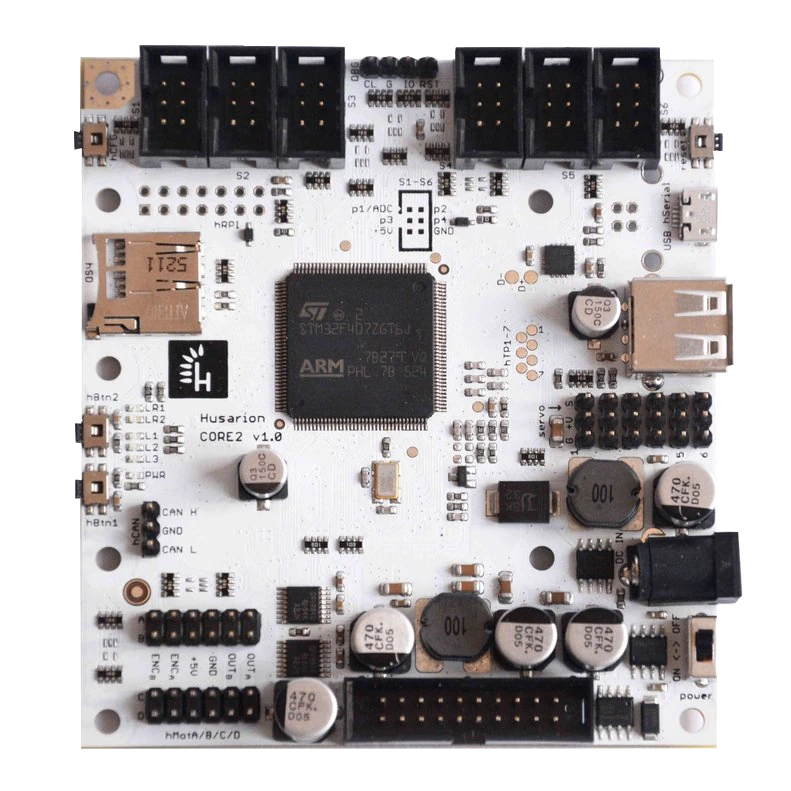
Leo Rover controller
Leo Rover is based on CORE2-ROS electronics board which, together with the Raspberry Pi computer, controls all the Rover's functionalities.
We encourage you to check all the specs of the board itself as there's a great number of interfaces to be used for further development.
Electrical specification
| Interface | Description | Parameters |
|---|---|---|
| Power input | 6.8-16V | 70...3000mA current consumption, depends on external modules standard 5.5/2.1 mm DC plug (centre-positive) |
| I/O ports | 54 ports | 3.3V/5V tolerant GPIOs series resistance is 330Ω |
| ADC | up to 13 channels | 12-bit resolution |
| PWM | up to 10 channels: 6x 3.3V, 4x H-bridge output | Period range for 3.3V outputs: 1...65535 μs Frequency range for H-bridge: 1Hz...21khz (in 16 steps) |
| UART | up to 4 channels | baudrate: 4800, 9600, 14400, 19200, 38400, 57600, 115200, 128000, 256000, 1000000, 2000000, 4000000 |
| I2C | 3 channels | up to 400kHz |
| SPI | 1 | up to 1 Mbps |
| CAN | 1 | 500 kbps |
| External Interrupts | up to 8 channels | triggered by an edge or voltage level |
To learn more about Core2-ROS visit this site
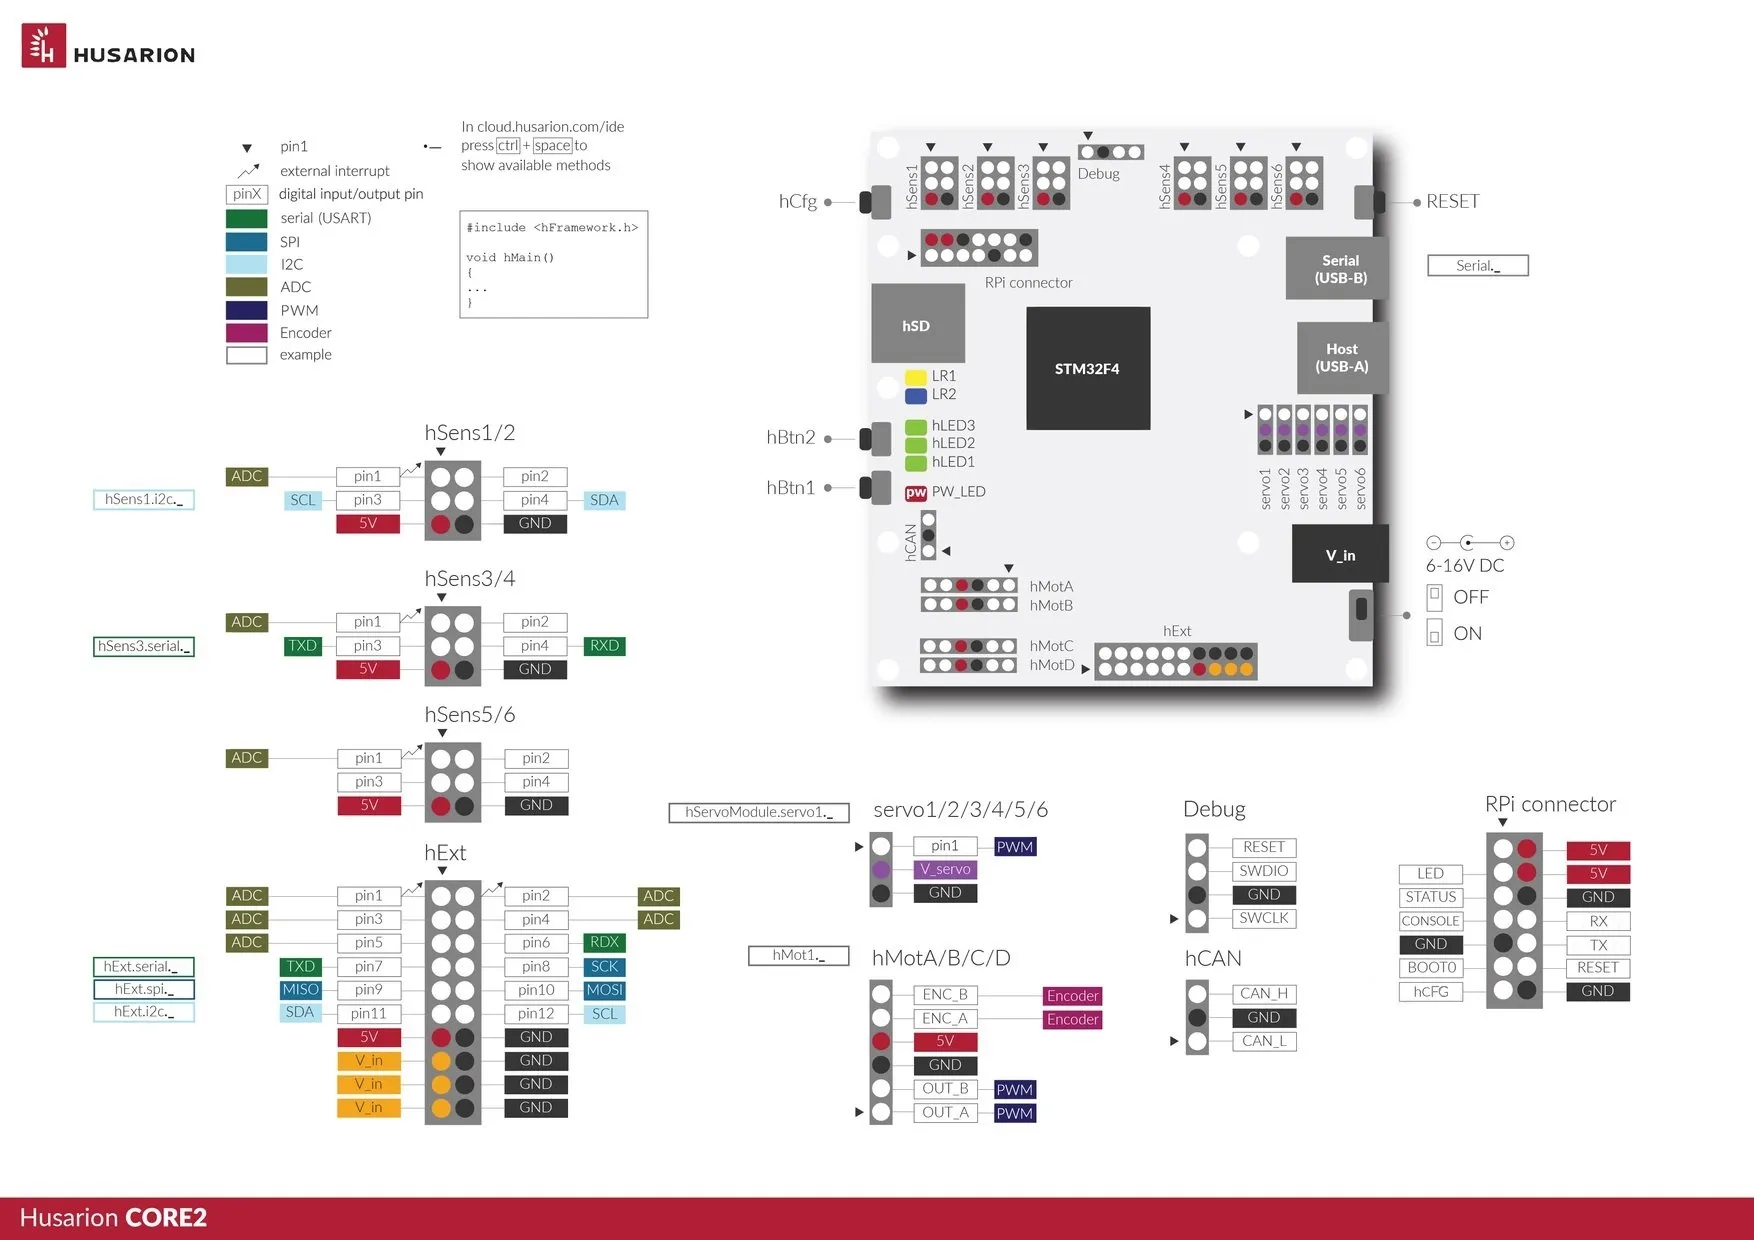
Ports used by Leo Rover
To make it easier, we listed all the interfaces used by the Rover as default. Just to make sure you don't interfere with them when developing.
| Port | Functionality |
|---|---|
| Power input | to power the board and Raspberry Pi |
| hExt pin 1 (I/O) | to control the battery LED (to show the system readiness) |
| hMot A, B, C & D (PWM H-bridge) | to power the rover motors and encodes |
| USB hSerial | used to flash firmware to the board (doesn't need to be connected all the time) |
Take into consideration during the Rover assembly and development.
The board corner where there's power connector and power-related components tends to interfere with sensitive electronics such as wheel encoders. Make sure the encoder cables don't run on top of the corner.
3-pin power connector pinout
By default Leo Rover uses standard WEIPU SP13-3 connectors for connecting battery, Main Electronics Box and other possible addons.


| Pin name | Cable color |
|---|---|
| DC- | black |
| DC+ | red / black with white stripe |
| LED | green |
Software structure
Operating system
Ubuntu 20.04 + ROS Noetic
Alternatively:
Ubuntu 22.04 + ROS2 Humble
Ready-to-go UI located under 10.0.0.1 when using standard Leo Software Image.
Firmware
This is the program that runs directly on the processor of the LeoCore board. It provides different functionalities to the Raspberry Pi through serial bus. The main features of the default leocore_firmware are:
- differential drive controller (cmd_vel interface)
- wheel states monitoring (joint_states interface)
- battery voltage monitoring
- wheel odometry calculation
- IMU support
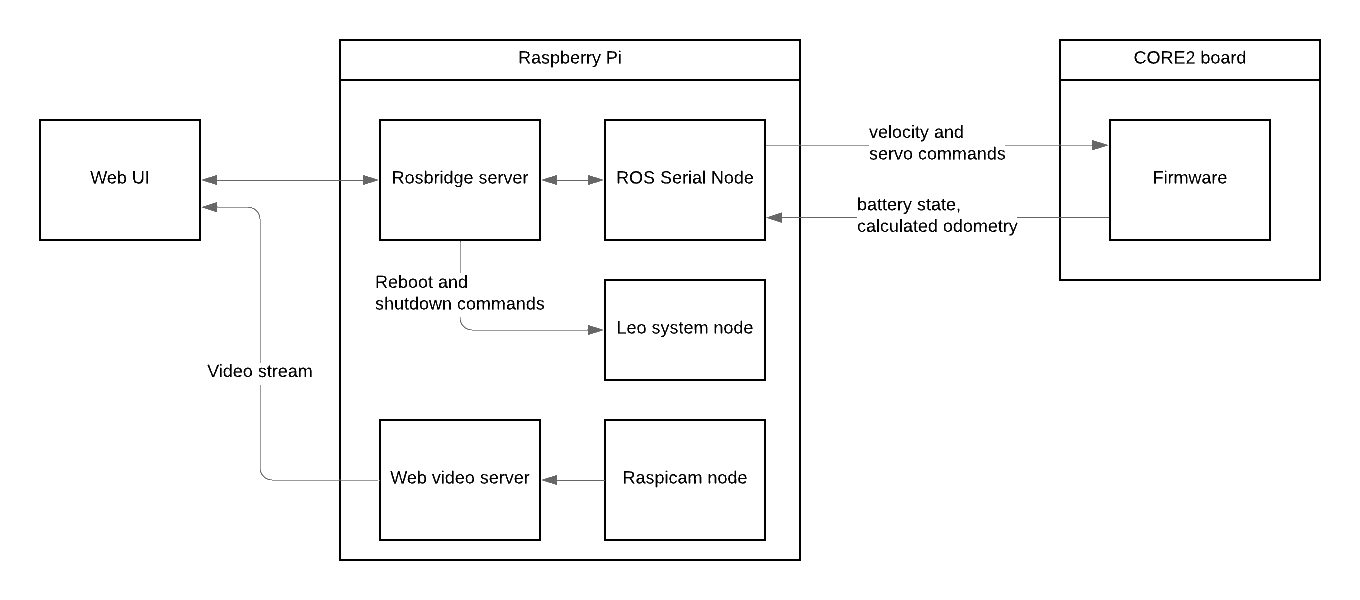
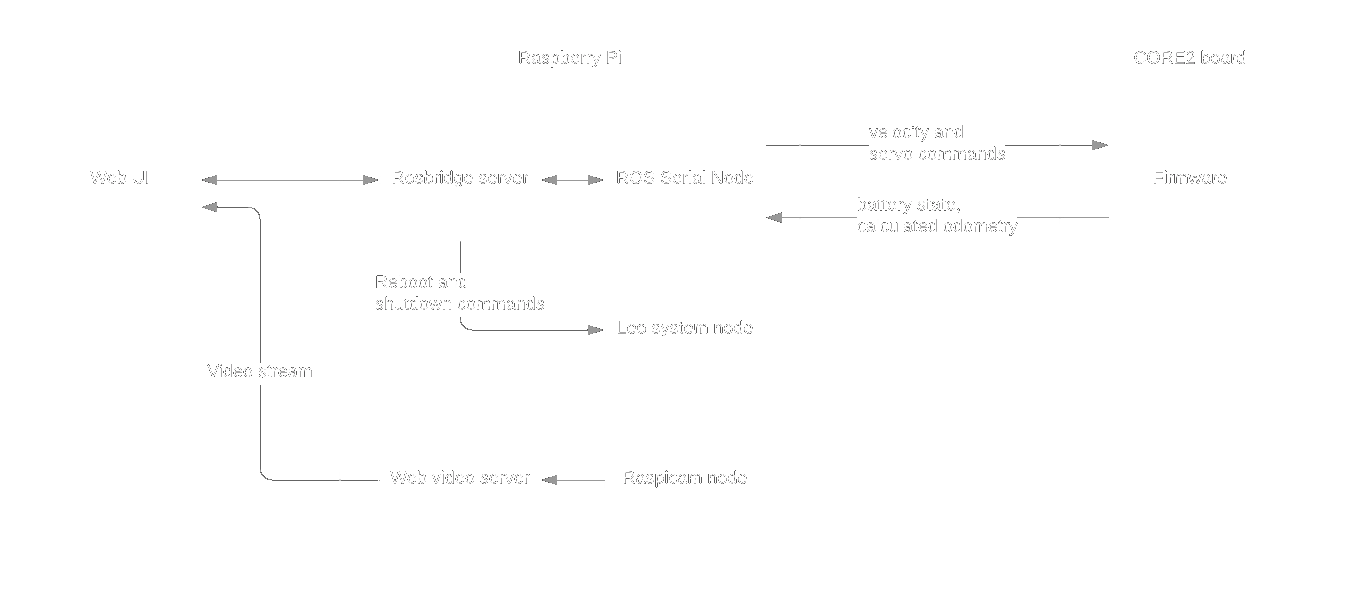
ROS nodes
When the Raspberry Pi boots, a set of ROS nodes is started. These nodes allow different features to be accessed via ROS topics and services. They are defined in leo_bringup package and mainly consist of:
- rosserial node - communicates with the firmware via serial interface and makes its features available via ROS topics and services
- Rosbridge server - creates WebSocket that provides a JSON API to ROS functionality for non-ROS programs.
- Raspicam node - publishes images from Raspberry Pi camera module to ROS image transport topic
- Web video server - provides a video stream of a ROS image transport topic that can be accessed via HTTP
- Leo system node - provides system shutdown and reboot via ROS topics.
Web user interface (UI)
This is the user interface that can be accessed via a web browser. It communicates with Rosbridge server using roslibjs to access functionalities that are available in ROS topics. The default leo_ui brings features such as:
- control of the Rover via a keyboard or a virtual joystick
- display of a camera stream from Web video server
- output of current battery voltage measurement
- reboot and shutdown buttons