ArUco Marker Tracking with ROS
An ArUco tag is a type of fiducial marker widely used in robotics and computer vision to support tasks such as localization, mapping, and navigation. These visual markers provide a reliable, easily detectable point of reference that helps robots perceive and interpret their environment with precision.
As sending raw images from the camera via wireless network may be insufficient, we will relay all the processing to the Raspberry Pi.
What to expect?
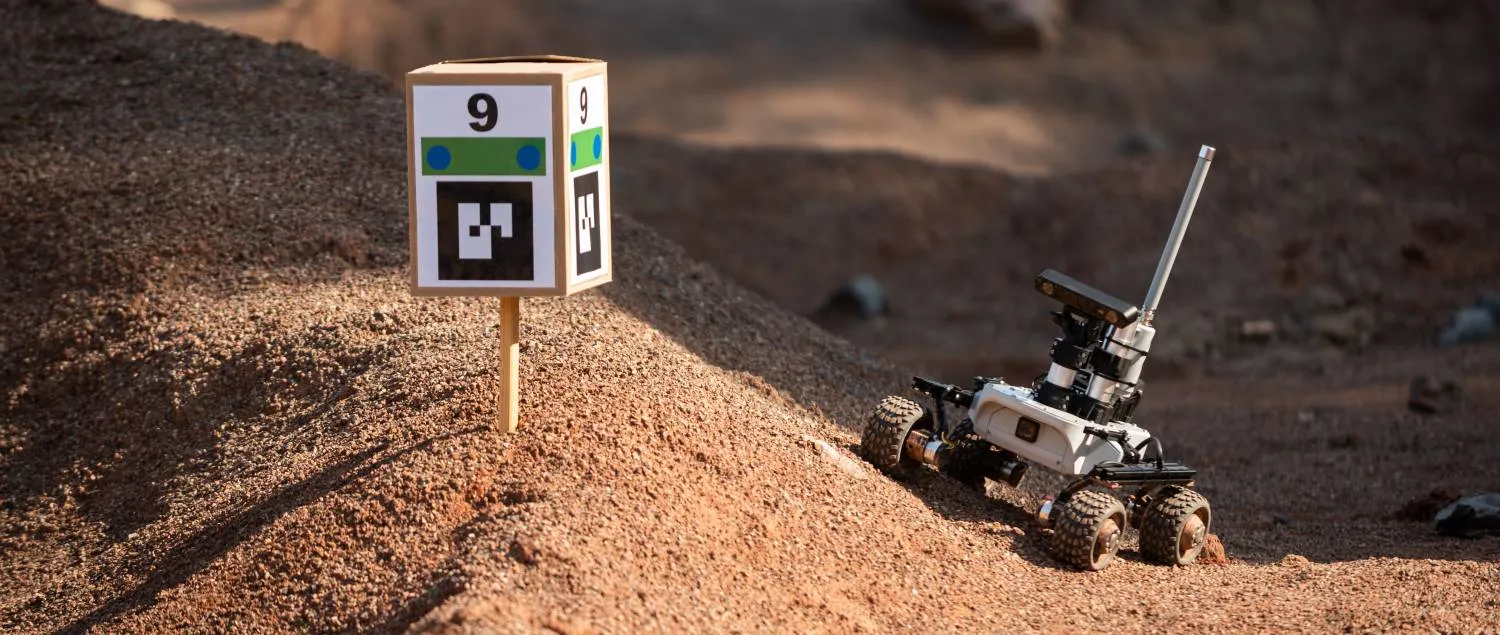
After this tutorial is completed, you will be able to detect and visualize ArUco tags like this:
The detected ArUco Tags are also published to /aruco_detections topic, so you
could use the output in your custom nodes.
Prerequisites
Software integration
Starting the ArUco tracking
LeoOS comes with the ArUco tag detection packages preinstalled, so you don't need to install anything - they just need to be enabled.
Start by logging in into your rover via SSH:
Start ArUco tracking by setting the corresponding environment variable to true
in /etc/ros/setup.bash:
export START_ARUCO_TRACKING=true
And restart the ROS nodes:
ros-nodes-restart
ArUco tracker configuration can be found in /etc/ros/aruco_tracker.yaml. By
default it is configured to track markers from 4X4_50 ArUco dictionary with
marker side size of 15cm. If you plan to use different sizes or dictionaries for
your ArUco markers, /etc/ros/aruco_tracker.yaml has to be adjusted
appropriately.
The parameters in the aruco namespace can be changed at runtime while the node
is working - either with ros2 param set or using the rqt_reconfigure GUI
tool. Feel free to play around with different configurations and then add the
chosen parameters to the /etc/ros/aruco_tracker.yaml file.
You can find a detailed description of each parameter in the aruco namespace
here.
Example usage
Generating ArUco markers
Now, we need to create some markers, so go back to your computer.
If you don't have ROS installed, you can follow this guide:
Install the aruco_opencv package:
sudo apt install ros-${ROS_DISTRO}-aruco-opencv
And run the create_marker script:
ros2 run aruco_opencv create_marker 0
You can also run
ros2 run aruco_opencv create_marker --help
to see the help message with desctription of all available options.
This will create xm marker with id 0 and save it to markers.pdf
file. The script will also print some information looking like this
ArUco dictionary: 4X4_50
Inner marker bits: 4
Marker border bits: 1
Pixels per bit: 1
Margin pixels: 1
Marker side size: 0.1500 m - 6 pixels
Output image side size: 0.200 m - 8 pixels
Output DPI: 1.016
Generating marker with ID 0...
Converting images to pdf and writing to output file markers.pdf...
Please note the Marker side size value. It is the value that should be
provided to marker_size parameter in the config yaml file.
Make sure to print the marker in the original scale.
Due to differences in printer setups, the actual size of the printed marker may
be different. Make sure the marker_size parameter represents the actual size
(in meters) of the ArUco tag.
Visualization
The detected ArUco tags are published on aruco_detections topic. You can see
their positions with
ros2 topic echo /aruco_detections
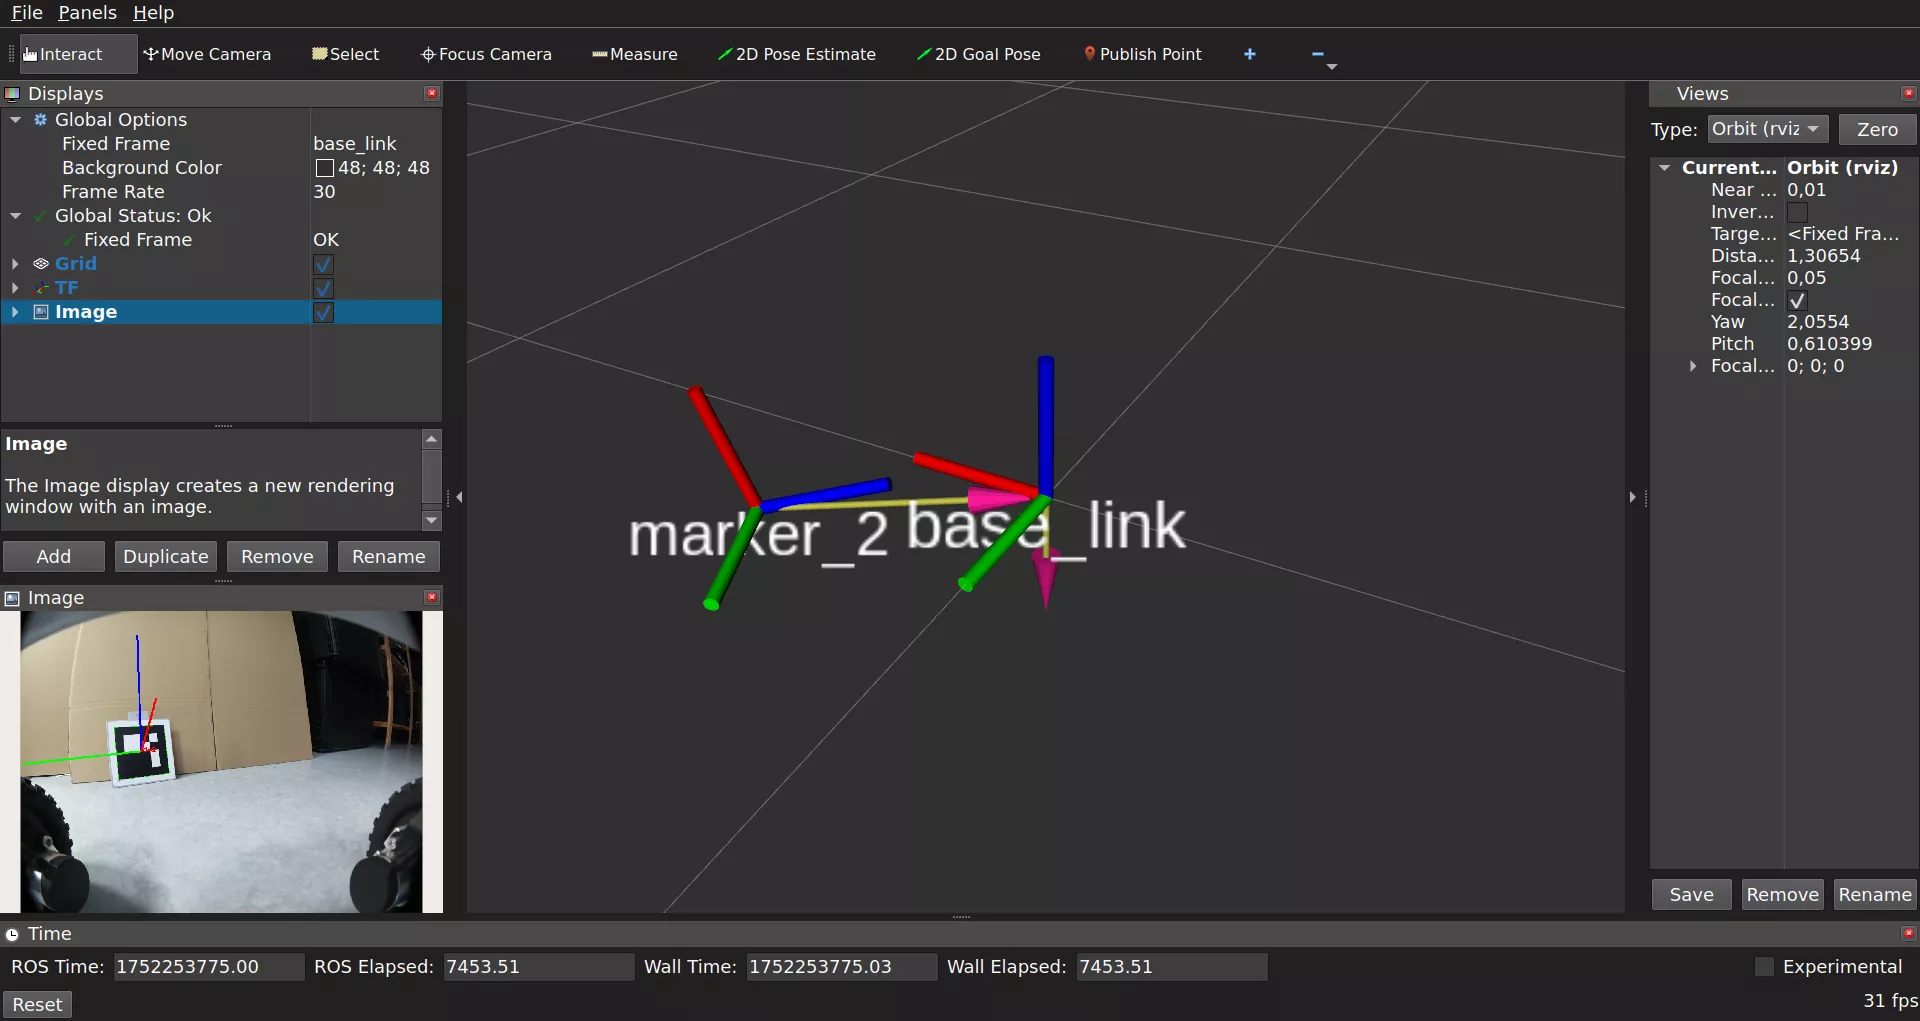
You can get a more graphical representation of the data with RViz as with our config, the marker poses are also publihsed as TF.
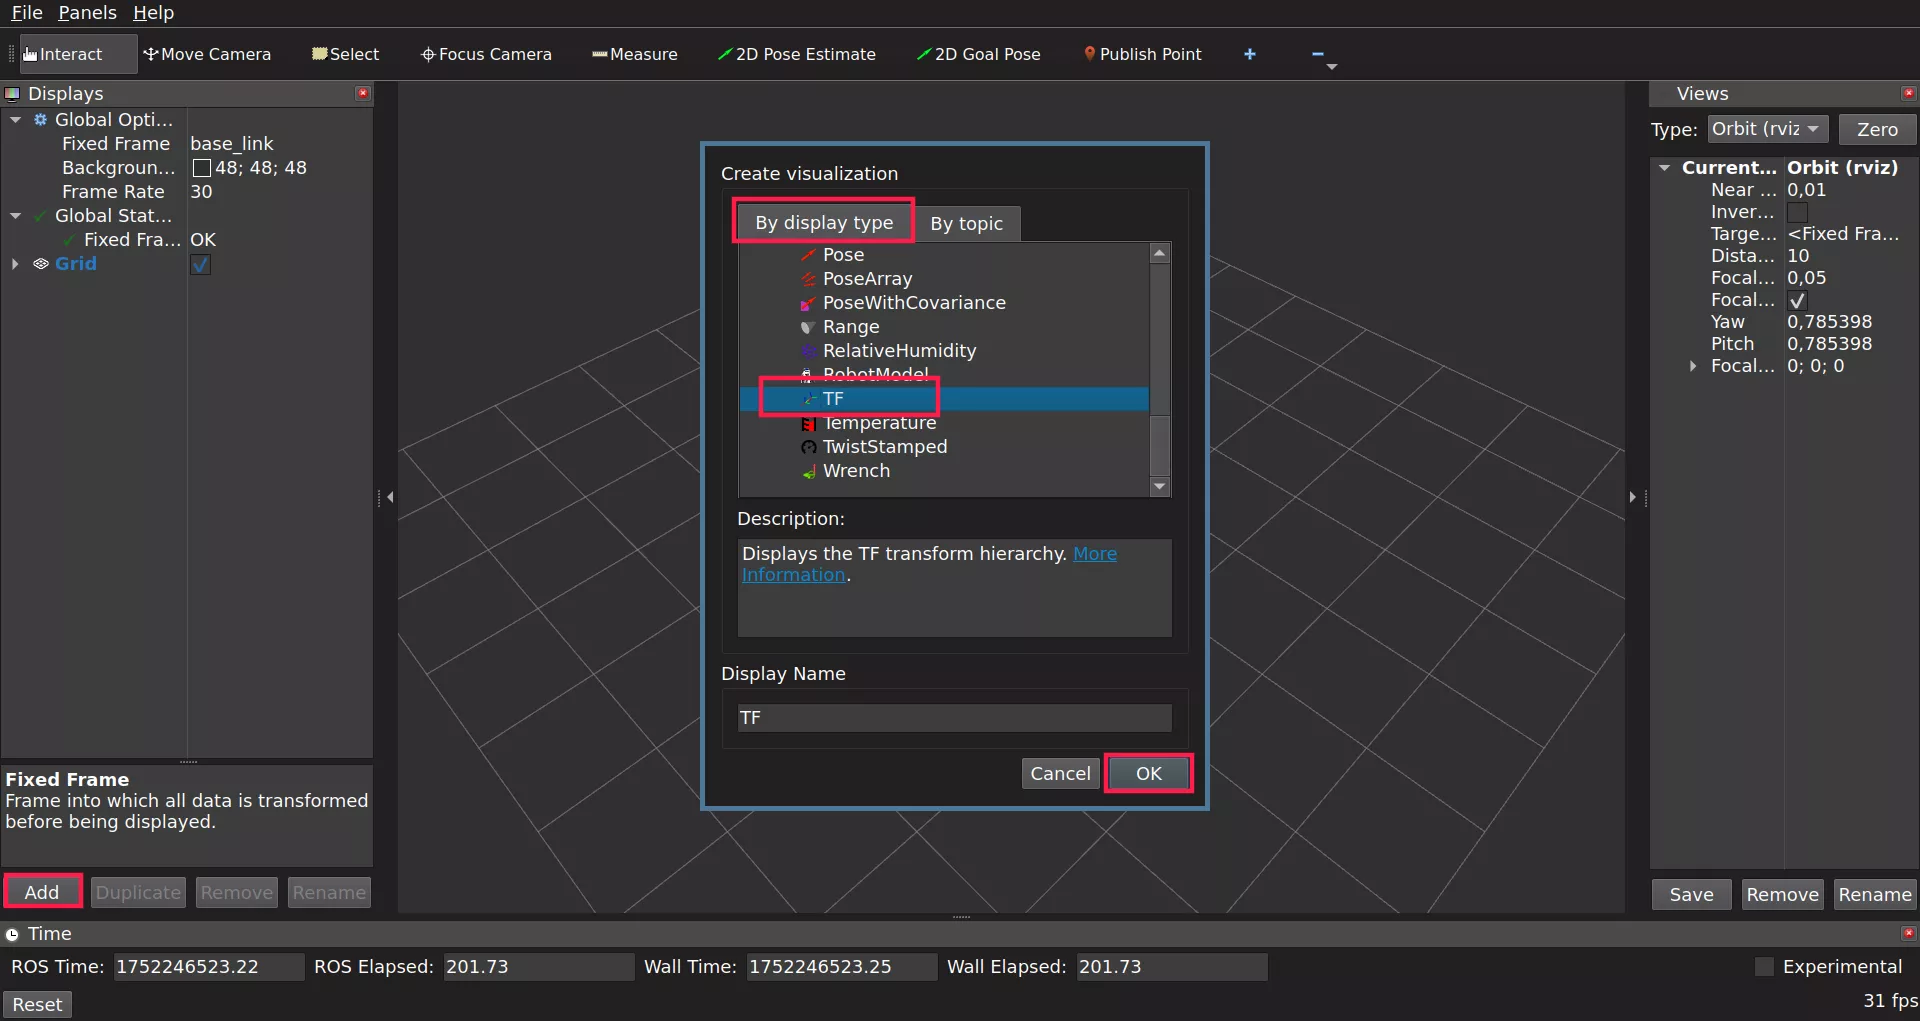
Open RViz by typing rviz2 in the terminal and set Fixed Frame to base_link.

Now on the Displays panel click Add -> By display type and search for
TF and click OK.
As there are many TF frames for the rover itself, to make it easier to
distinguish check the Show Names option and from the Frames dropdown
uncheck All Enabled - we only want base_link and any frame named like
marker_x where x is the id of the detected marker. Find those frames and
check their boxes to make them appear in RViz.
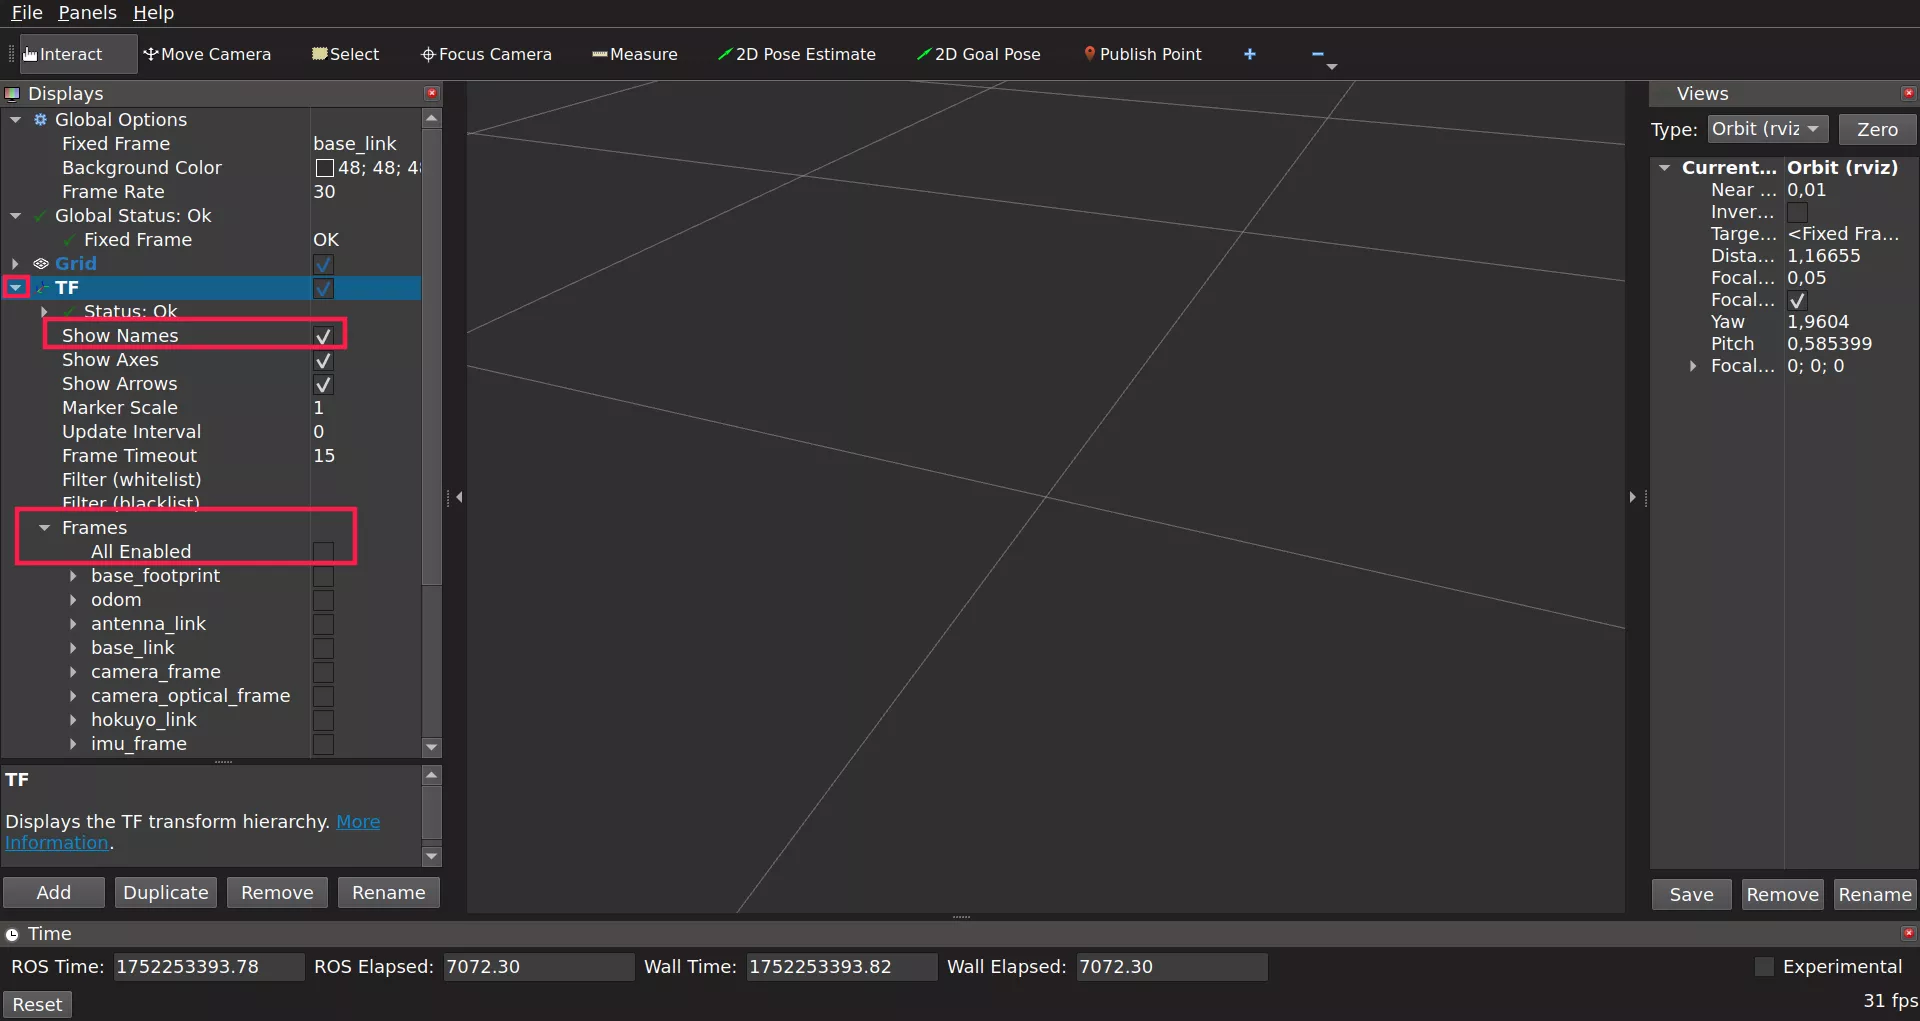
If you can't find any marker_x frame it's due to no marker being detected.
Make sure that the robot's camera can see your marker, and detects it.
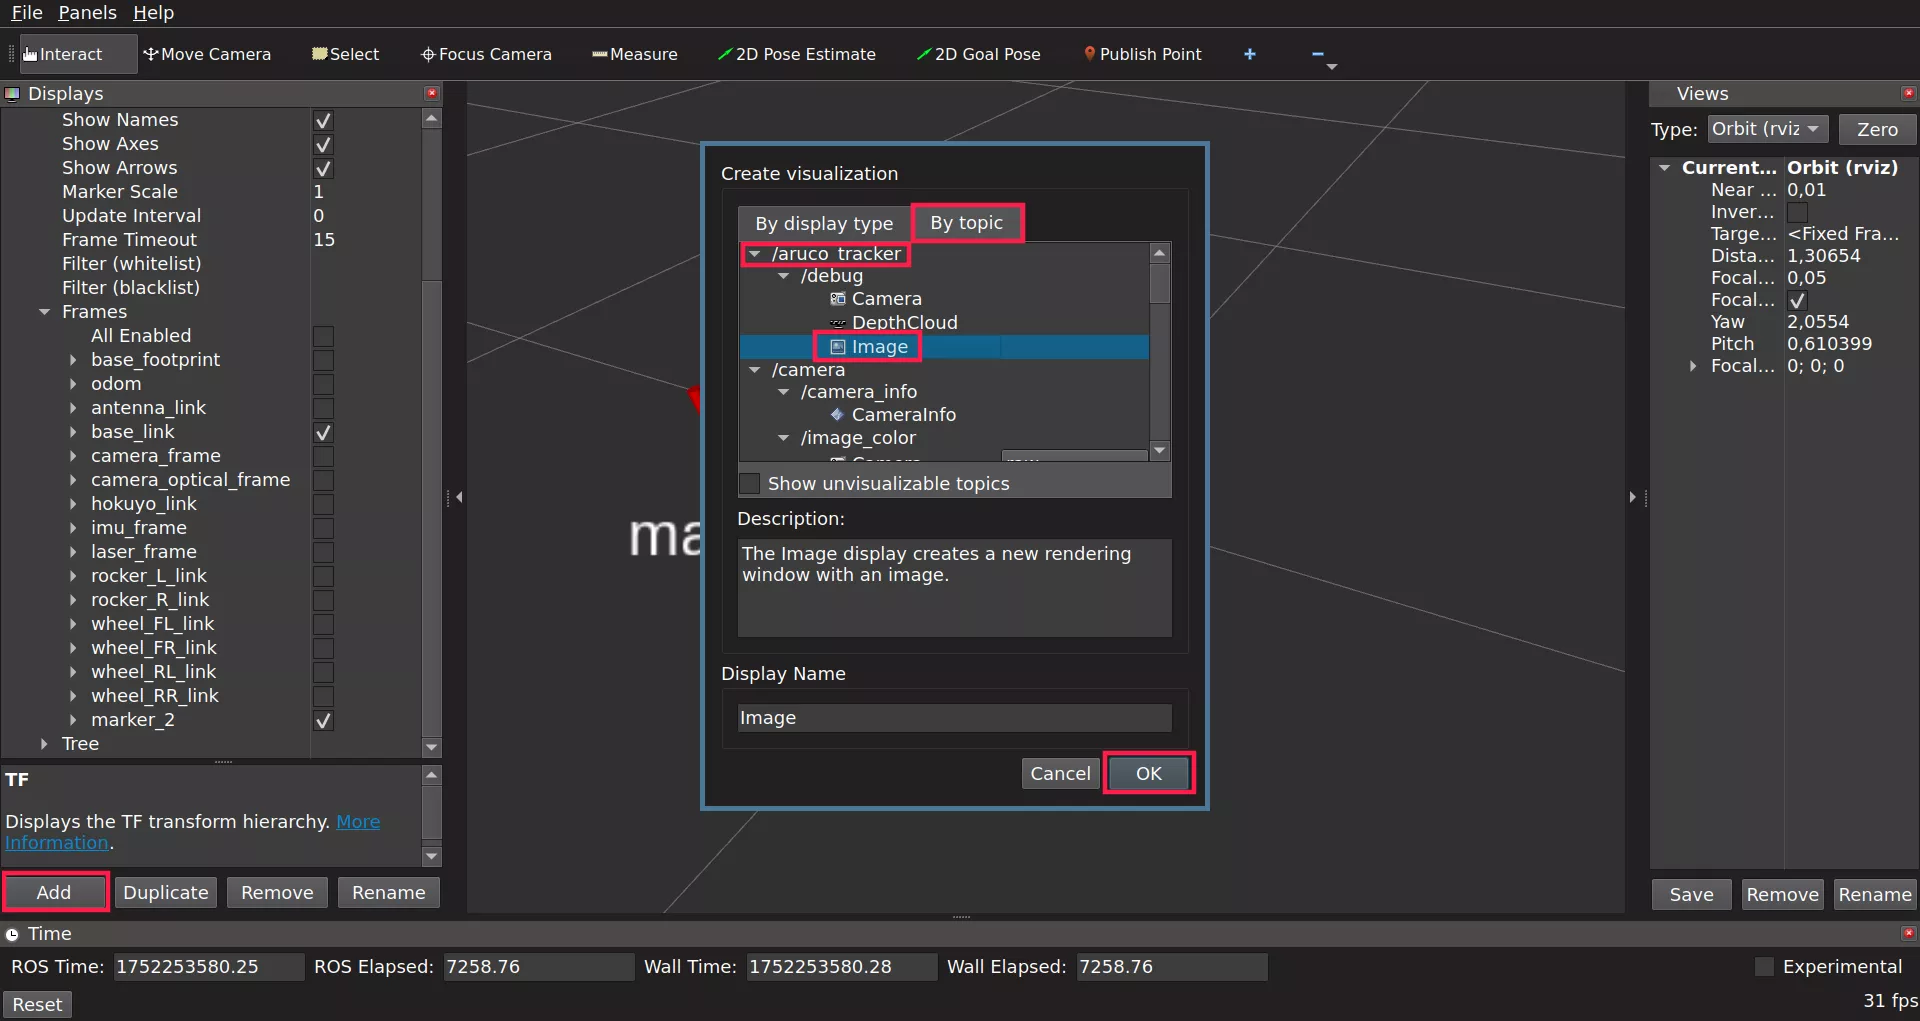
On /aruco_tracker/debug topic you can see the Camera images with the frame
axes of detected markers drawn on top of it. To see those images you need to
click on the Displays panel Add -> By topic and search for
aruco_tracker. There you will have debug topic for which you will be able to
choose Image display. Click it and confirm with Ok.
Your final setup should look more or less like this:
What's next?
After adding ArUco tag detection capabilities to your robot, you might be interested in making the Leo Rover follow the markers. For that, you can check out the follow ArUco marker example. You can also check out other examples from leo_examples repository (like line follower and object detection). If you are looking to add more sensors to your Leo Rover, take a look at our integrations.