Intel RealSense D435i Camera Integration
In this tutorial we will go through the process of connecting a RealSense D435i camera to your Leo Rover and integrating it with the system using ROS.
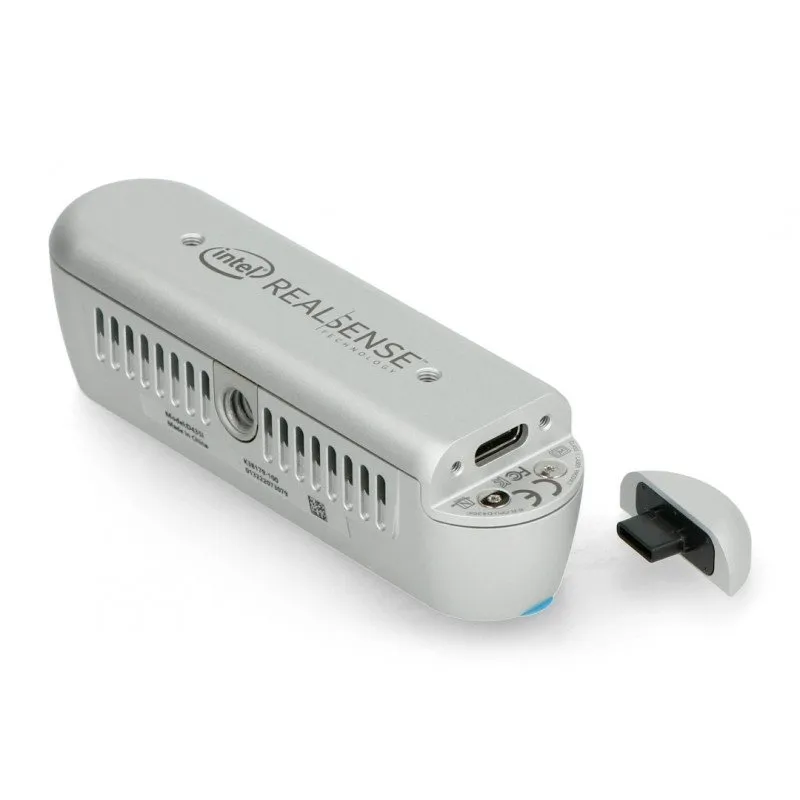
Intel RealSense D435i is a stereo camera with an inertial measurement unit (IMU) that provides depth information and motion tracking capabilities. It is commonly used in robotics applications for tasks such as obstacle avoidance, mapping, and navigation. By integrating the D435i camera with your Leo Rover, you can enhance its perception capabilities and enable it to interact with its environment in more sophisticated ways.
What to expect?
After completing this tutorial, you will have a RealSense D435i camera mounted on your Leo Rover, and you will be able to access the camera's data through ROS topics. You can find all available topics and configuration options here.
Prerequisites
Referenced products
Hardware integration
Mounting
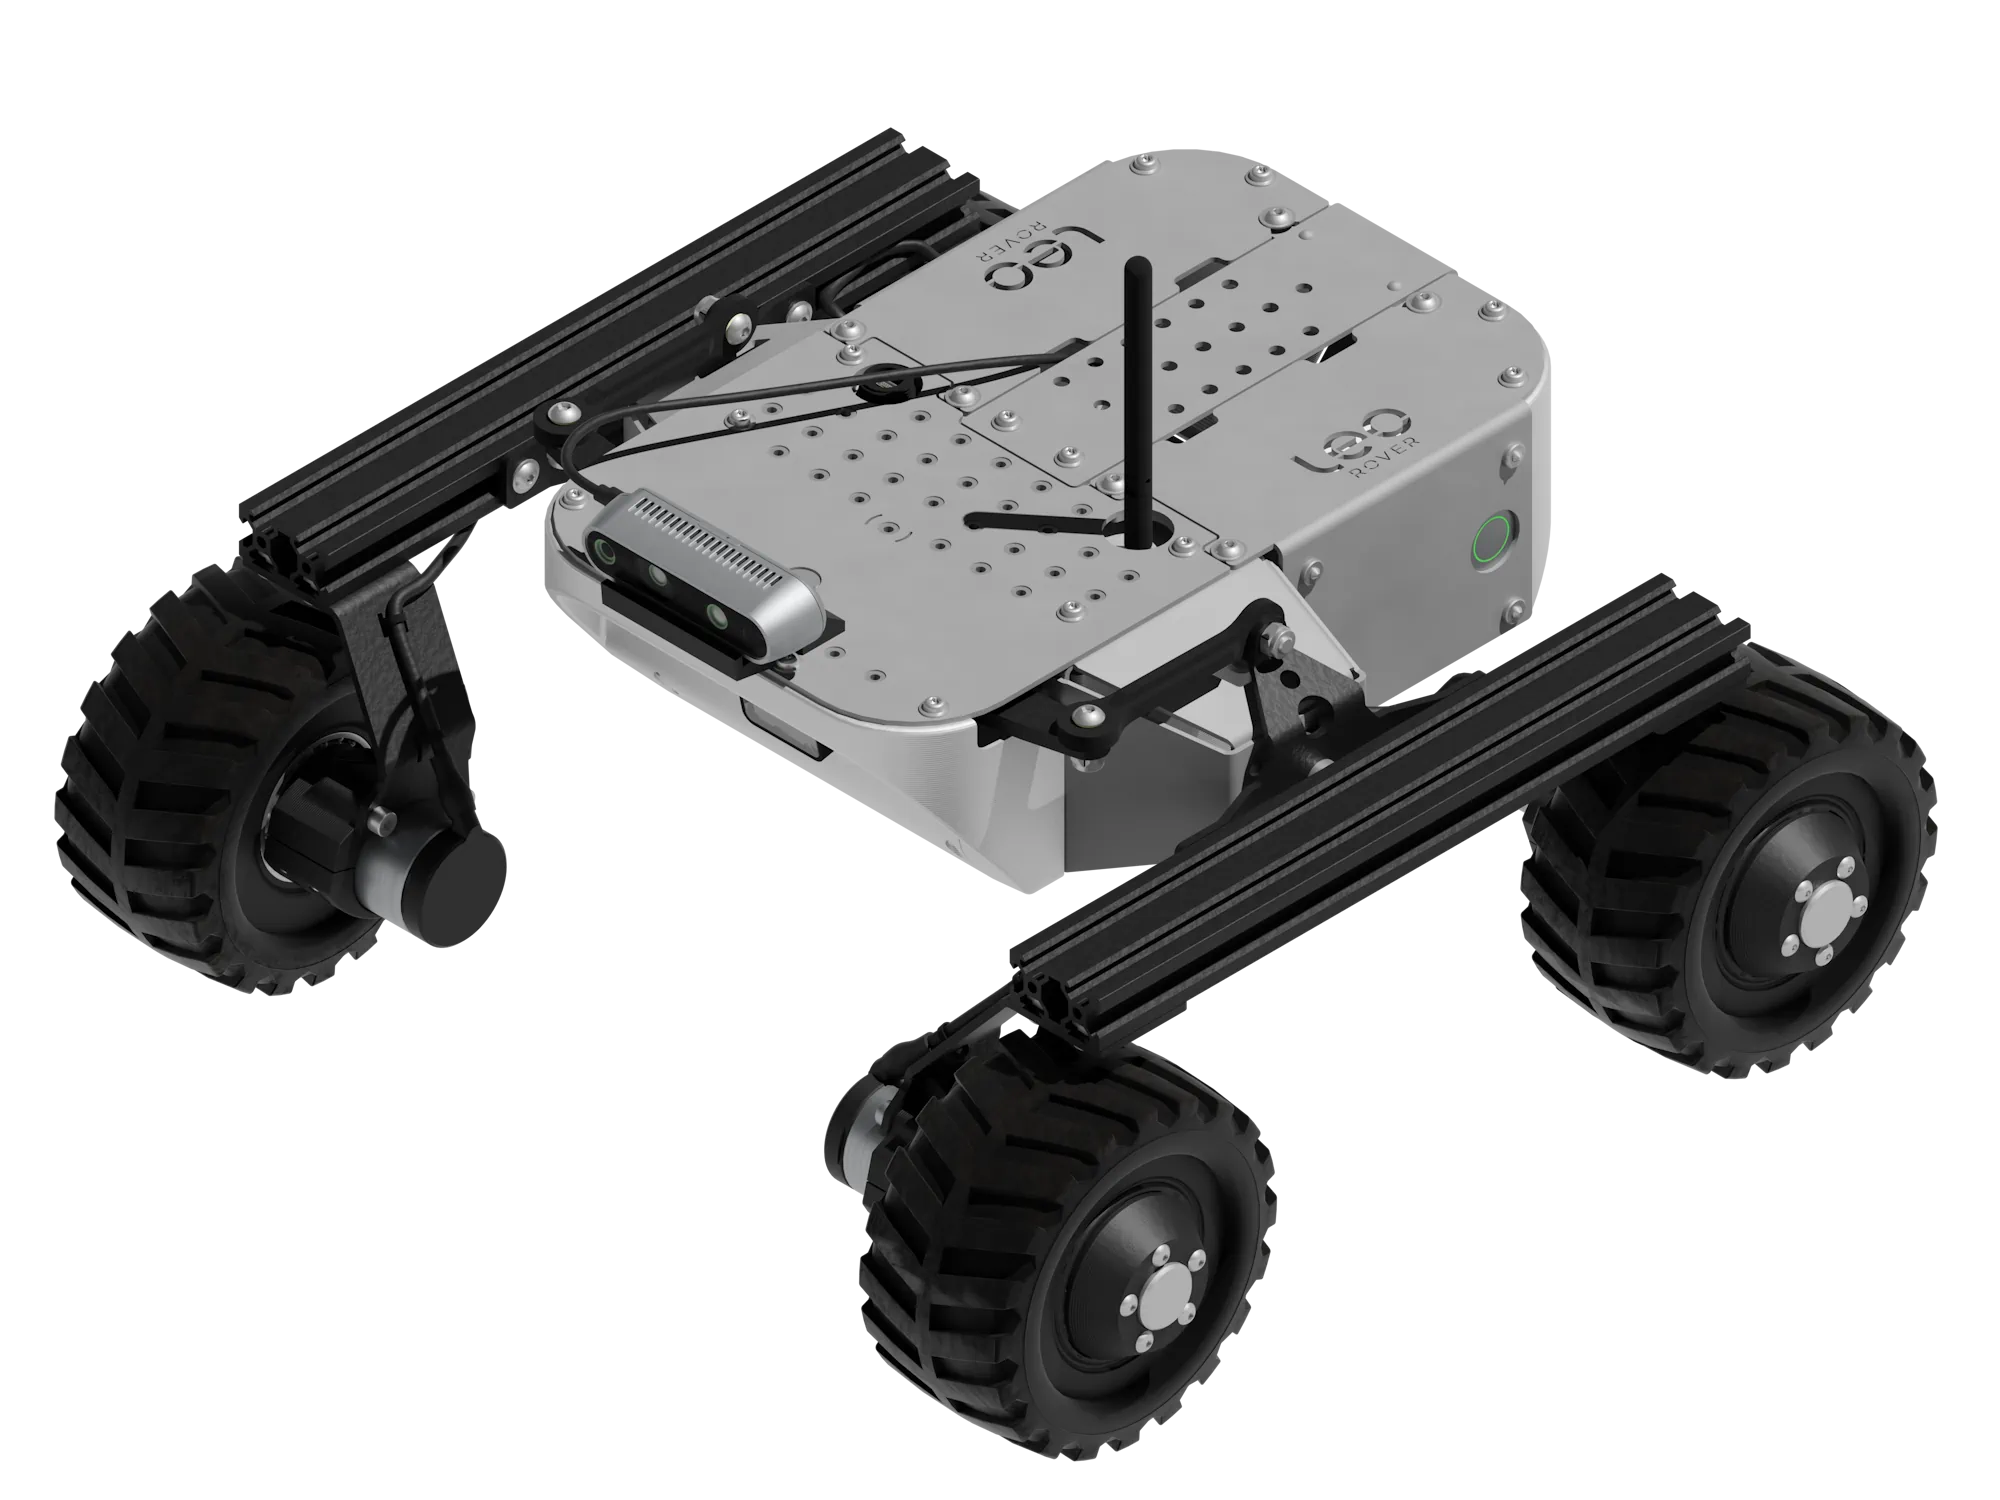
If you bought the integration kit, you can use the mounting adapter included in the kit. It is designed to mount the camera on the front part of the rover's mounting plate.
To mount the camera:
- Use the 1/4"-20 screw to attach the camera to the mounting adapter.
- Place the adapter on the front part of the rover's mounting plate, and use the included M5 x 10 screws to attach it to the plate.
This is an example of mounting the camera. You can mount it in any way you want, as long as it is securely attached to the rover, and the camera's field of view is not obstructed.
The position of the camera will affect the values in the URDF file, which we will need to edit in the software integration part. If you are not using our mounting adapter, you will need to adjust the values in the URDF file accordingly, so that the camera is correctly positioned in the robot model.
If you have access to a 3D printer, you can also design and print your own mounting adapter. This way you can customize the design to fit your specific needs, and you can also add features such as adjustable angles or additional mounting points.
Wiring
To connect the camera to the rover, plug the camera's USB cable into the rover's USB port. The connection provides power automatically, so you do not need an extra power supply. Since the RealSense D435i includes a USB-C to USB-A cable, please use the adapter (USB-C male to USB-A female) included with the rover to plug it into the rover's USB-C port.
Software integration
As ROS realsense2_camera package is available as a debian package, we will
install it using apt. To do so, connect to the rover via ssh, and type:
sudo apt install ros-${ROS_DISTRO}-realsense2-camera
We also want the description package, which includes 3D models of the device (those are required for some nodes). To install them type in the terminal:
sudo apt install ros-${ROS_DISTRO}-realsense2-description
The version of librealsense2 is almost always behind the one available in RealSense™ official repository, but this way is much easier to install. If you want to install the newest version, you can follow this tutorial.
Modifying the URDF model
As we would like to have the robot aware of where the camera is, we need to
create an URDF file with the RealSense included. On
this
site you can see which urdf camera models are available in the
realsense2_description package. Each of the files there has a xacro macro
with properties. We need to include the correct macro to make the camera visible
with the robot's model. To do that create a new file in /etc/ros/urdf
directory, and name it realsense.urdf.xacro. In this file, include the
following content:
<?xml version="1.0"?>
<robot xmlns:xacro="http://www.ros.org/wiki/xacro">

  <xacro:include filename="$(find realsense2_description)/urdf/_d435i.urdf.xacro"/>

  <xacro:sensor_d435i parent="base_link" name="d435i_camera">
    <origin xyz="0.132 0 0.0102" rpy="0 0.0872 0"/>
  </xacro:sensor_d435i>

</robot>
You can specify name property to anything you want. We just need to change it,
so we don't have conflicts on camera_link tf frame. origin property is for
specifying the position of the camera regarding the link specified in parent
property. So if the parent property is set to "base_link", the position in
origin property is regarding the origin of the Rover.
If you are not using our mounting adapter you might have to change the values in
origin property.
Now we have to include our camera model in robot.urdf.xacro file - the
description that is uploaded at boot. Add this line somewhere before the closing
</robot> tag.
<xacro:include filename="/etc/ros/urdf/realsense.urdf.xacro"/>
Launching camera nodes
To get the image from camera, you need to launch the camera nodes. You can do it by typing below commands in terminal:
source /opt/ros/${ROS_DISTRO}/setup.bash
ros2 launch realsense2_camera rs_launch.py camera_name:=d435i_camera camera_namespace:=/
You need to specify the camera_name argument because of the tf frame
conflicts. You have to put the same value as in the urdf file. We set here the
camera_namespace argument for convenience - default value for it is "camera",
which is the same as the robot's default camera. Therefore setting the argument
to empty string will automatically put the node's topics into global namespace.
(Optional) Launching camera nodes on system startup
We can create a realsense.launch.xml launch file in /etc/ros directory, that
would start the node with a fitting configuration.
<launch>
  <include file="$(find-pkg-share realsense2_camera)/launch/rs_launch.py">
    <arg name="camera_namespace" value=""/>
    <arg name="camera_name" value="d435i_camera"/>
  </include>
</launch>
Make sure to specify the camera_name argument to the right value. You need
that for working camera model in visualization.
You can check what other options you can specify directly in the file by running in terminal
ros2 launch realsense2_camera rs_launch.py -s
Include the launch file in the robot.launch.xml file somewhere before the
closing </launch> tag, so that the node starts at boot.
<include file="/etc/ros/realsense.launch.xml"/>
Now, the realsense camera node will be launched with every system startup. You can also force this start right now with
ros-nodes-restart
Example usage
The topics from camera node should be now visible. You can check them with
ros2 topic tool - topics from your node will have prefix and namespace
specified by you in the camera and camera_namespace ROS arguments.
If you have ROS installed on your computer, you can get the camera image with
rqt, and see the robot model with camera attached using rviz2.
In rqt go to plugins -> visualization choose image view and then
choose your topic.
Don't worry if the quality is low, and the image is lagging. It is due to transfer of the data through your rover and computer.
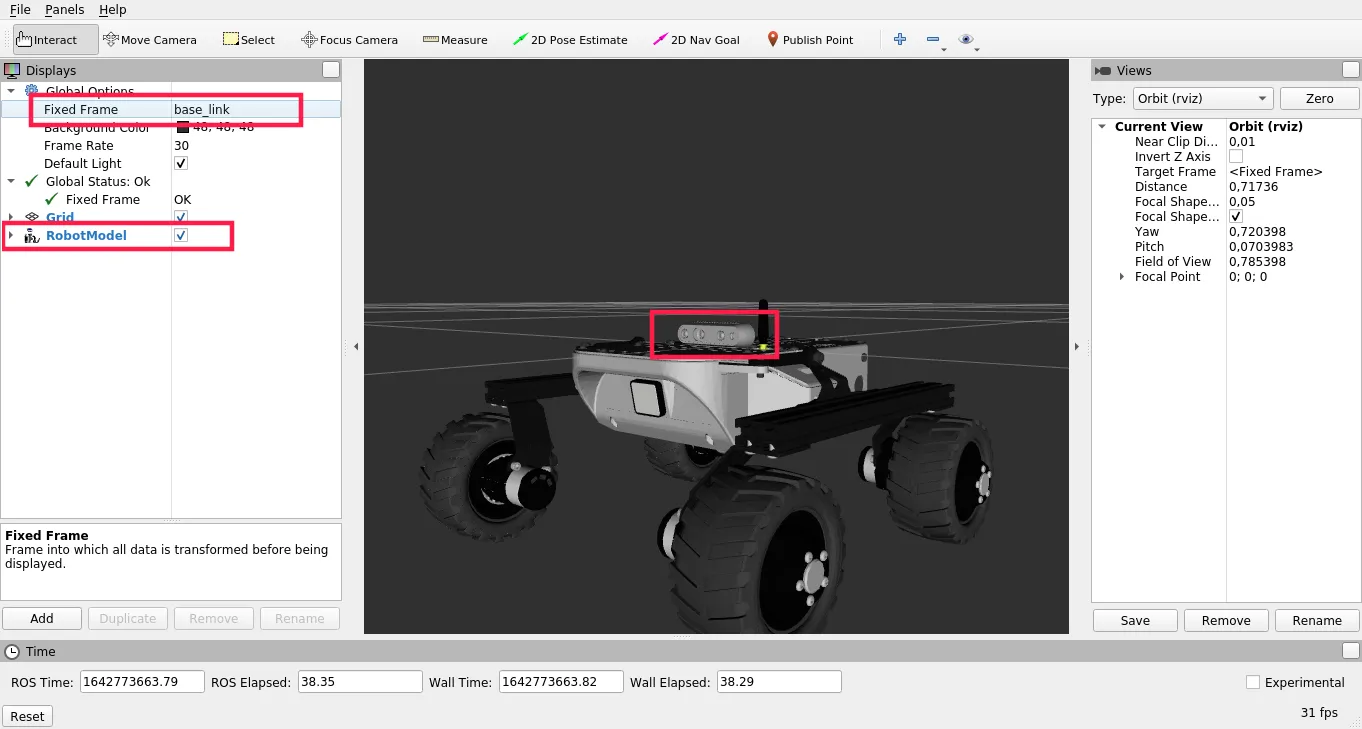
You can also start RViz, and add robot model in the display view. Choose
also base_link as fixed frame, and you should see the rover model with
camera attached.
To be able to see the camera model in RViz, you need to have the
realsense2_description package installed on your computer as well.
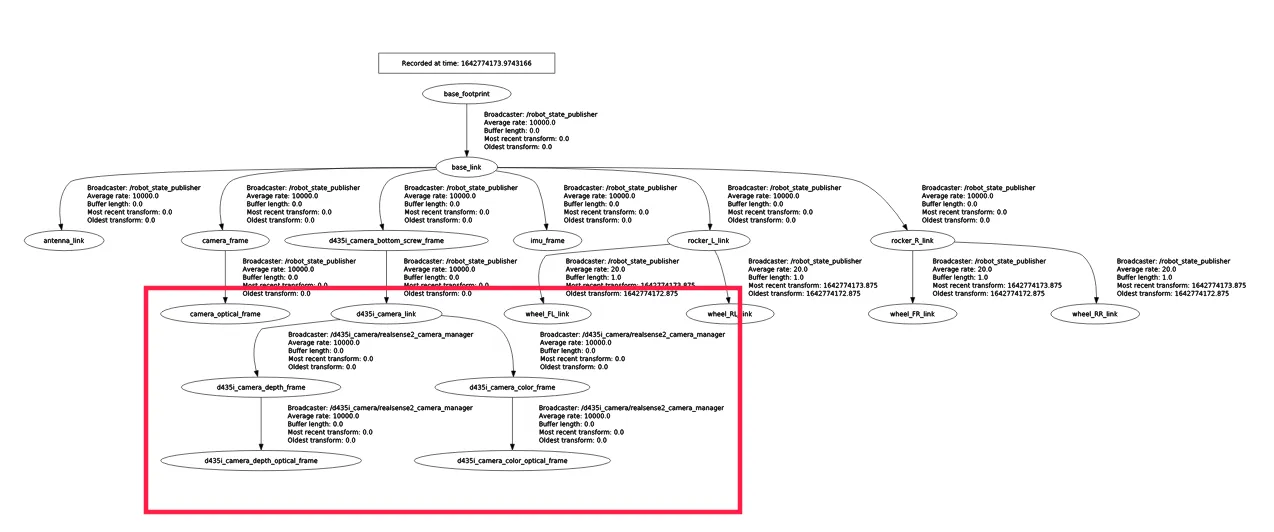
You can also display tf tree in rqt, to see if everything is configured
correctly (plugins -> visualization -> TF Tree)
What next?
Stereo cameras are commonly used in projects involving autonomous navigation, you might be interested in a tutorial about it.
They are however, not the only way of teaching a Leo Rover how to move on it's own. Check out our line follower tutorial if you want to learn more. You can also check our Integrations page for more hardware you can connect to your rover.